Style Settings
This guide explains how to configure EVOVA 3D viewer style settings.
Style Settings can be shared internally among brand managers through the preset feature, and once saved, the same settings can be easily applied to other products.
Access Path:
Left Sidebar > [Library] > Select Item > Right Sidebar > [Style]
 Image 1. Style Tab
How to Use Style Settings
1. Style Management
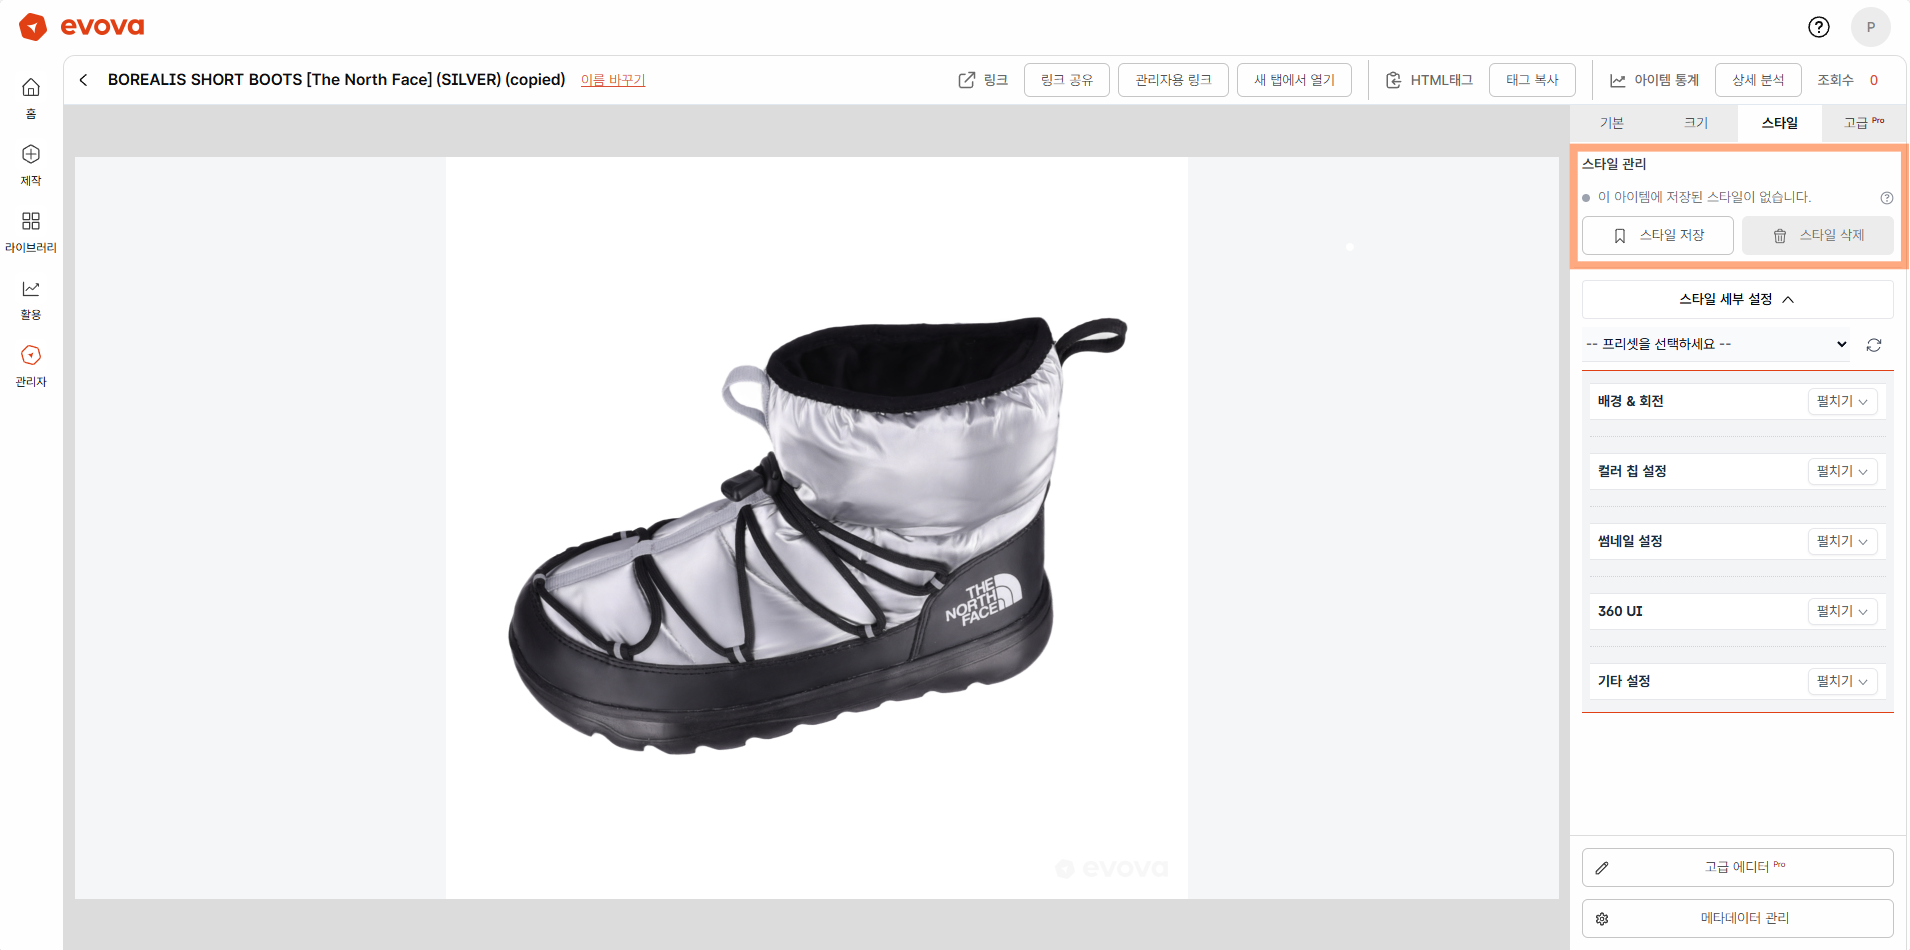 Image 2. Style Status
You can check and manage the current product's style status at the top of the Style tab.
1-1. Check Style Status
- Style is set: Red dot indicator - a saved style exists
- Style is not set: Gray dot indicator - no saved style exists
- Help icon: Displays detailed explanation of style settings on hover
1-2. Save and Delete Style
- [Save Style] button: Saves all styles currently set for the product
- All settings including background rotation, color chip, thumbnail, UI, etc. are saved at once
- Saved styles can be applied to other products later
- [Delete Style] button: Deletes the saved style
- Only activated when a style is set
- Returns to default settings after deletion
2. Preset Detailed Settings
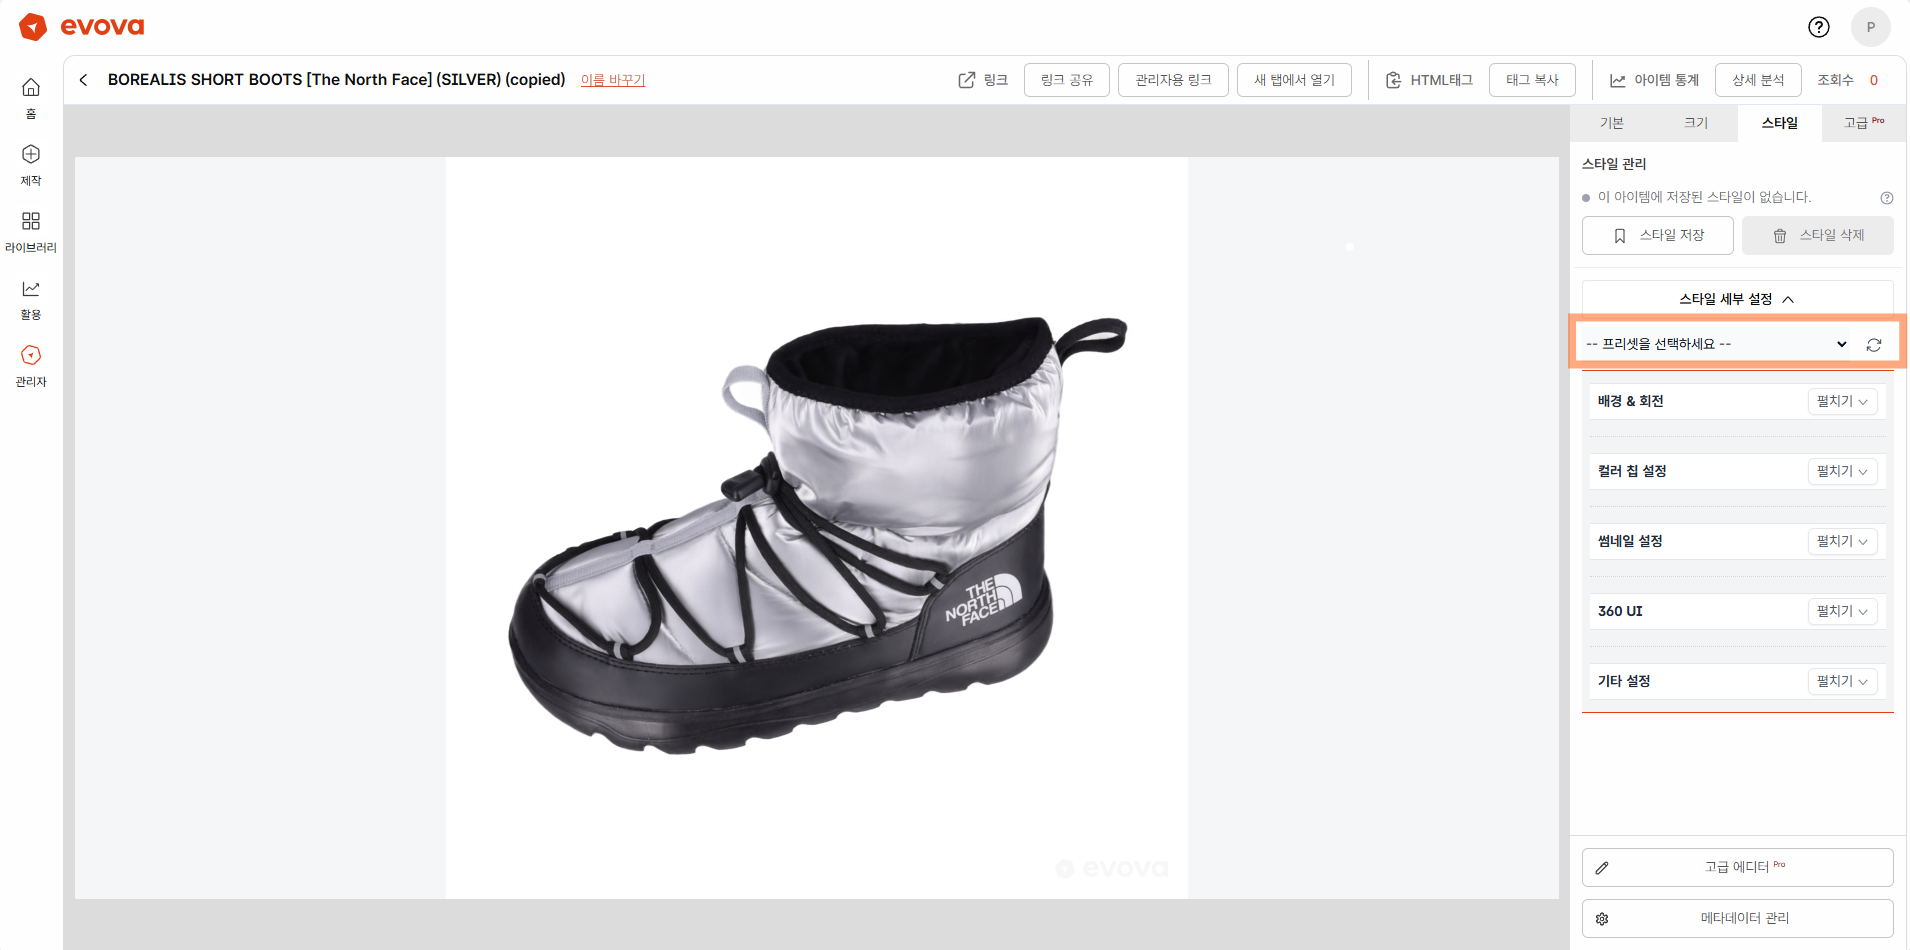 Image 3. Style Preset
Click the [Style Detailed Settings] button to expand the preset settings area.
2-1. Select Preset
You can select the desired preset from the dropdown menu:
- [DEFAULT] Preset: Default presets provided by EVOVA
- e.g.,
[DEFAULT] BASIC,[DEFAULT] MINIMAL - Standard styles managed by the system
- e.g.,
- [CUSTOM] Preset: Custom presets created by users
- e.g.,
[CUSTOM] my-brand-style - Save and reuse your brand's unique style
- e.g.,
- + Add: Create a new custom preset
- A preset name input field appears when selected
- Enter a name in English or numbers and click [Save] button
2-2. Preset Management
- [Save] button (Custom creation mode):
- Click to save after entering new preset name
- All currently configured styles are saved as a preset
- [Refresh] icon (Preset selection mode):
- Reloads the settings of the selected preset
- Useful when reverting to original preset state during editing
3. Background Rotation Settings
Configure the background and auto-rotation function of the 3D viewer.
3-1. Background Color
- Select viewer background color using the color picker
- Recommend selecting a color that contrasts with the product color
3-2. Rotation Mode
- Auto: Product rotates automatically at a constant speed
- Enter desired rotation speed as a number
- Enter '0' to stop rotation
- Keyframe: Plays along the camera path set in the timeline
- Requires keyframe settings in the Recording tab of Advanced Editor
- Enables more dynamic and intentional camera direction
- Details: Timeline Sequence Guide
4. Color Chip Settings
If the product has color options, you can configure color chip display settings.
Note: This section only appears when color options are set for the product. Tip: See Metadata Management Settings Guide
4-1. Select Color Chip Type
- Select the color chip design to display
5. Thumbnail & Loading Settings
Configure the 3D item loading method and thumbnail display.
5-1. Thumbnail Option (Display Thumbnail First)
- ON: Display thumbnail image first before 3D model loads
- Thumbnail image is shown before user interaction
- Smoothly transitions to 3D upon interaction
- OFF: Display only the 3D model
- 3D is shown even before user interaction
5-2. Close Button
- Useful only when using thumbnails
- ON: Places a close button to return from 3D to thumbnail image
- OFF: No close button placed. Returns to thumbnail after time passes.
6. 360 UI
Customize the control UI displayed on the 3D viewer.
6-1. UI Type
Select the design style of icons displayed on the viewer.
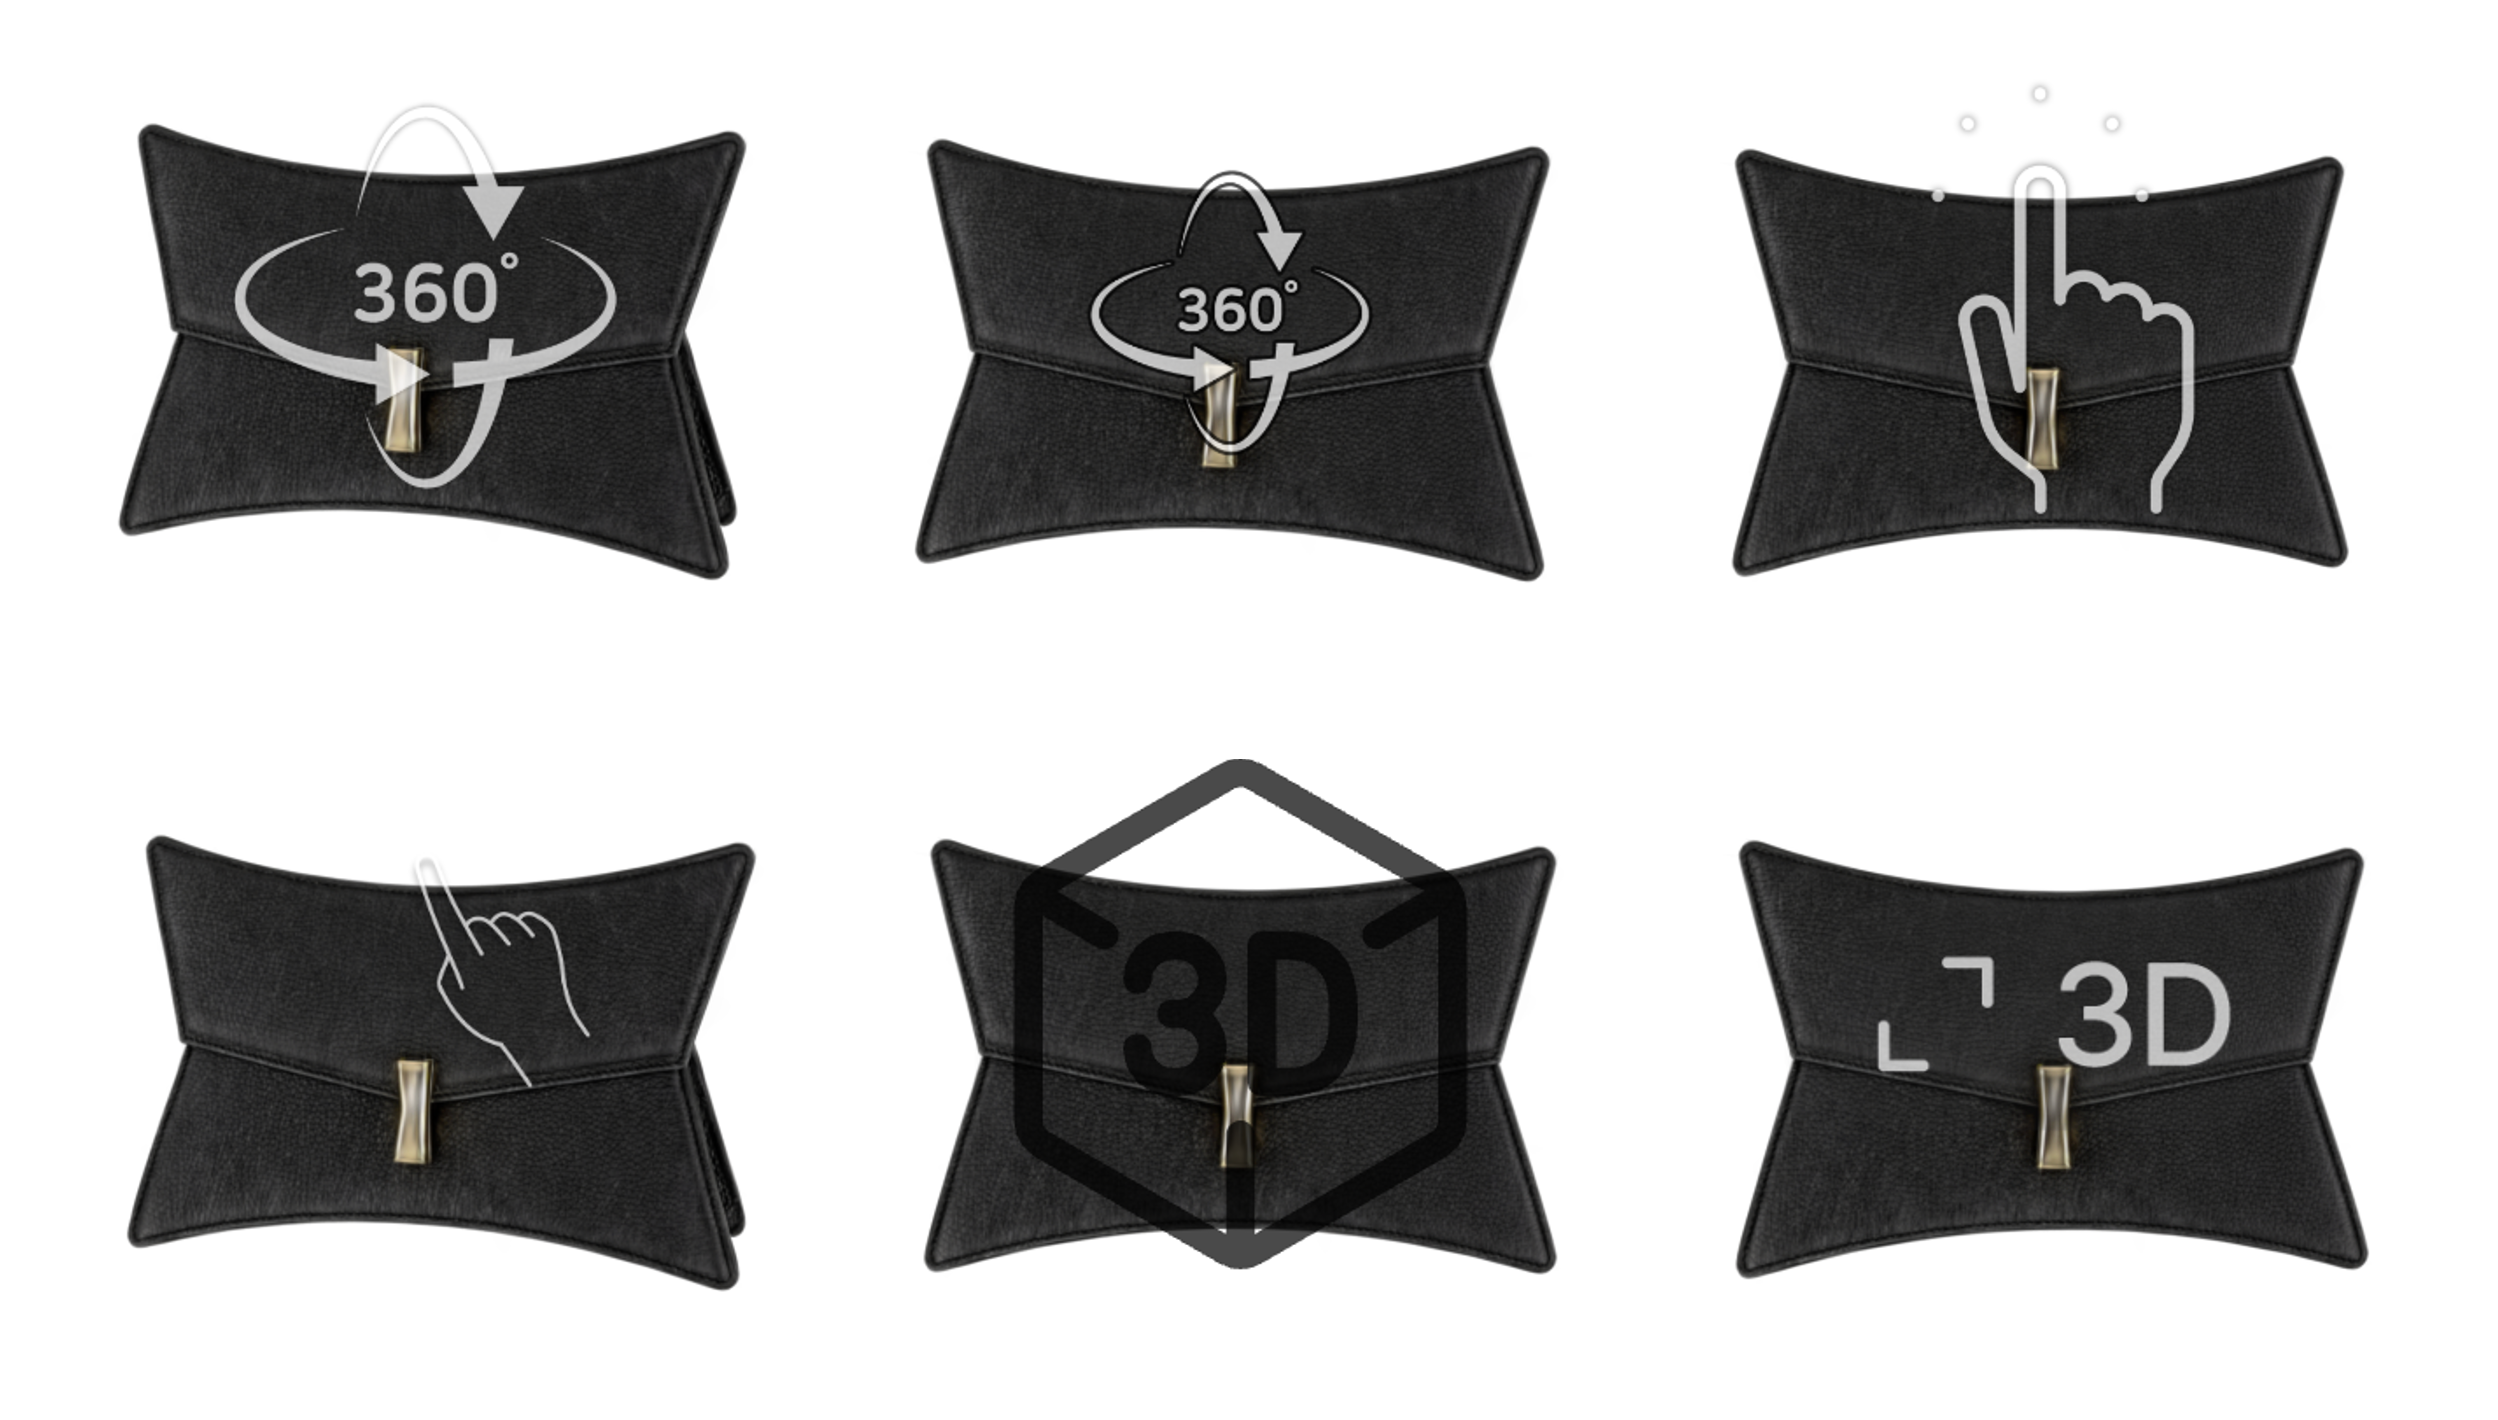 Image 4. UI Type
- Select desired UI style from dropdown
- Choose a design that matches your brand tone and manner
6-2. UI Position
Select the approximate area where icons will be positioned within the viewer screen.
- e.g., top left, bottom right, etc.
- Select based on product and brand layout
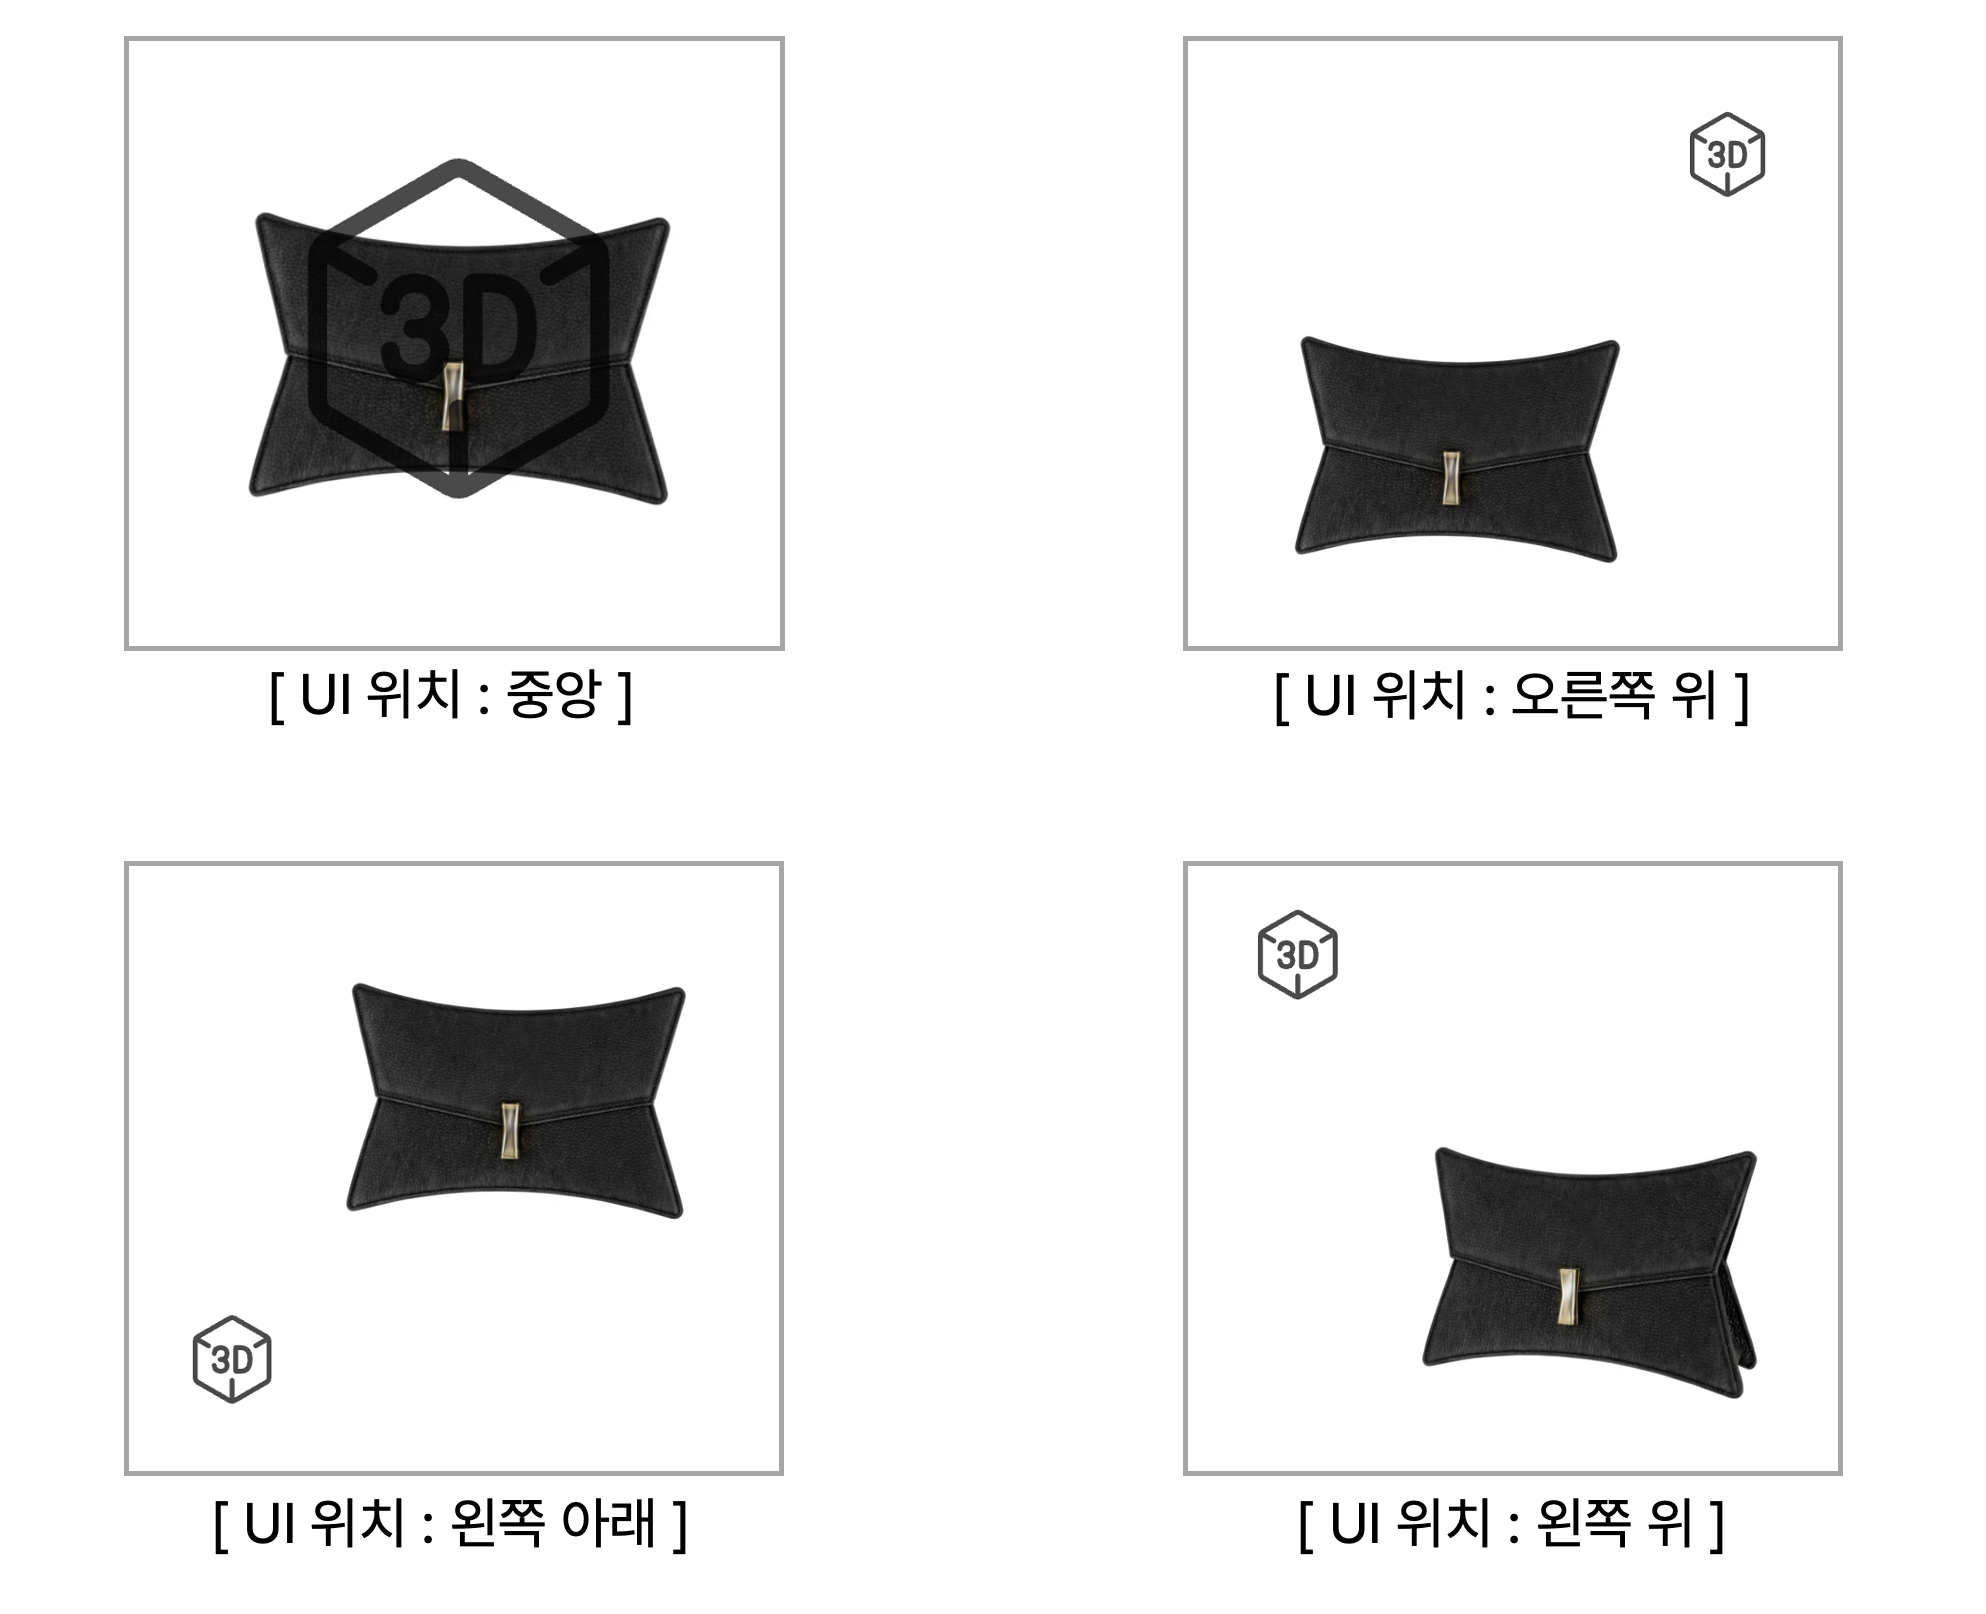 Image 5. UI Position
6-3. Fine Position Adjustment (X, Y Coordinates)
- Horizontal: Adjust left/right position in pixels
- Vertical: Adjust up/down position in pixels
- Use when precise placement is needed
6-4. UI Size
- PC Size: UI size in desktop environment
- Mobile Size: UI size in mobile environment
Scale Reference:
- 1x = default size
- 1.5x = 1.5 times the default size
- Optimize for each device considering screen ratio or visual balance
7. Other Settings
7-1. 3D Loading Effect
- ON: Display 3D effect when 3D viewer first loads
- OFF: No 3D effect when 3D viewer first loads
7-2. 3D Viewer Info Button Toggle
- ON: Display viewer information
- OFF: Hide viewer information
7-3. Dynamic Loading
- Useful only when using thumbnail option
- ON: Load 3D model when user interaction occurs. Can prevent unnecessary loading, but loading wait time is exposed to users.
- OFF: Load 3D model even before user interaction. Can provide better user experience, but 3D model loads even when only thumbnail image is shown. (Recommended)
7-4. Viewer Logo Settings
- Logo Display ON/OFF: Whether to display brand logo in 3D viewer
- Logo Image Upload:
- Click [Browse] to select image
- Click [Upload] to apply
- Restore Default: Restore to EVOVA default logo
Style Application Order
- Select Preset or Create New Preset (optional)
- Configure 5 Sections:
- Background Rotation
- Visual Effects (Color Chip)
- Thumbnail & Loading
- UI Settings
- Other Settings
- Click [Save Style] to apply
- Check real-time preview in left 3D viewer
Preset Usage Tips
Create Presets per Brand
- Save unique styles as presets for each brand
- Simply select the brand preset when adding new products for instant application
Seasonal Style Management
- e.g.,
[CUSTOM] summer-2025,[CUSTOM] winter-2025 - Change styles by season or campaign
Important Notes
- Check Before Saving Preset: Ensure all section settings are complete
- DEFAULT Presets: Cannot be modified, need to create new CUSTOM preset
- Real-time Preview: Check changes immediately in left viewer
- Save Style Required: Changes are only applied after clicking [Save Style] button
Closing
Adding Dimensions to E-commerce
EVOVA is always here to help make your brand experience more stable and special.
If you have any questions, please feel free to contact our support team.
Email: info@metown.co.kr
Phone: 02-6380-0315