Timeline Sequence
You can create an automatically playing 3D showroom by setting up a camera move sequence.
Access Path:
EVOVA Dashboard > Left Sidebar > [3D Showroom] > [List] > Click Individual Product > Right Sidebar > [3D Editor] > [Recording]
What is Timeline Sequence?
Timeline Sequence is a feature that saves multiple camera positions as keyframes and automatically plays them back with smooth transitions. With this feature, you can:
- Show various angles of the product sequentially
- Create camera movements that emphasize specific details
- Achieve more dynamic and intentional camera direction than simple auto-rotation
How to Set Up Timeline Sequence
1. Open 3D Editor
- Click the
[3D Editor]button on the product detail page EVOVA Dashboard > Left Sidebar > [3D Showroom] > [List] > Click Individual Product > [3D Editor]
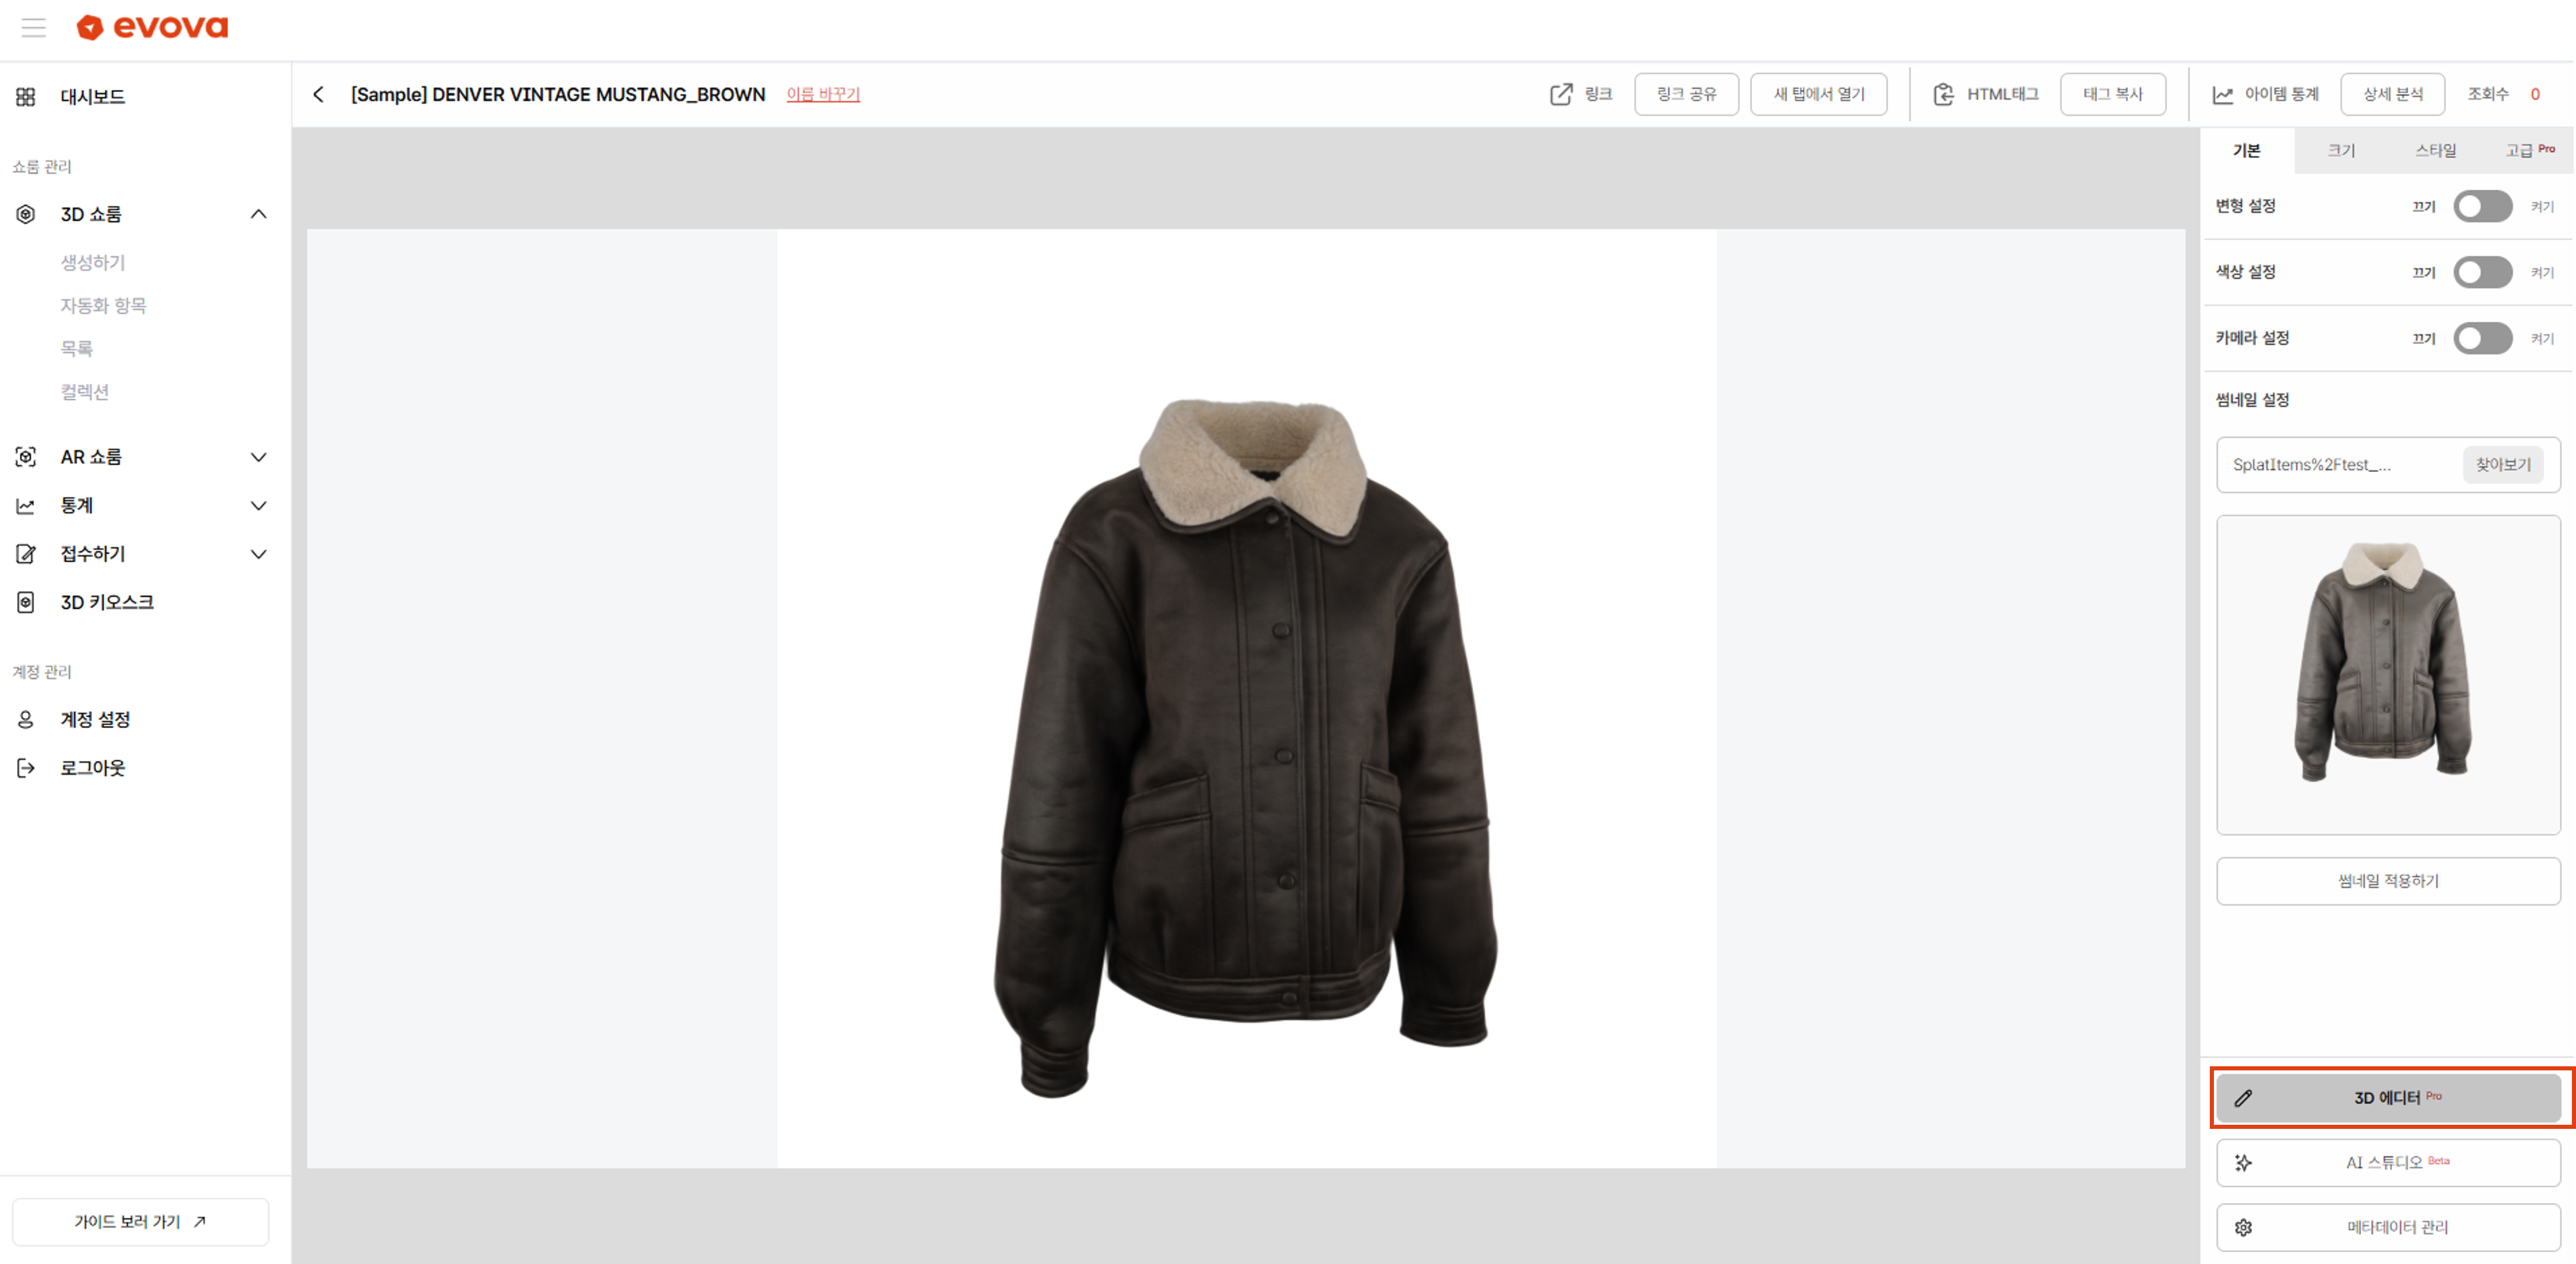 Image 1. Opening EVOVA Showroom 3D Editor
2. Select Recording Tab
- Click the
[Recording]tab in the 3D Editor right sidebar - The timeline panel will appear at the bottom of the screen
 Image 2. Recording Tab and Timeline Panel
3. Adding Keyframes
Keyframes record the position where the camera will be located at a specific time.
3-1. Adding the First Keyframe
- Drag the 3D view with your mouse to move to your desired first camera angle
- Set the time to 0 seconds position on the timeline
- Click the
[Add Keyframe]button at the bottom of the timeline - An orange keyframe marker will be created on the timeline
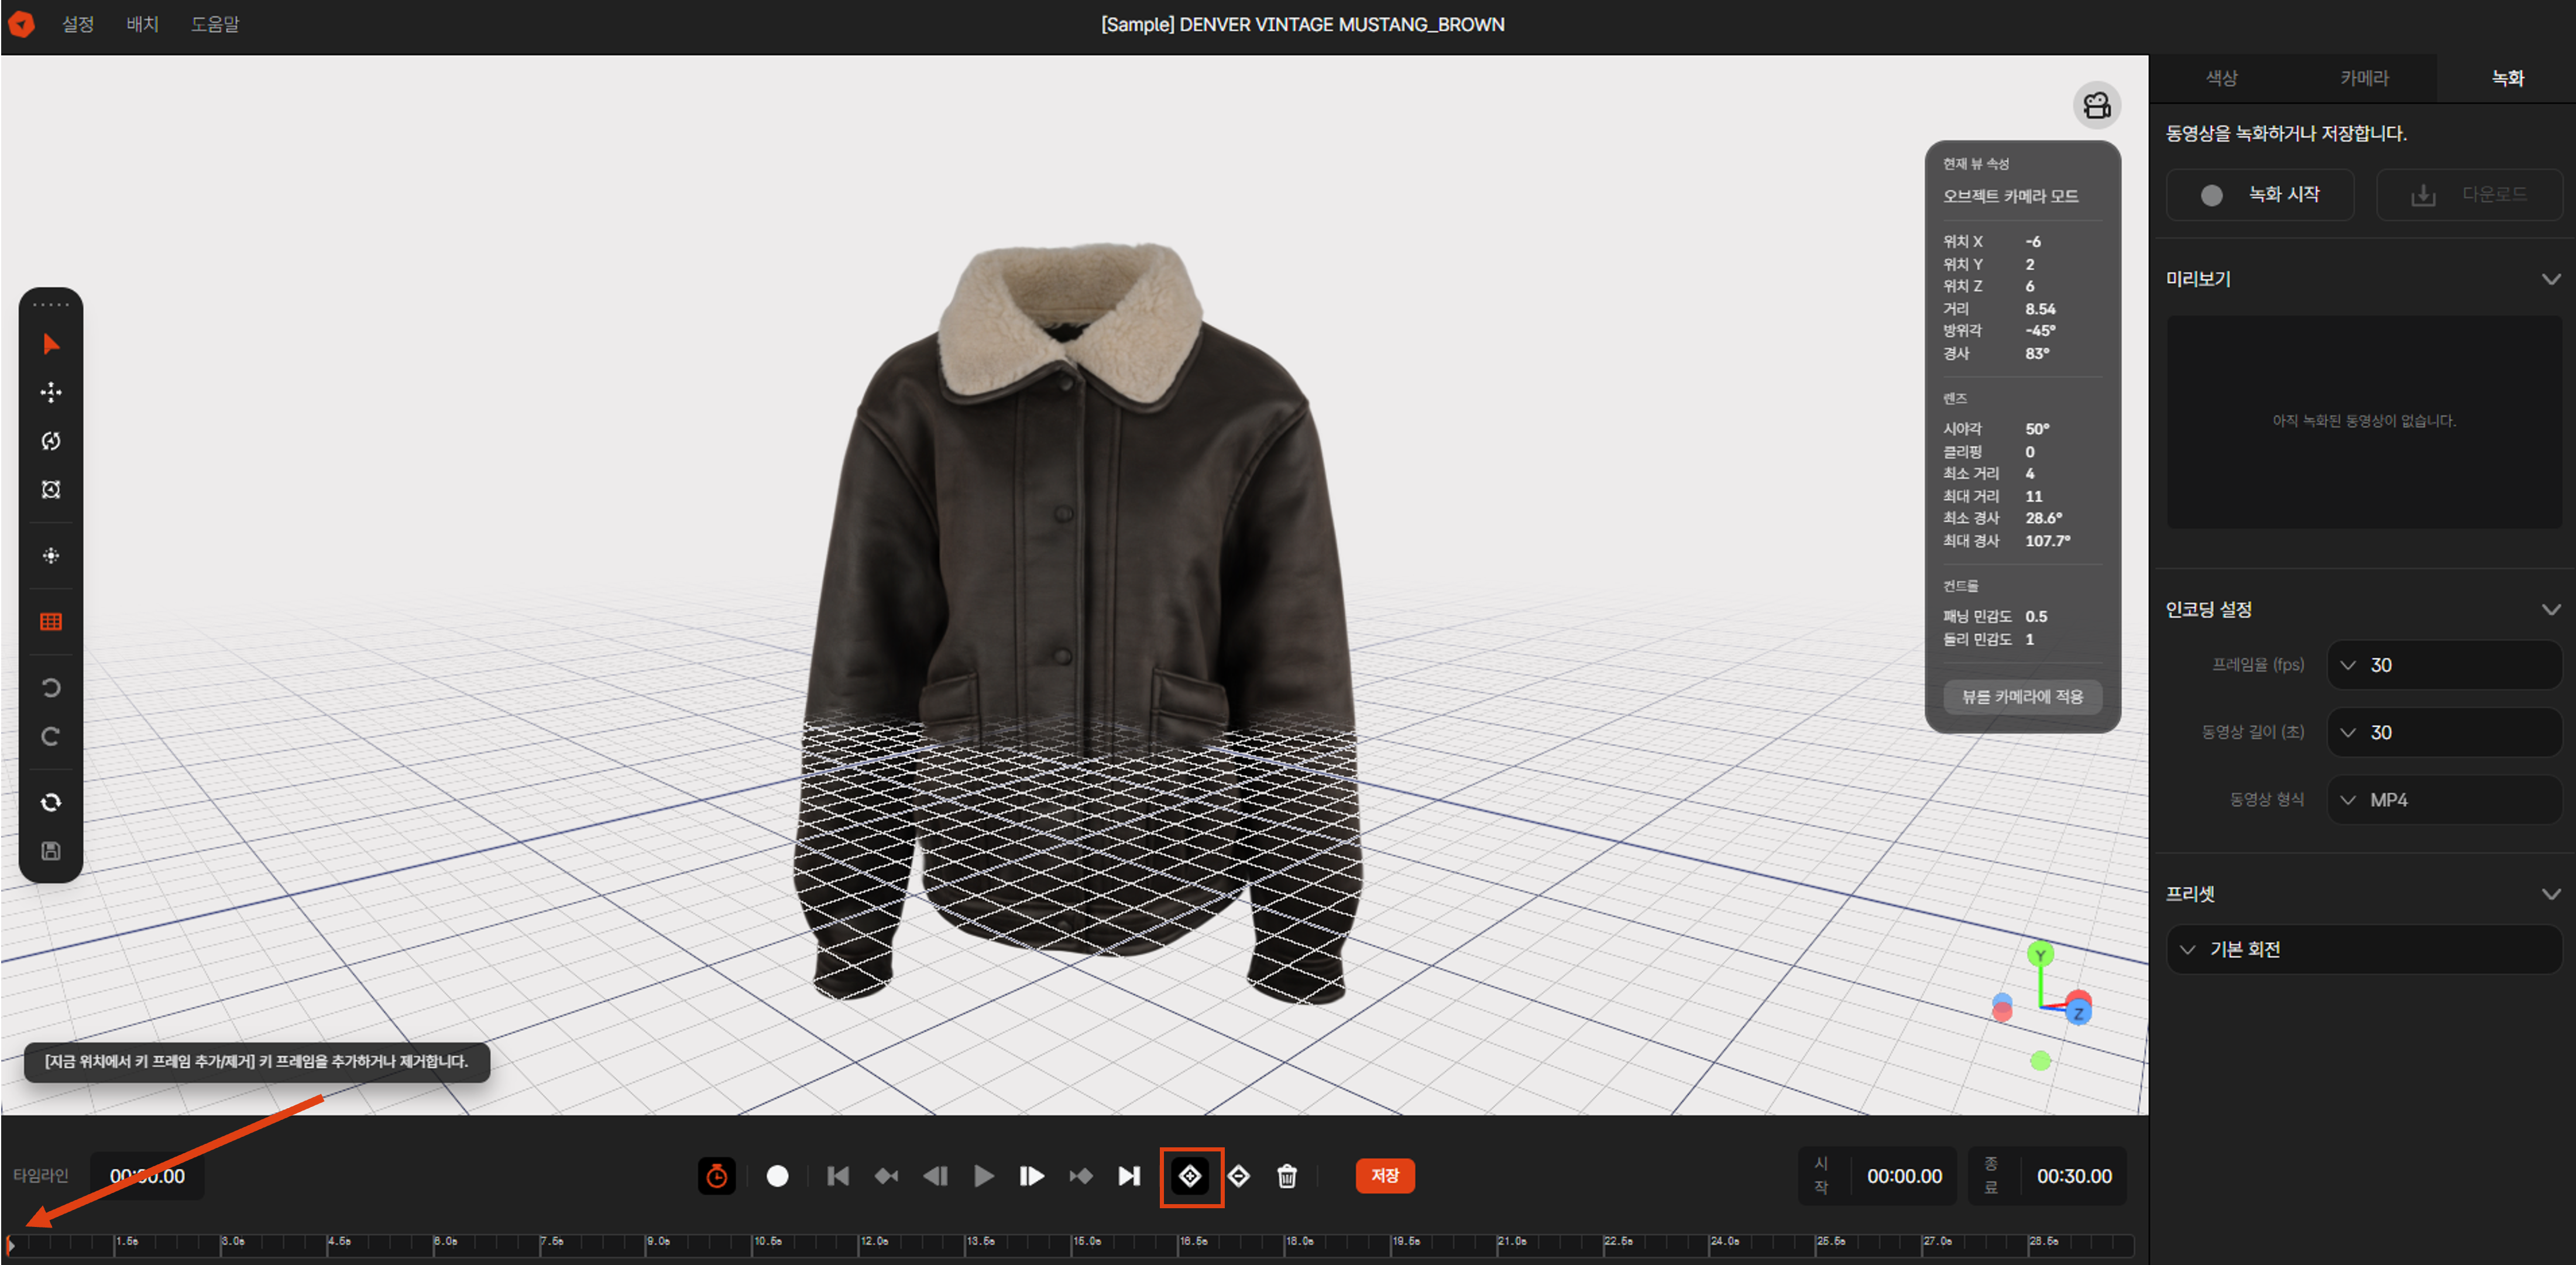 Image 3. Adding First Keyframe
3-2. Creating Additional Keyframes
- Move the timeline time bar to your desired time (e.g., 3 seconds)
- Use your mouse in the 3D view to move to a new camera angle
- Click the
[Add Keyframe]button again - Repeat this process to add multiple keyframes
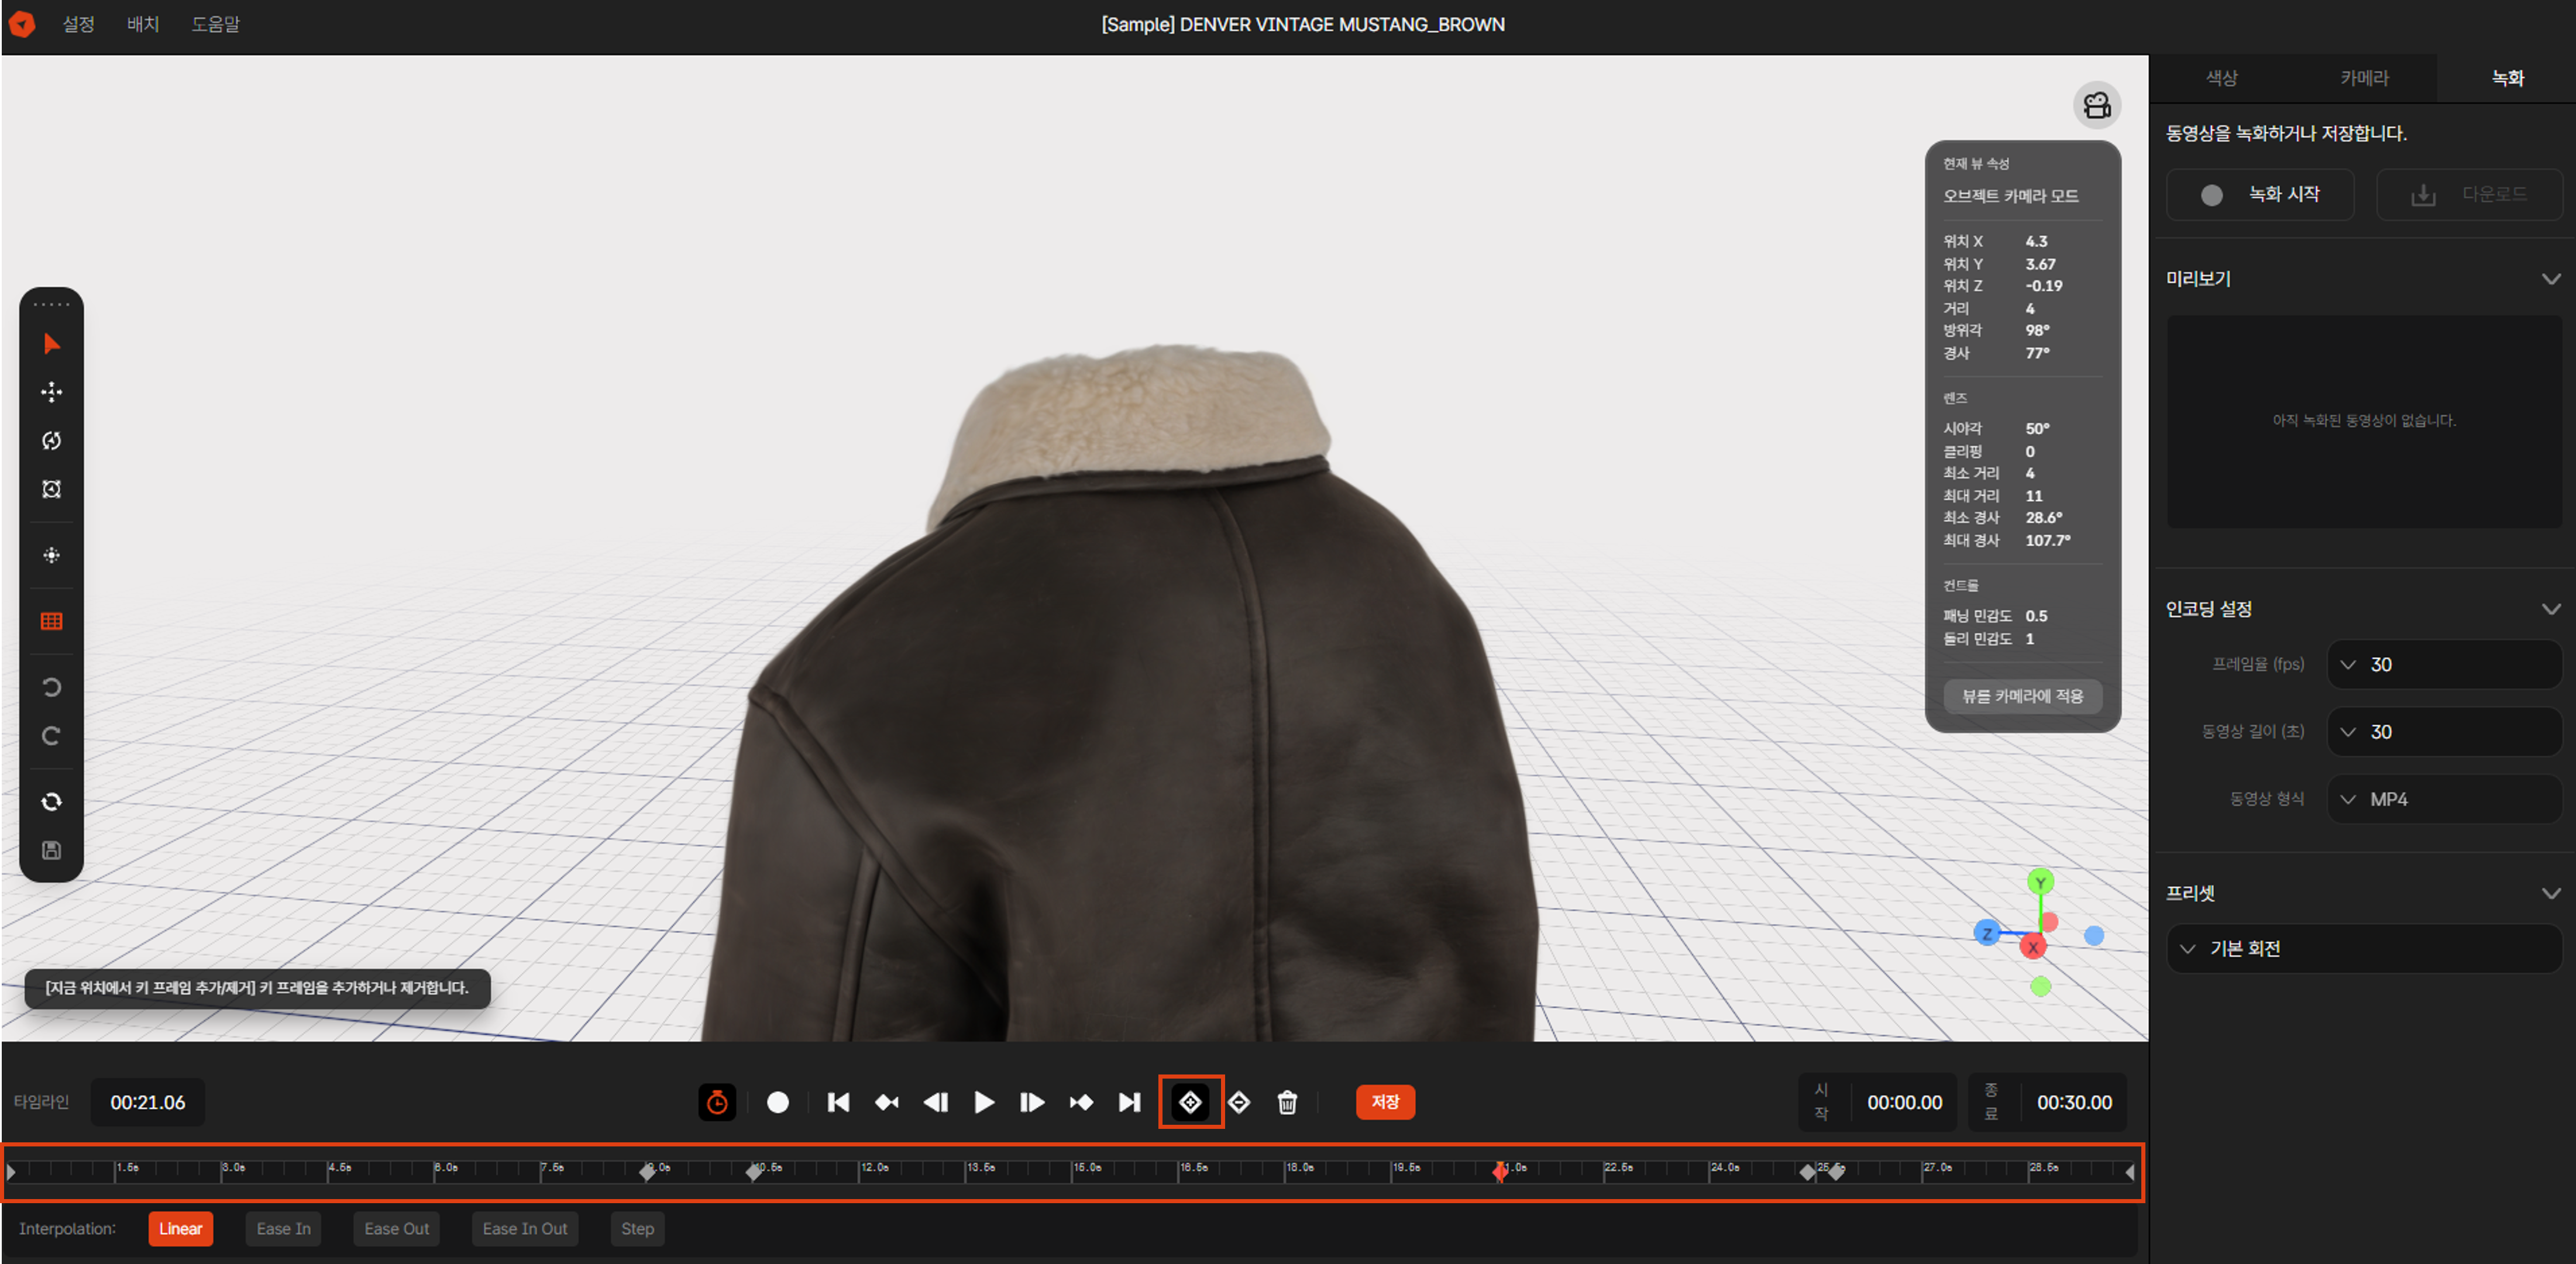 Image 4. Adding Multiple Keyframes
4. Timeline Playback and Preview
4-1. Playing
- Click the
[Play]button at the bottom of the timeline - The camera will automatically move following the set keyframes
- You can click the
[Pause]button during playback to stop
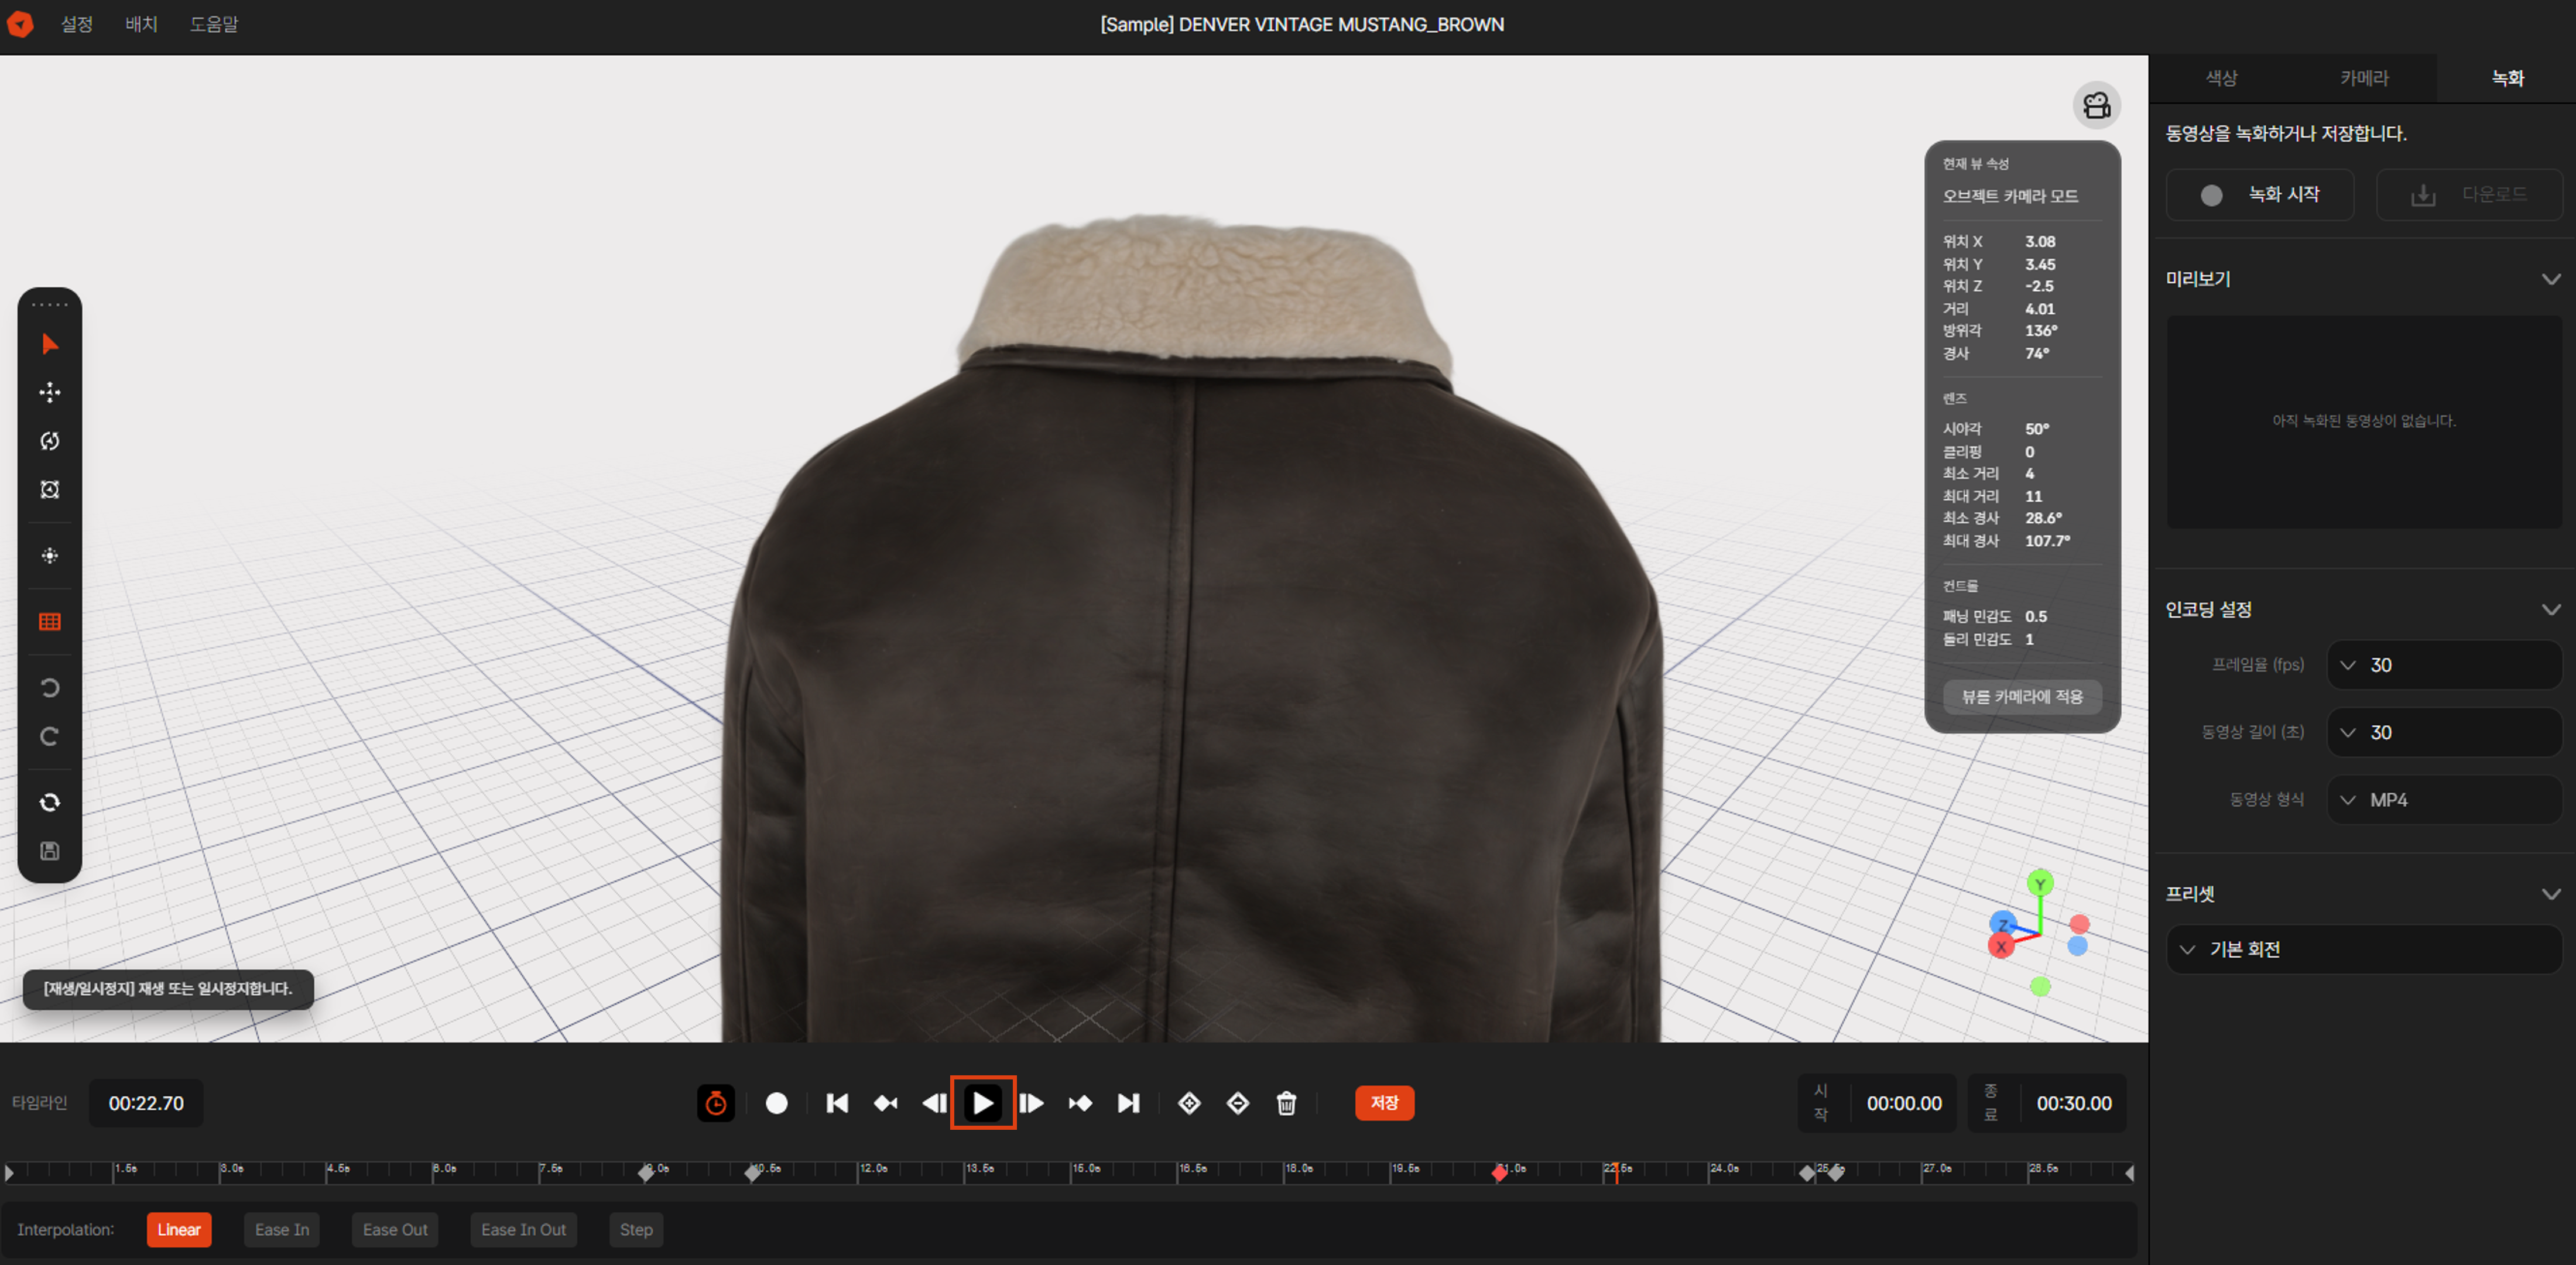 Image 5. Timeline Playback
4-2. Moving to a Specific Keyframe
- Click a keyframe marker on the timeline to jump directly to that position
- You can drag the timeline bar to move to the desired time
5. Editing Keyframes
5-1. Adjusting Keyframe Time
- Drag a keyframe marker on the timeline to move it to a different time
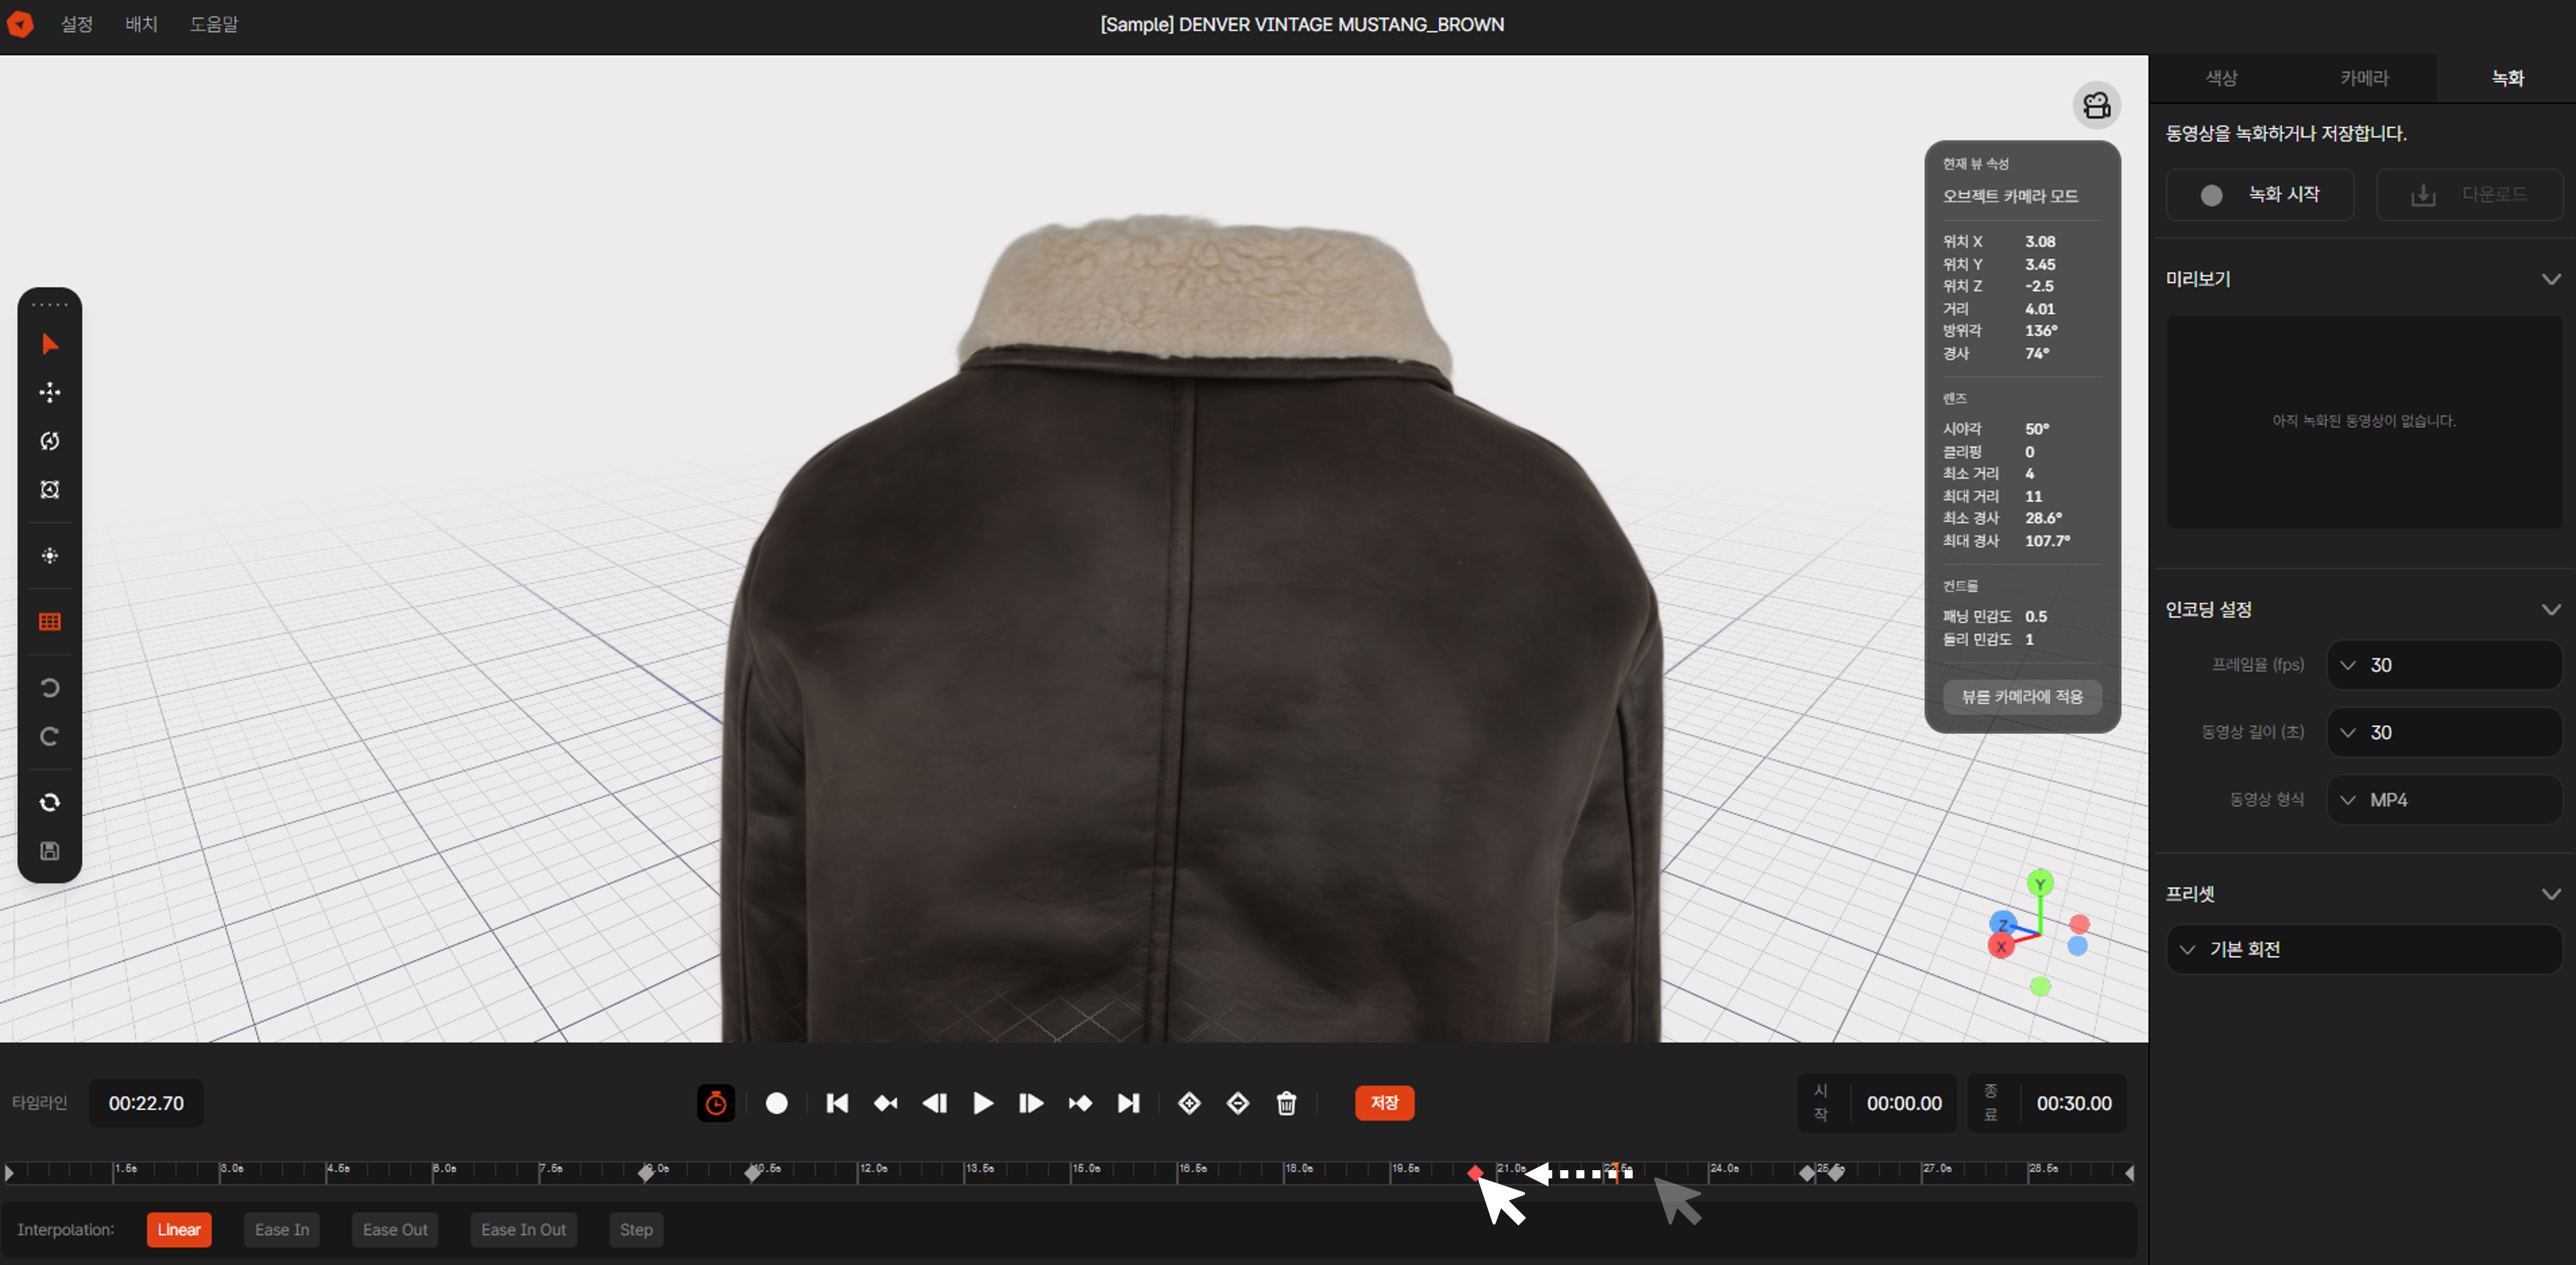 Image 6. Dragging Keyframe to Adjust Time
5-2. Selecting Interpolation Method
When you select a keyframe, you can set the interpolation method. This defines the movement between the selected keyframe and the next keyframe.
- Linear: Move at a constant speed
- Ease In: Start slowly and gradually speed up
- Ease Out: Start fast and gradually slow down
- Ease In Out: Start slowly and end slowly
- Step: Move instantly without smooth transition
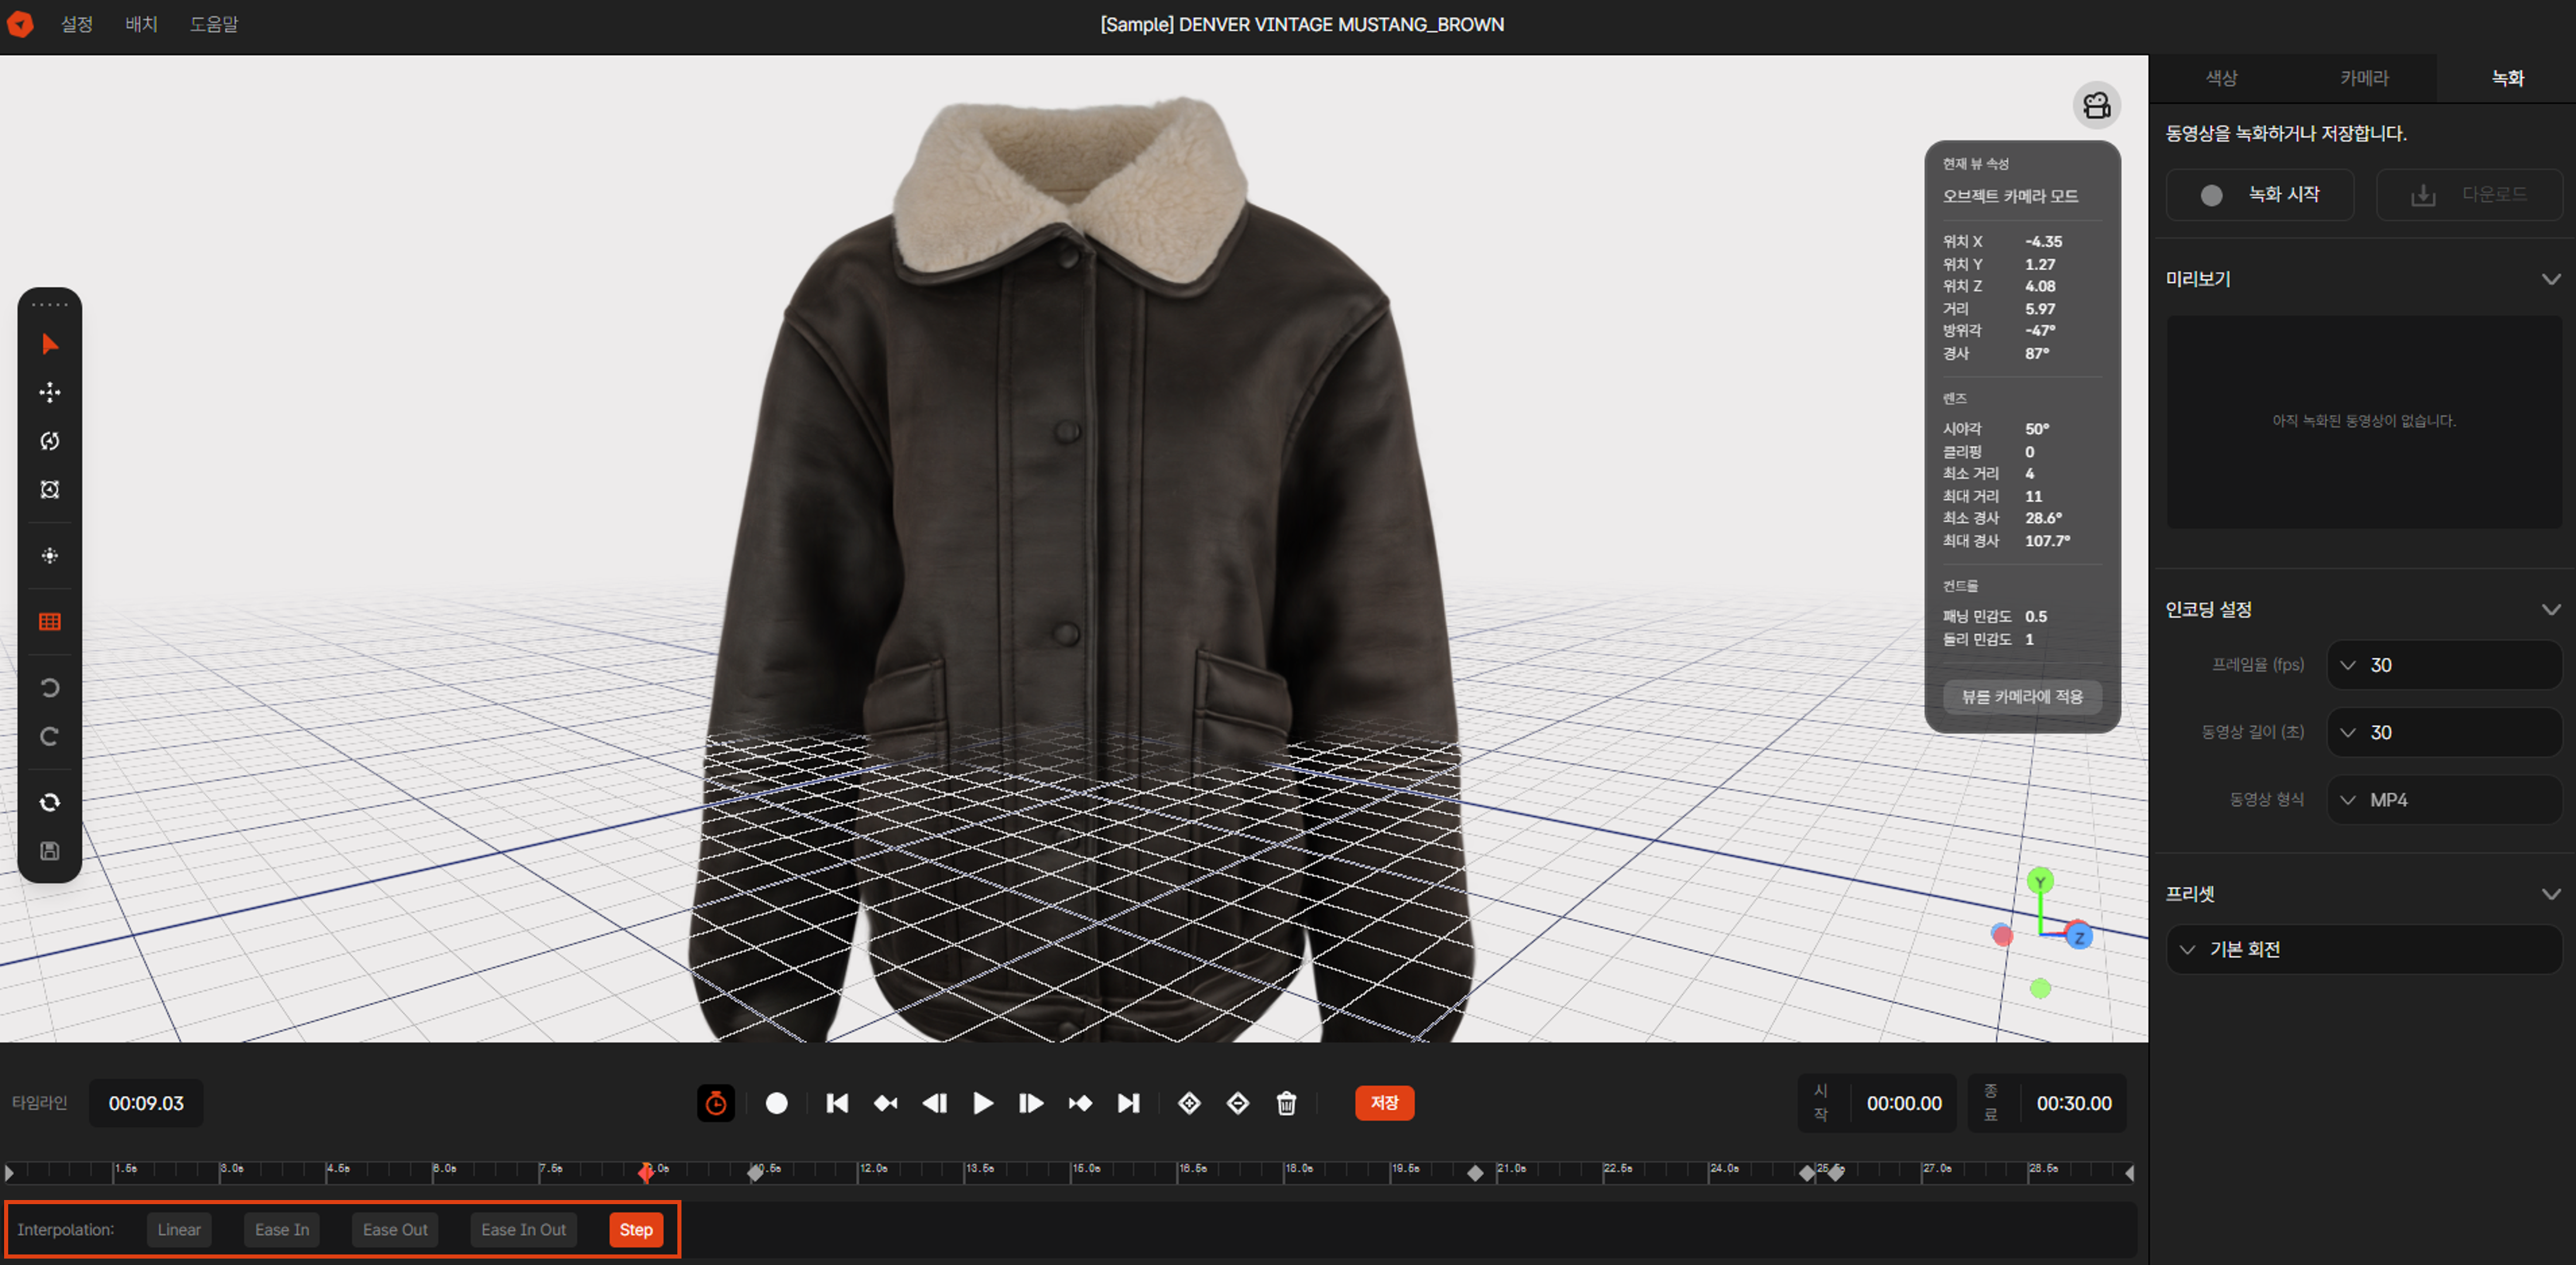 Image 7. Selecting Interpolation Method
5-3. Deleting Keyframes
- Select the keyframe you want to delete
- Click the
[Delete]icon on the right side of the keyframe, or - Click the
[Delete Selected Keyframe]button at the bottom of the timeline
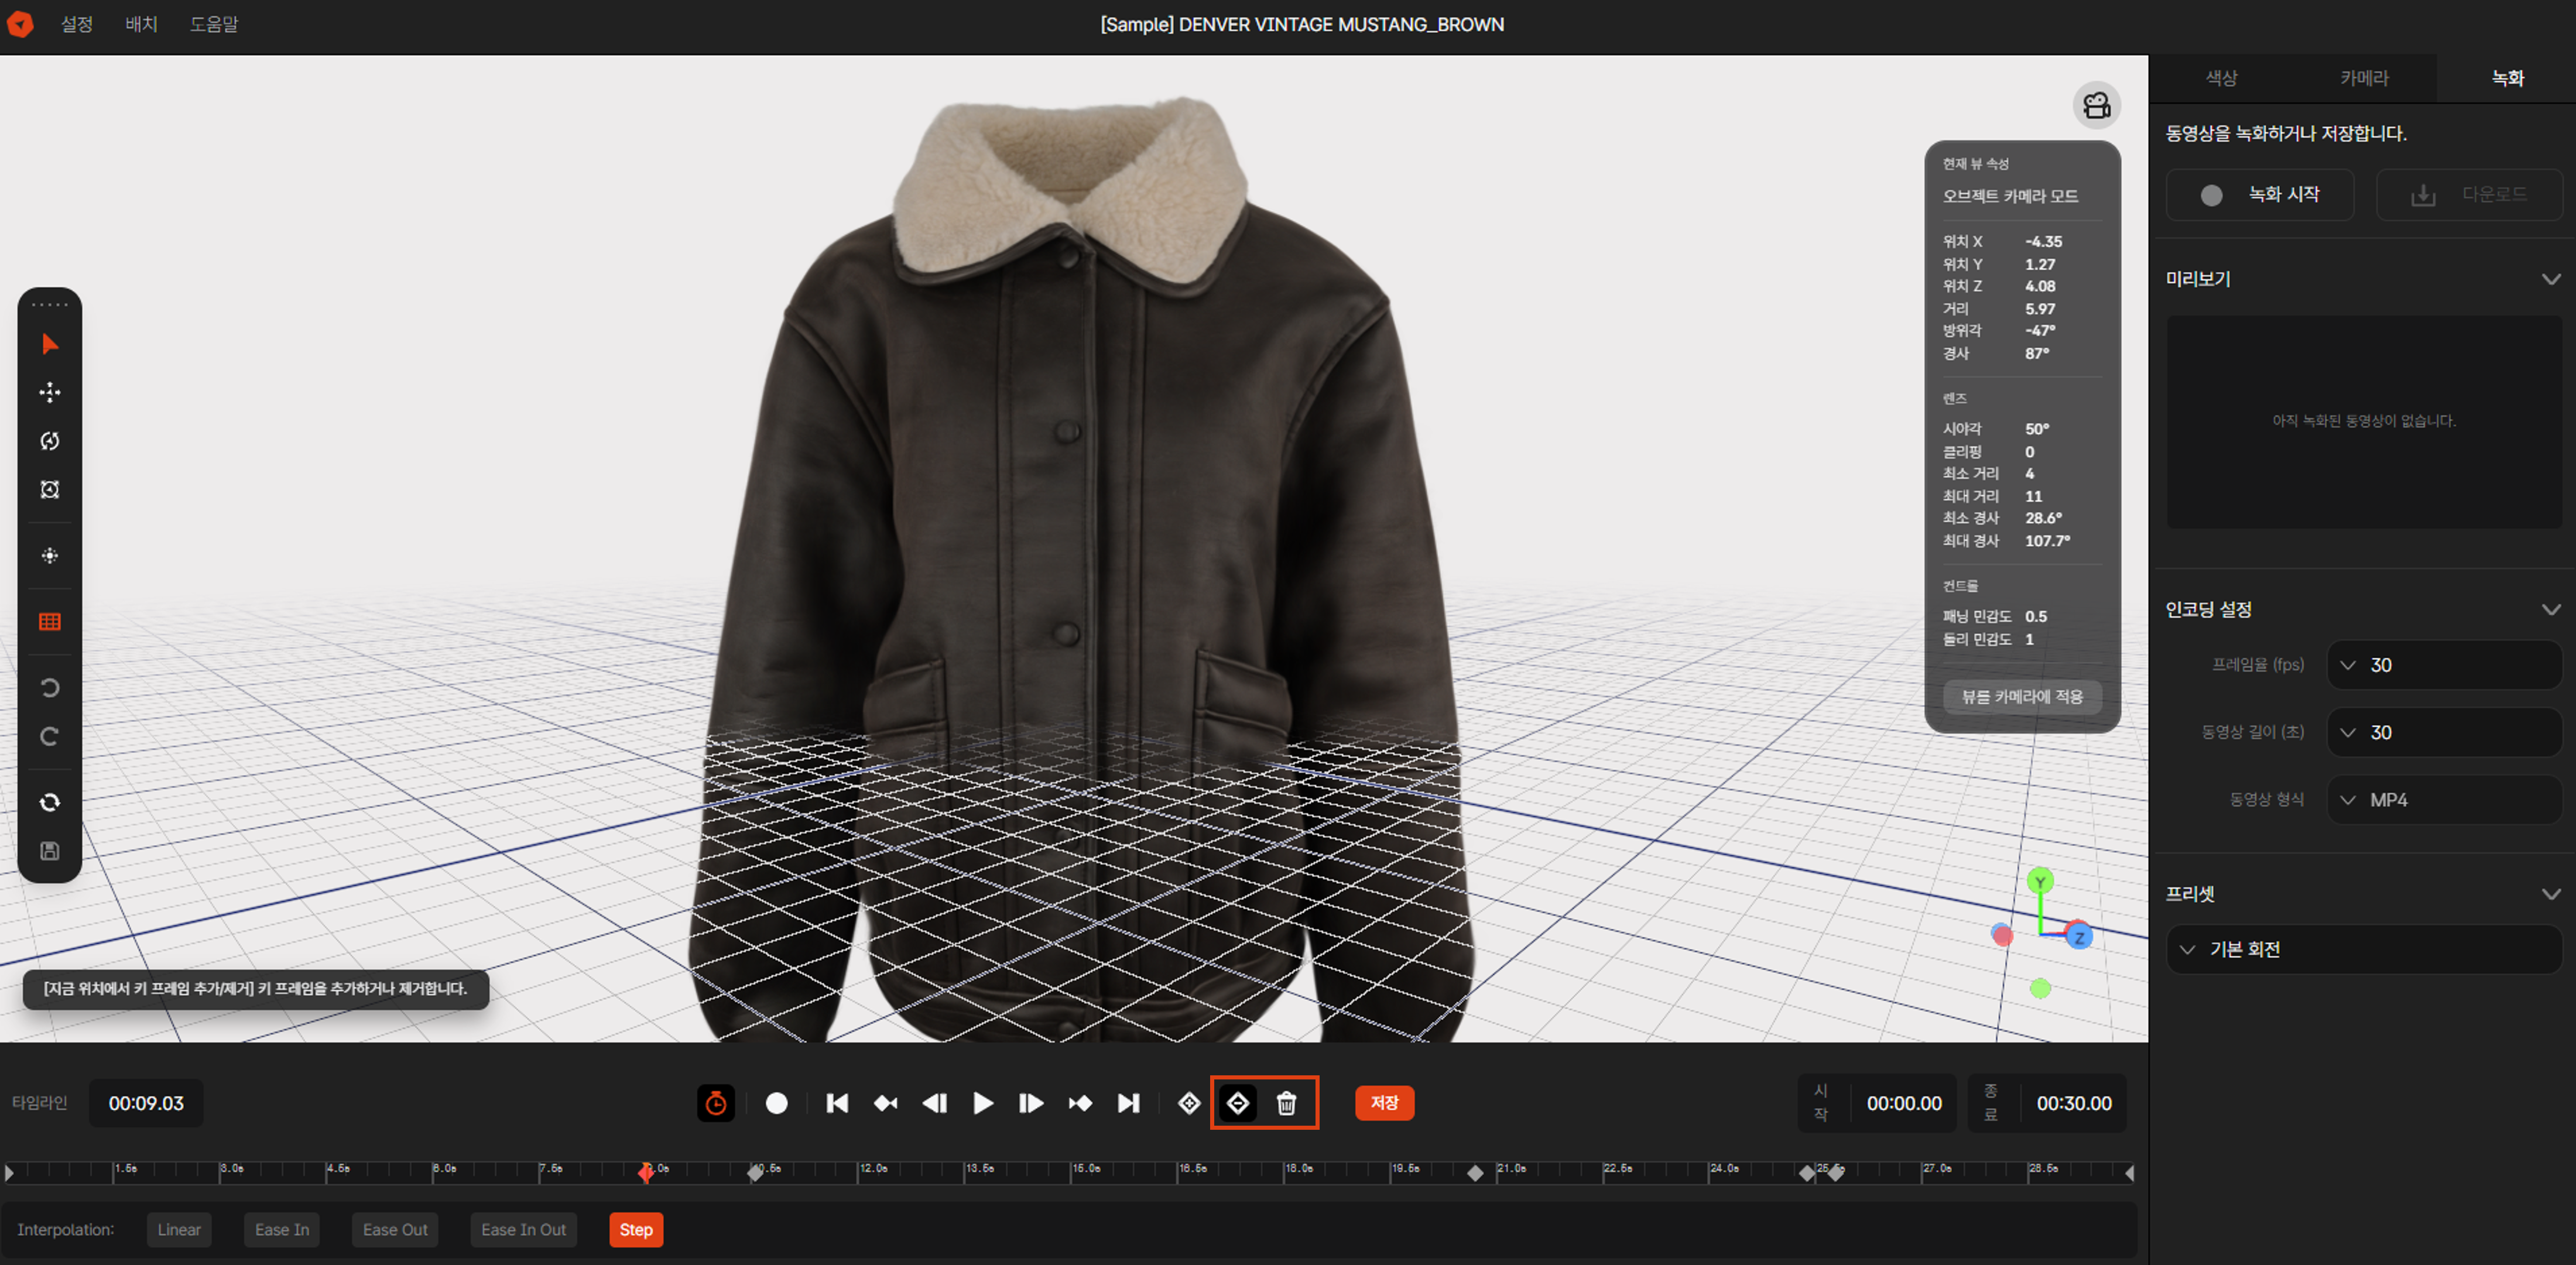 Image 8. Deleting Keyframe
6. Adjusting Timeline Length
The default timeline length is 30 seconds, and you can adjust it as needed.
- Click the end time at the top right of the timeline
- Enter your desired time (maximum 300 seconds / 5 minutes)
- Click the
[Apply]button - Keyframes after the end time will be automatically deleted
 Image 9. Adjusting Timeline Length
7. Saving the Timeline
After completing your timeline settings, you must click the save button to save.
- Configure all keyframes and settings as desired
- Click the
[Save Timeline]button at the bottom right of the timeline - When the "Save Complete" message appears, it has been saved successfully
- Be careful - if you leave the page without saving, your changes will be lost
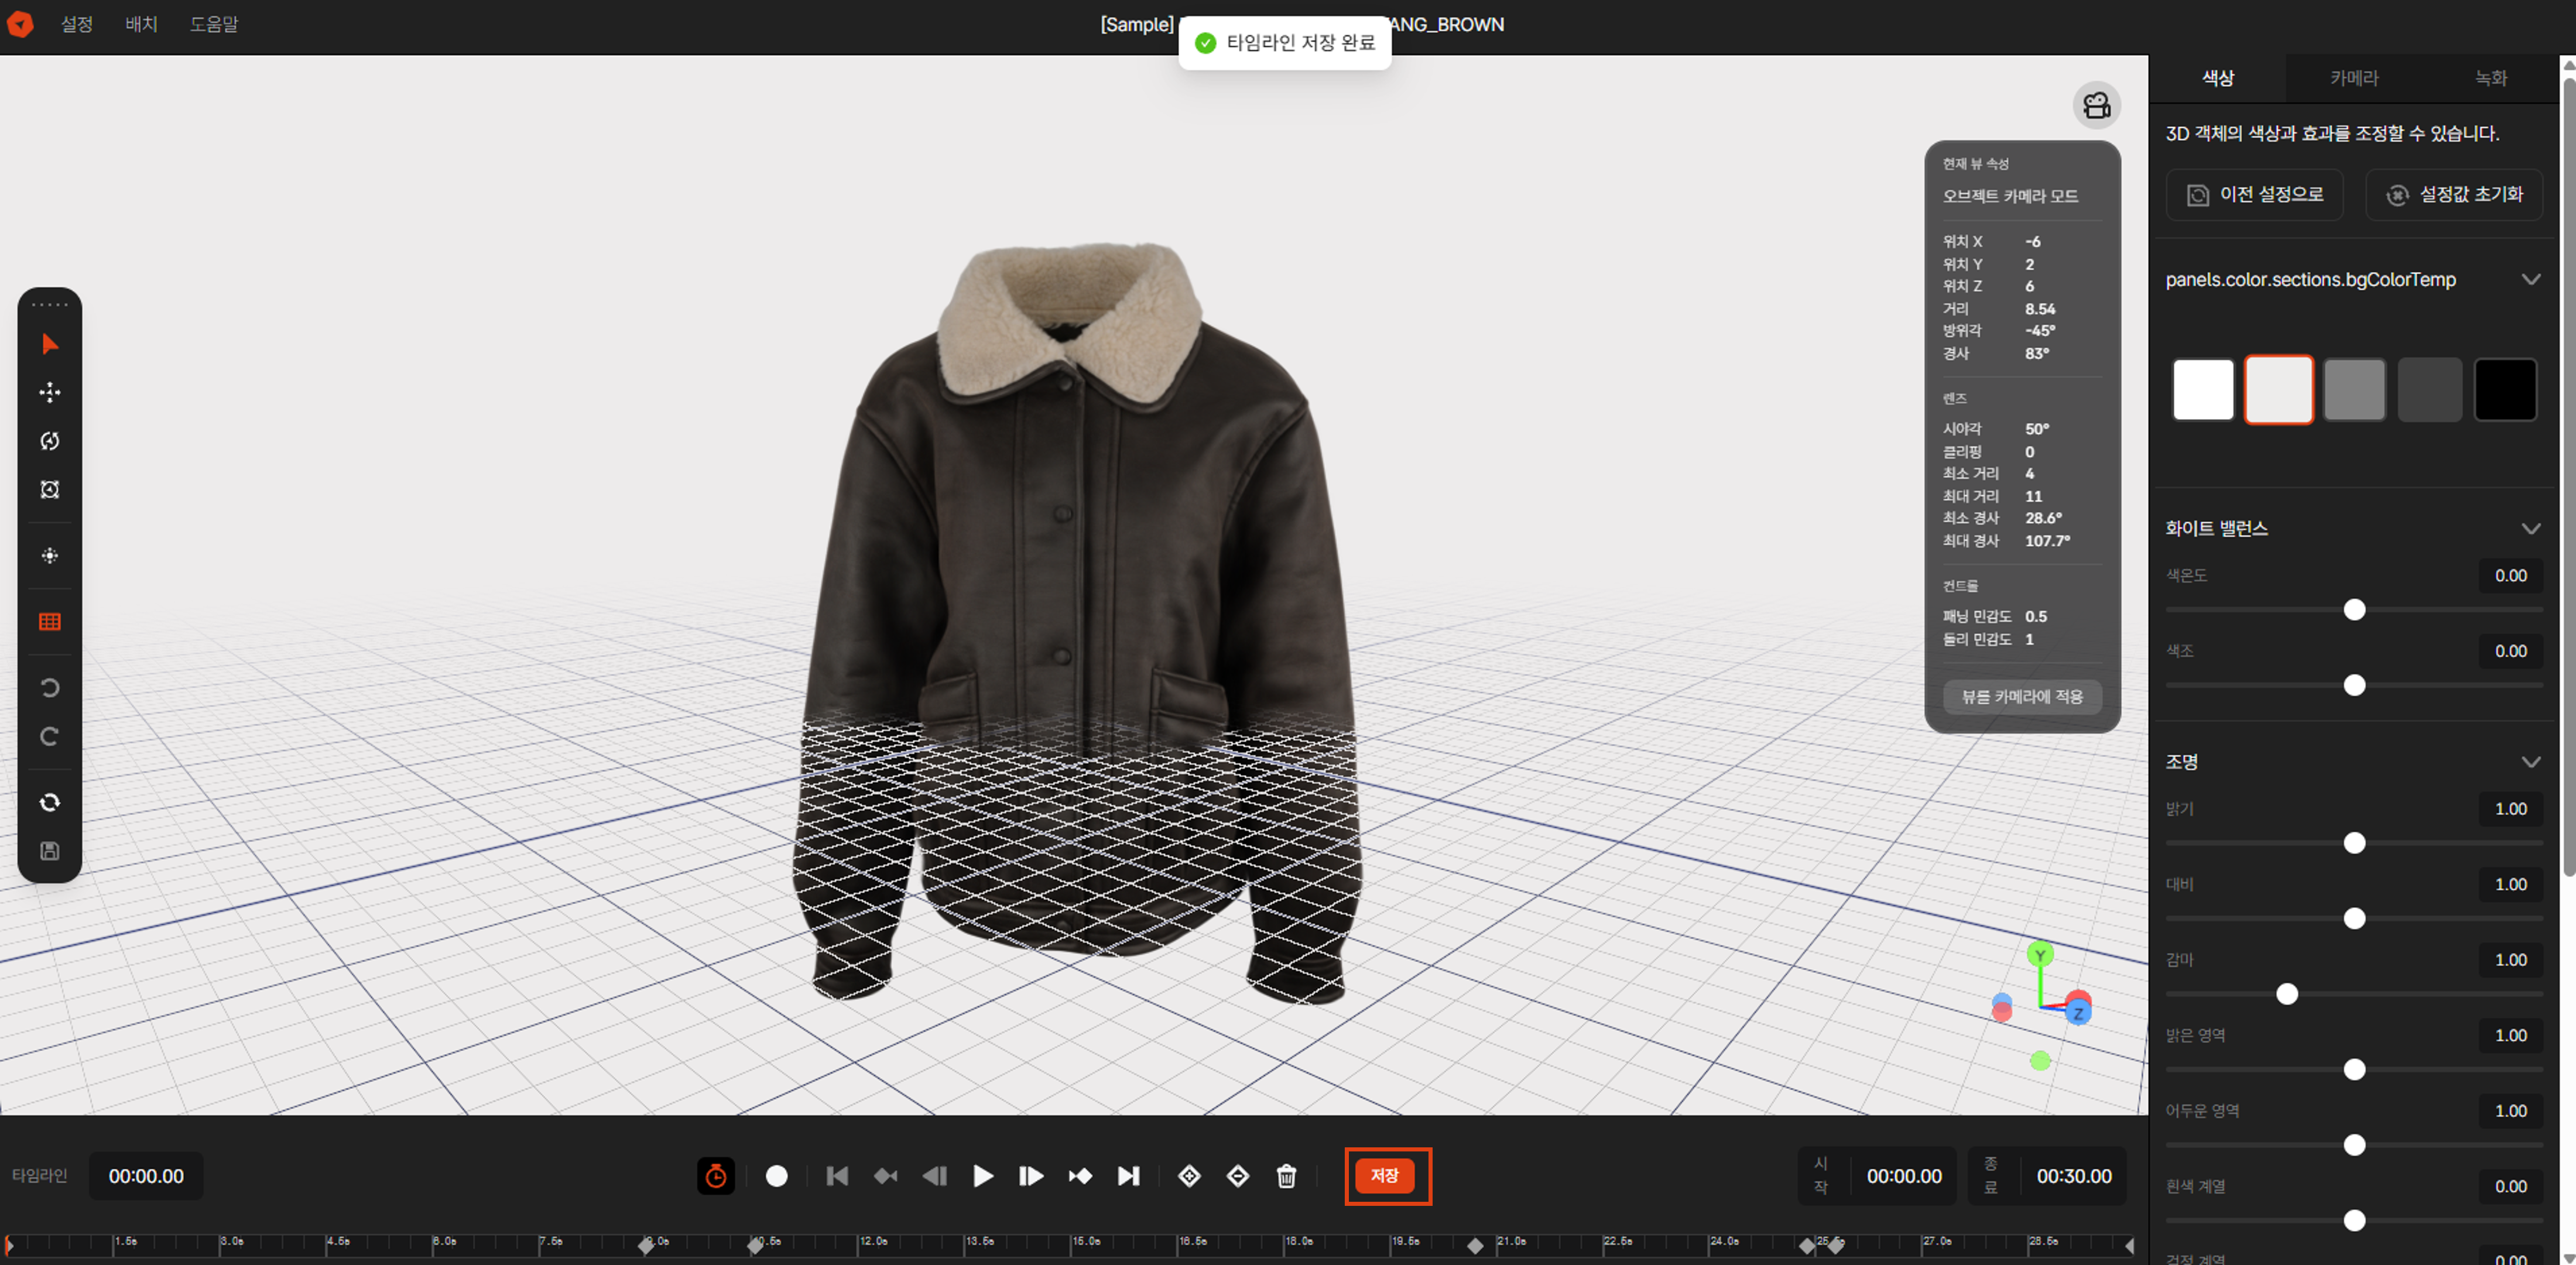 Image 10. Timeline Save Button
Important Notes:
- The save button is disabled during playback or recording
- Saving includes both keyframe information and timeline length
- We recommend saving whenever you make changes
Playing Timeline in Viewer
1. Change Rotation Mode in Style Settings
To automatically play the timeline sequence on the 3D Showroom detail page:
EVOVA Dashboard > [3D Showroom] > [List] > Click Individual Product- Click the
[Style]tab in the right sidebar - Click
[Style Detailed Settings] - In the Background Rotation section, select
Keyframefor Rotate Mode
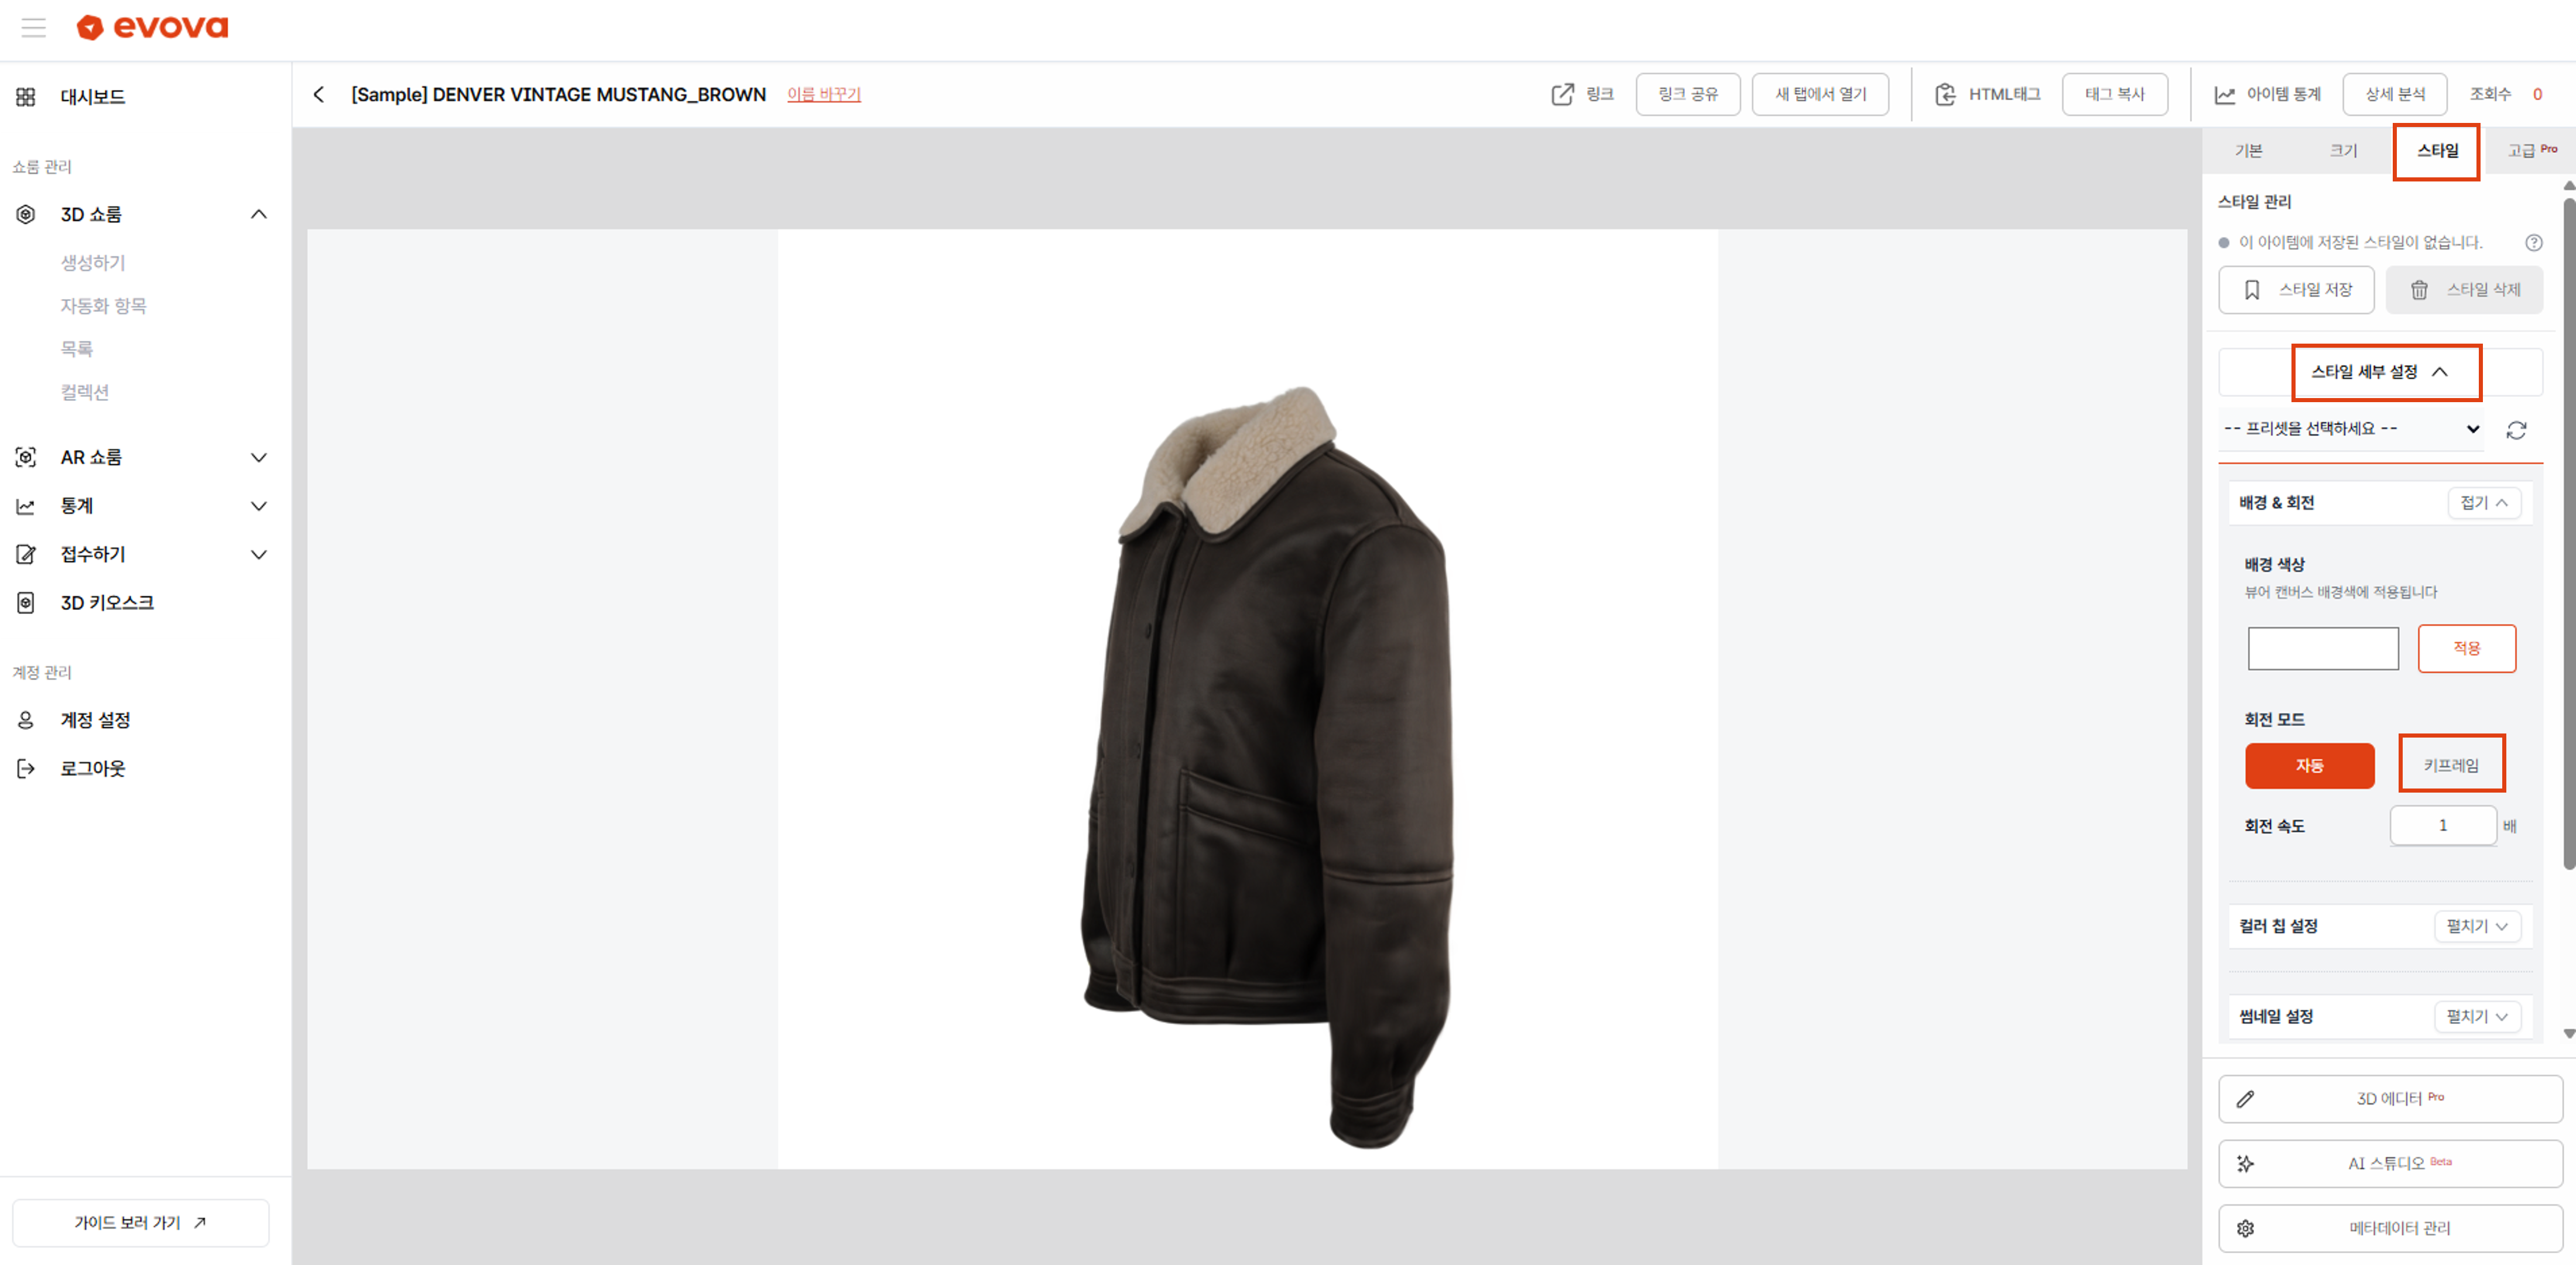 Image 11. Setting Rotate Mode to Keyframe
2. Adjusting Rotation Speed
- You can adjust the timeline playback speed with the Rotation Speed slider
- 1x speed: Plays at the exact time set in the editor
- 2x speed: Plays twice as fast
- 0.5x speed: Plays at half speed
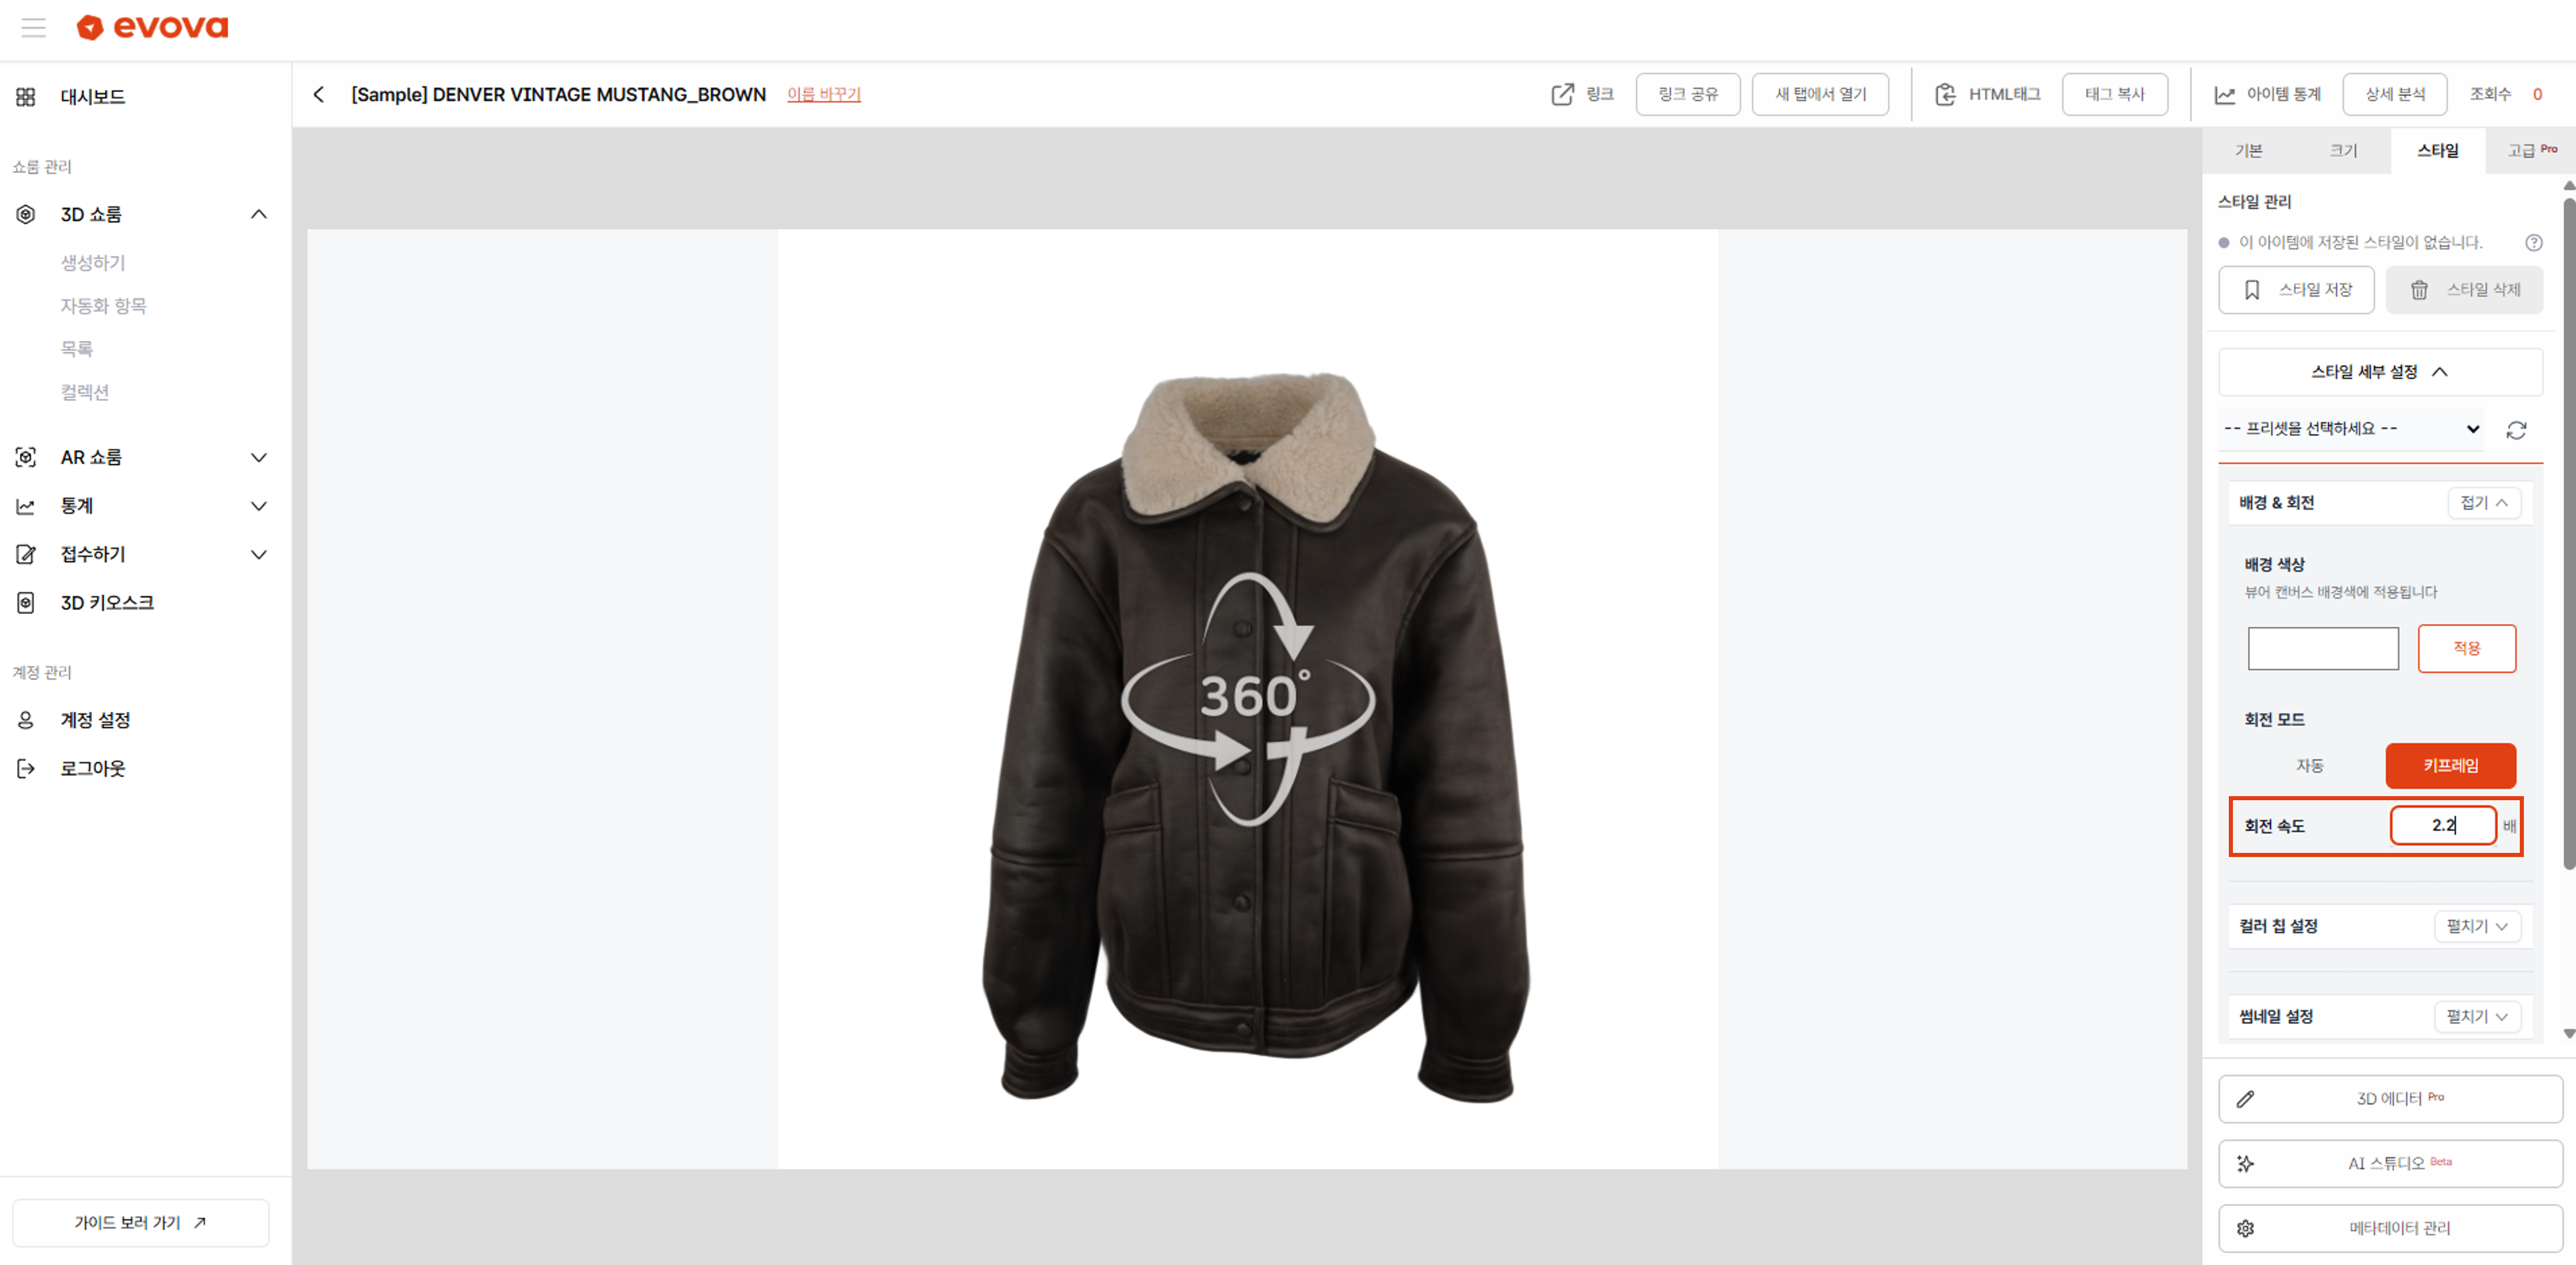 Image 12. Adjusting Rotation Speed
3. Verify in Viewer
- After completing style settings, click the
[Save Style]button - Navigate to the product viewer page
- When the page loads, the timeline will automatically play
- Automatic playback stops when the user drags with mouse or scrolls
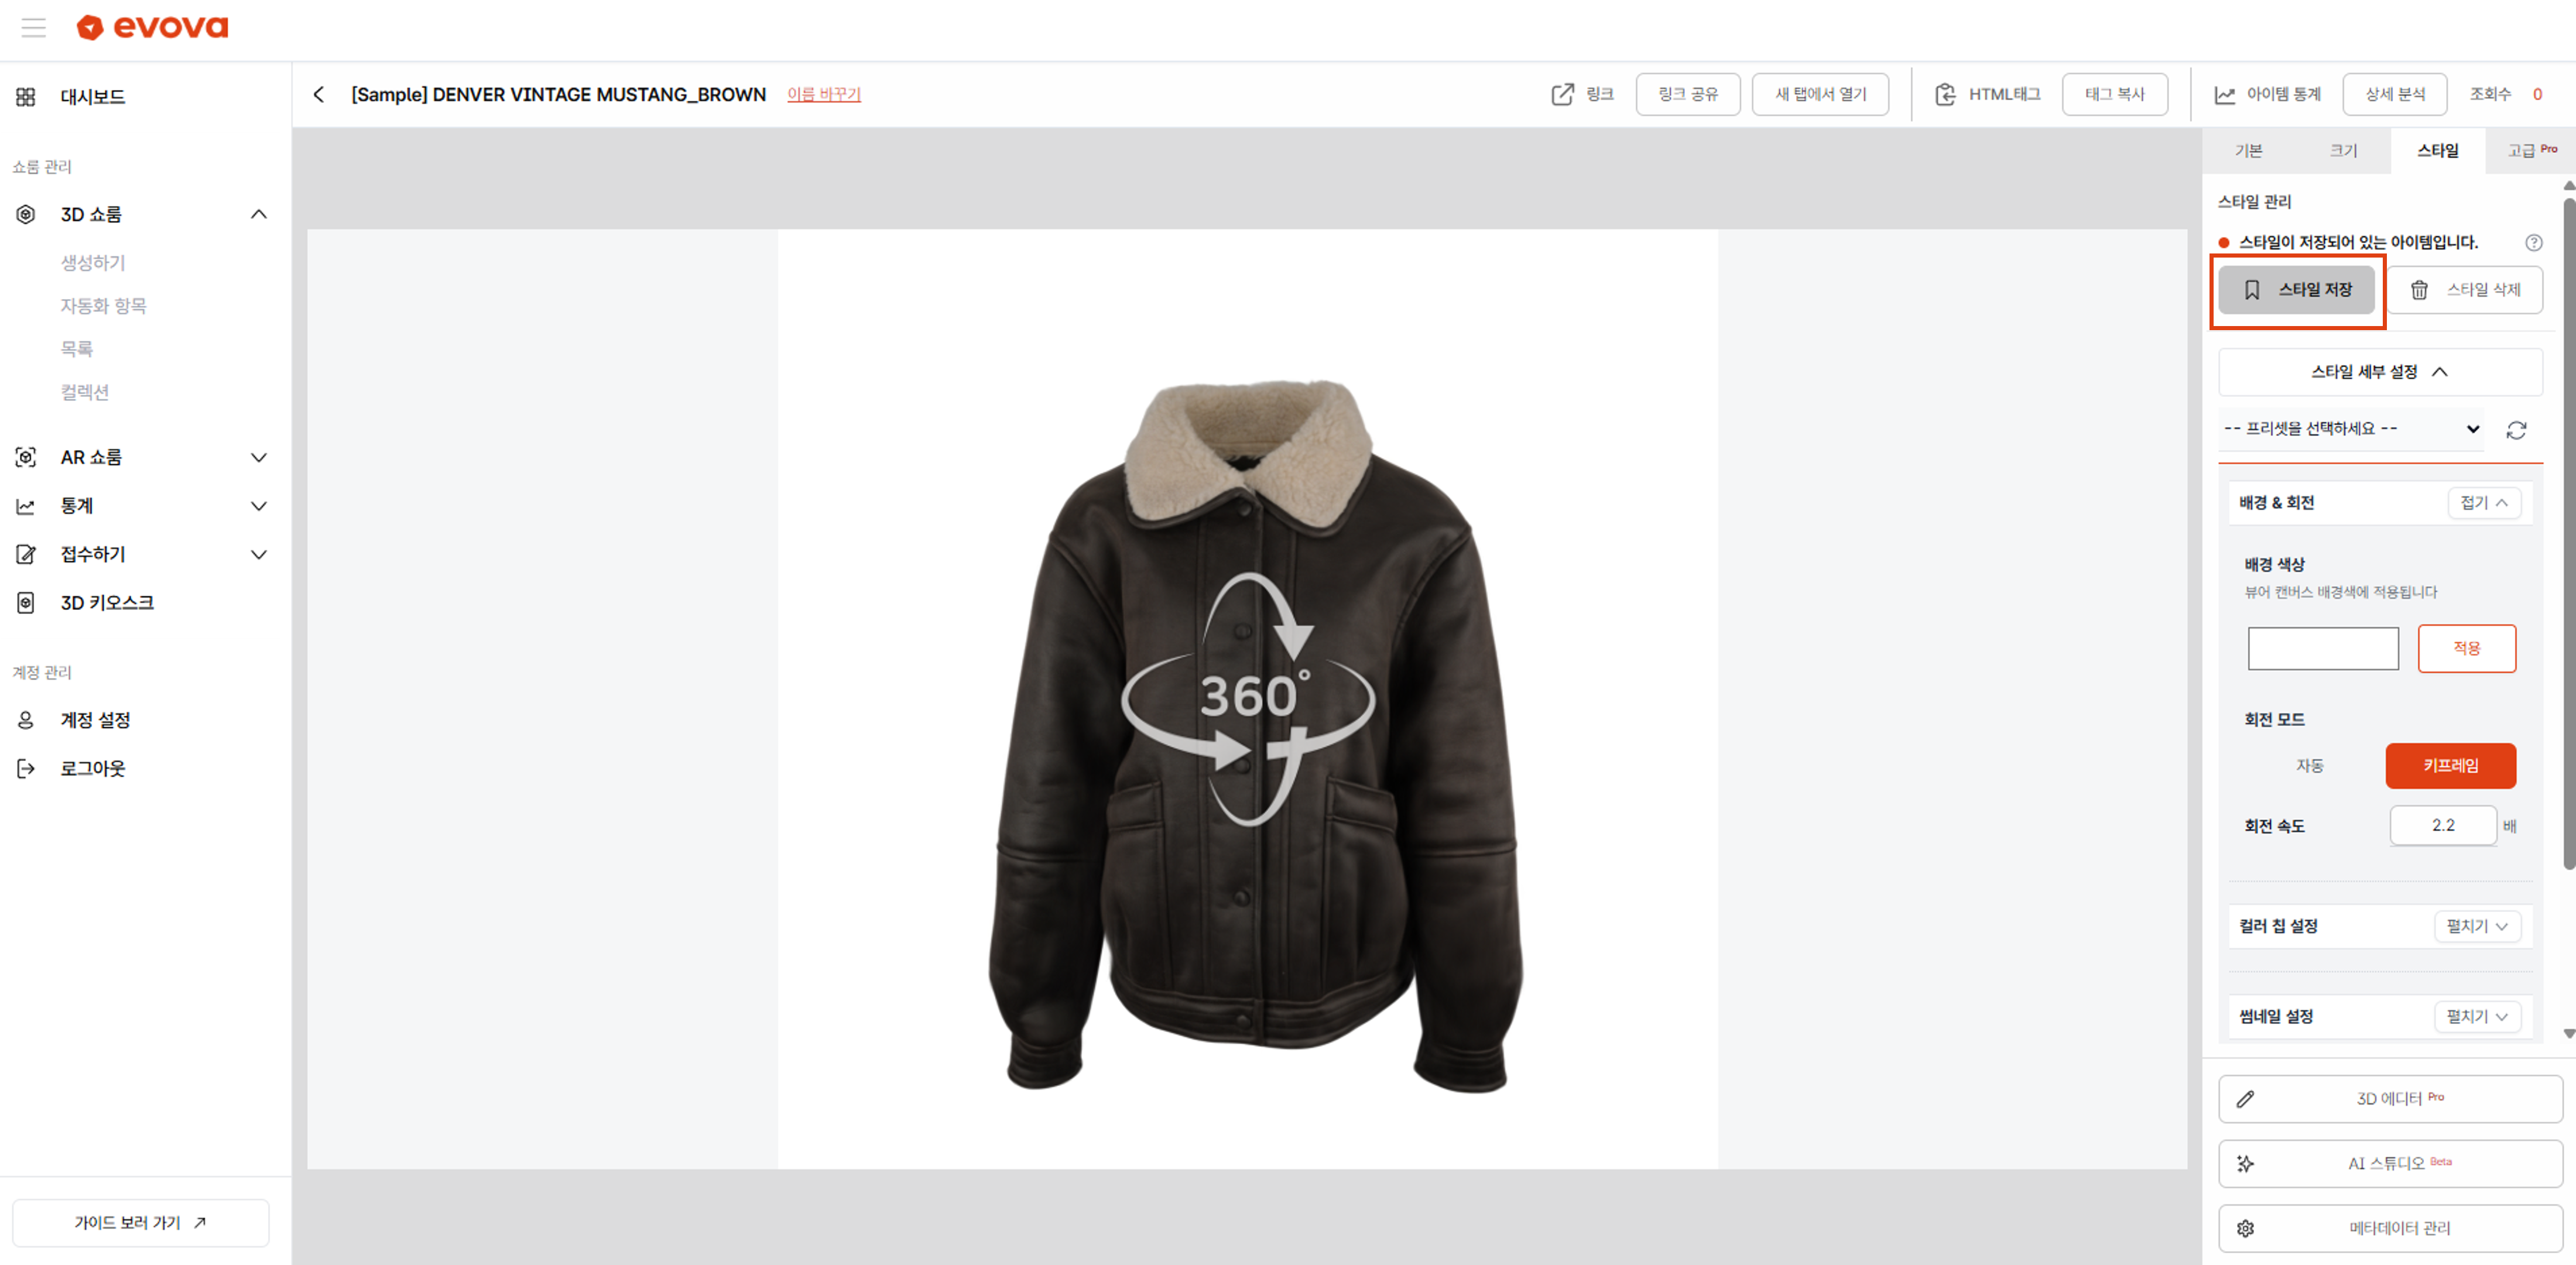 Image 13. Timeline Auto-Play in Viewer
Timeline Usage Tips
Emphasizing Details
- If you want to show a specific part of the product up close, add a keyframe that zooms in on that area
- Using the Ease In Out interpolation method creates smoother camera movement
Starting with Full View
- It's recommended to set the first keyframe at an angle where the entire product is visible
- This allows users to grasp the overall appearance of the product first
Appropriate Timeline Length
- Too short and the camera moves too fast, which can be disorienting
- Too long and users may get bored
- Generally, 10-20 seconds is appropriate
Number of Keyframes
- Too many keyframes can be complex and difficult to manage
- We recommend starting with 3-5 keyframes
- Add more gradually as needed
Frequently Asked Questions (FAQ)
Q1. The timeline won't save
A: The timeline must be saved manually. After adding or modifying keyframes, be sure to click the [Save] button at the bottom of the timeline. When the "Save Complete" message appears, it has been saved successfully.
Q2. The timeline doesn't play in the viewer
A: Check if the Rotate Mode is set to Keyframe in the style settings. If it's set to Auto, only the default auto-rotation will work.
Q3. Movement between keyframes is too fast
A: Try setting longer time intervals between keyframes, or lower the rotation speed. Alternatively, changing the interpolation method to Ease In Out will provide smoother movement.
Q4. What is the maximum timeline length?
A: You can set up to 300 seconds (5 minutes). However, we recommend setting it to 30 seconds or less for better user experience.
Q5. Does the timeline work on mobile?
A: Yes, it works the same way in the mobile viewer. Automatic playback stops when you drag with touch.
Closing
Adding Dimensions to E-commerce
By utilizing EVOVA Timeline Sequence, you can showcase your products more dynamically and attractively. Go beyond simple auto-rotation and deliver your product's core value through intentional camera direction.
If you have any questions, please feel free to contact our support team.
Email: info@metown.co.kr
Phone: 02-6380-0315