Basic Settings
To adjust your 3D product settings, please follow the steps below.
Access Path:
Left Sidebar > [Library] > Click Item > Right Sidebar > [Basic]
How to Use Basic Settings
1. Access Basic Settings
- Select
[Basic]from the right sidebar.
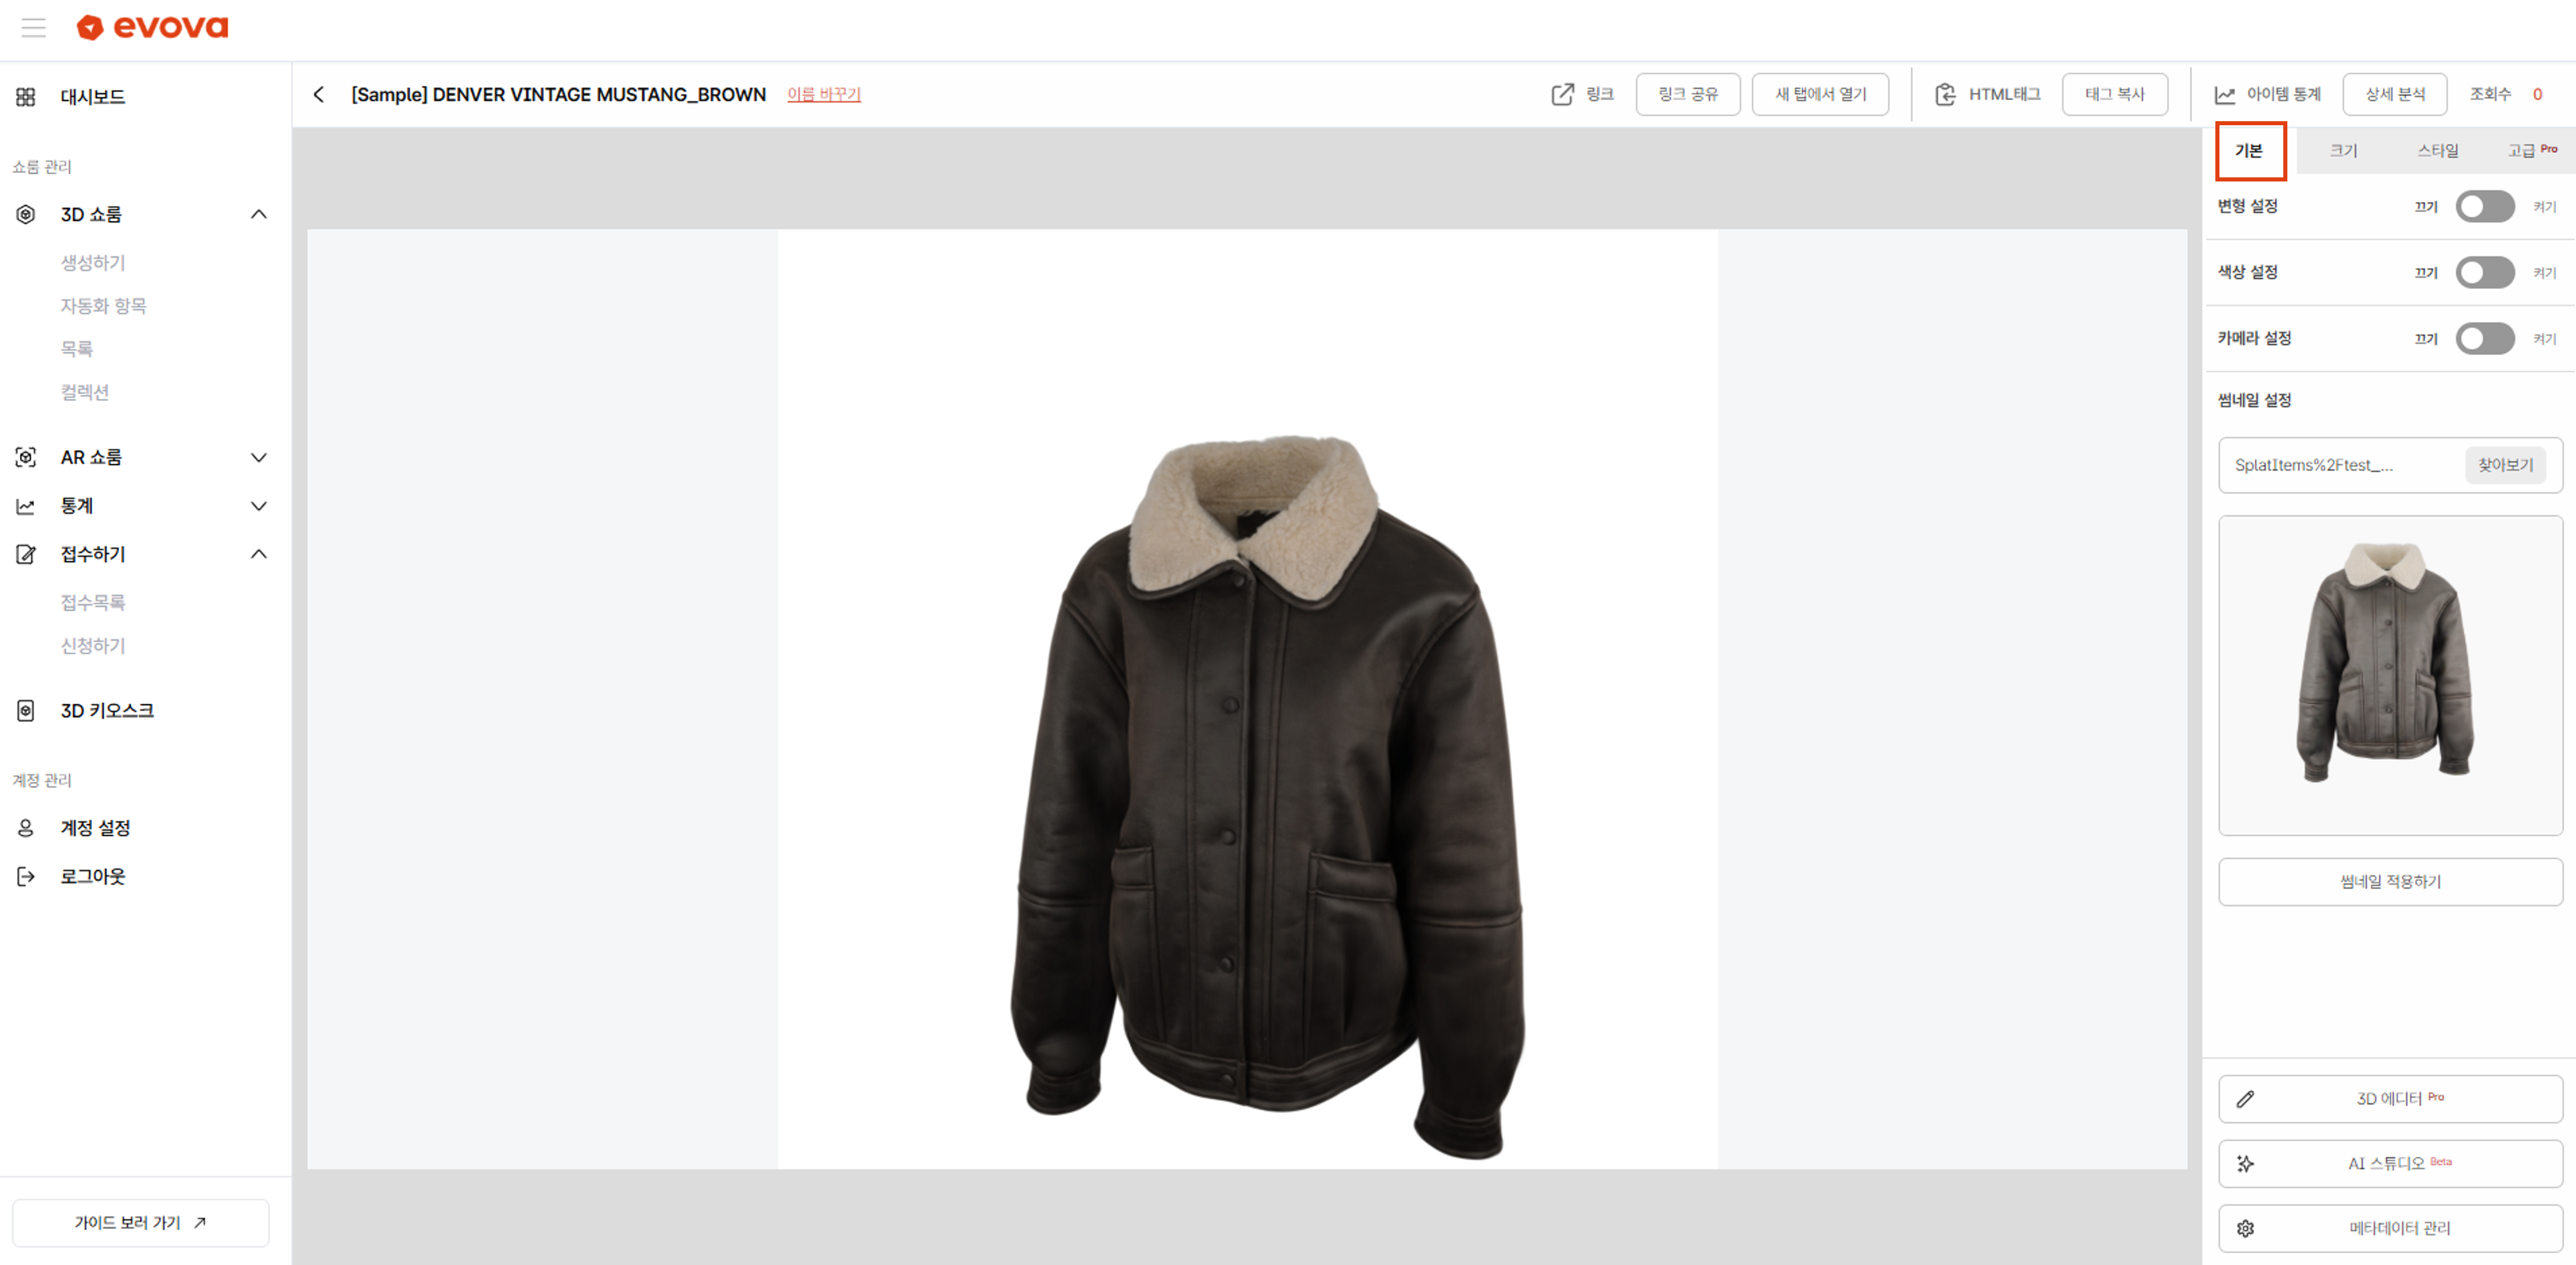 Image 1. Accessing Style Basic Settings
2. Transform Settings
- 3D Model Scale: Adjust the overall size of the product displayed on screen
- 3D Model Position: Move the product in Horizontal (X) / Height (Y) / Depth (Z) directions
- 3D Model Rotation: Rotate the product around X, Y, Z axes to adjust to front view or desired angle
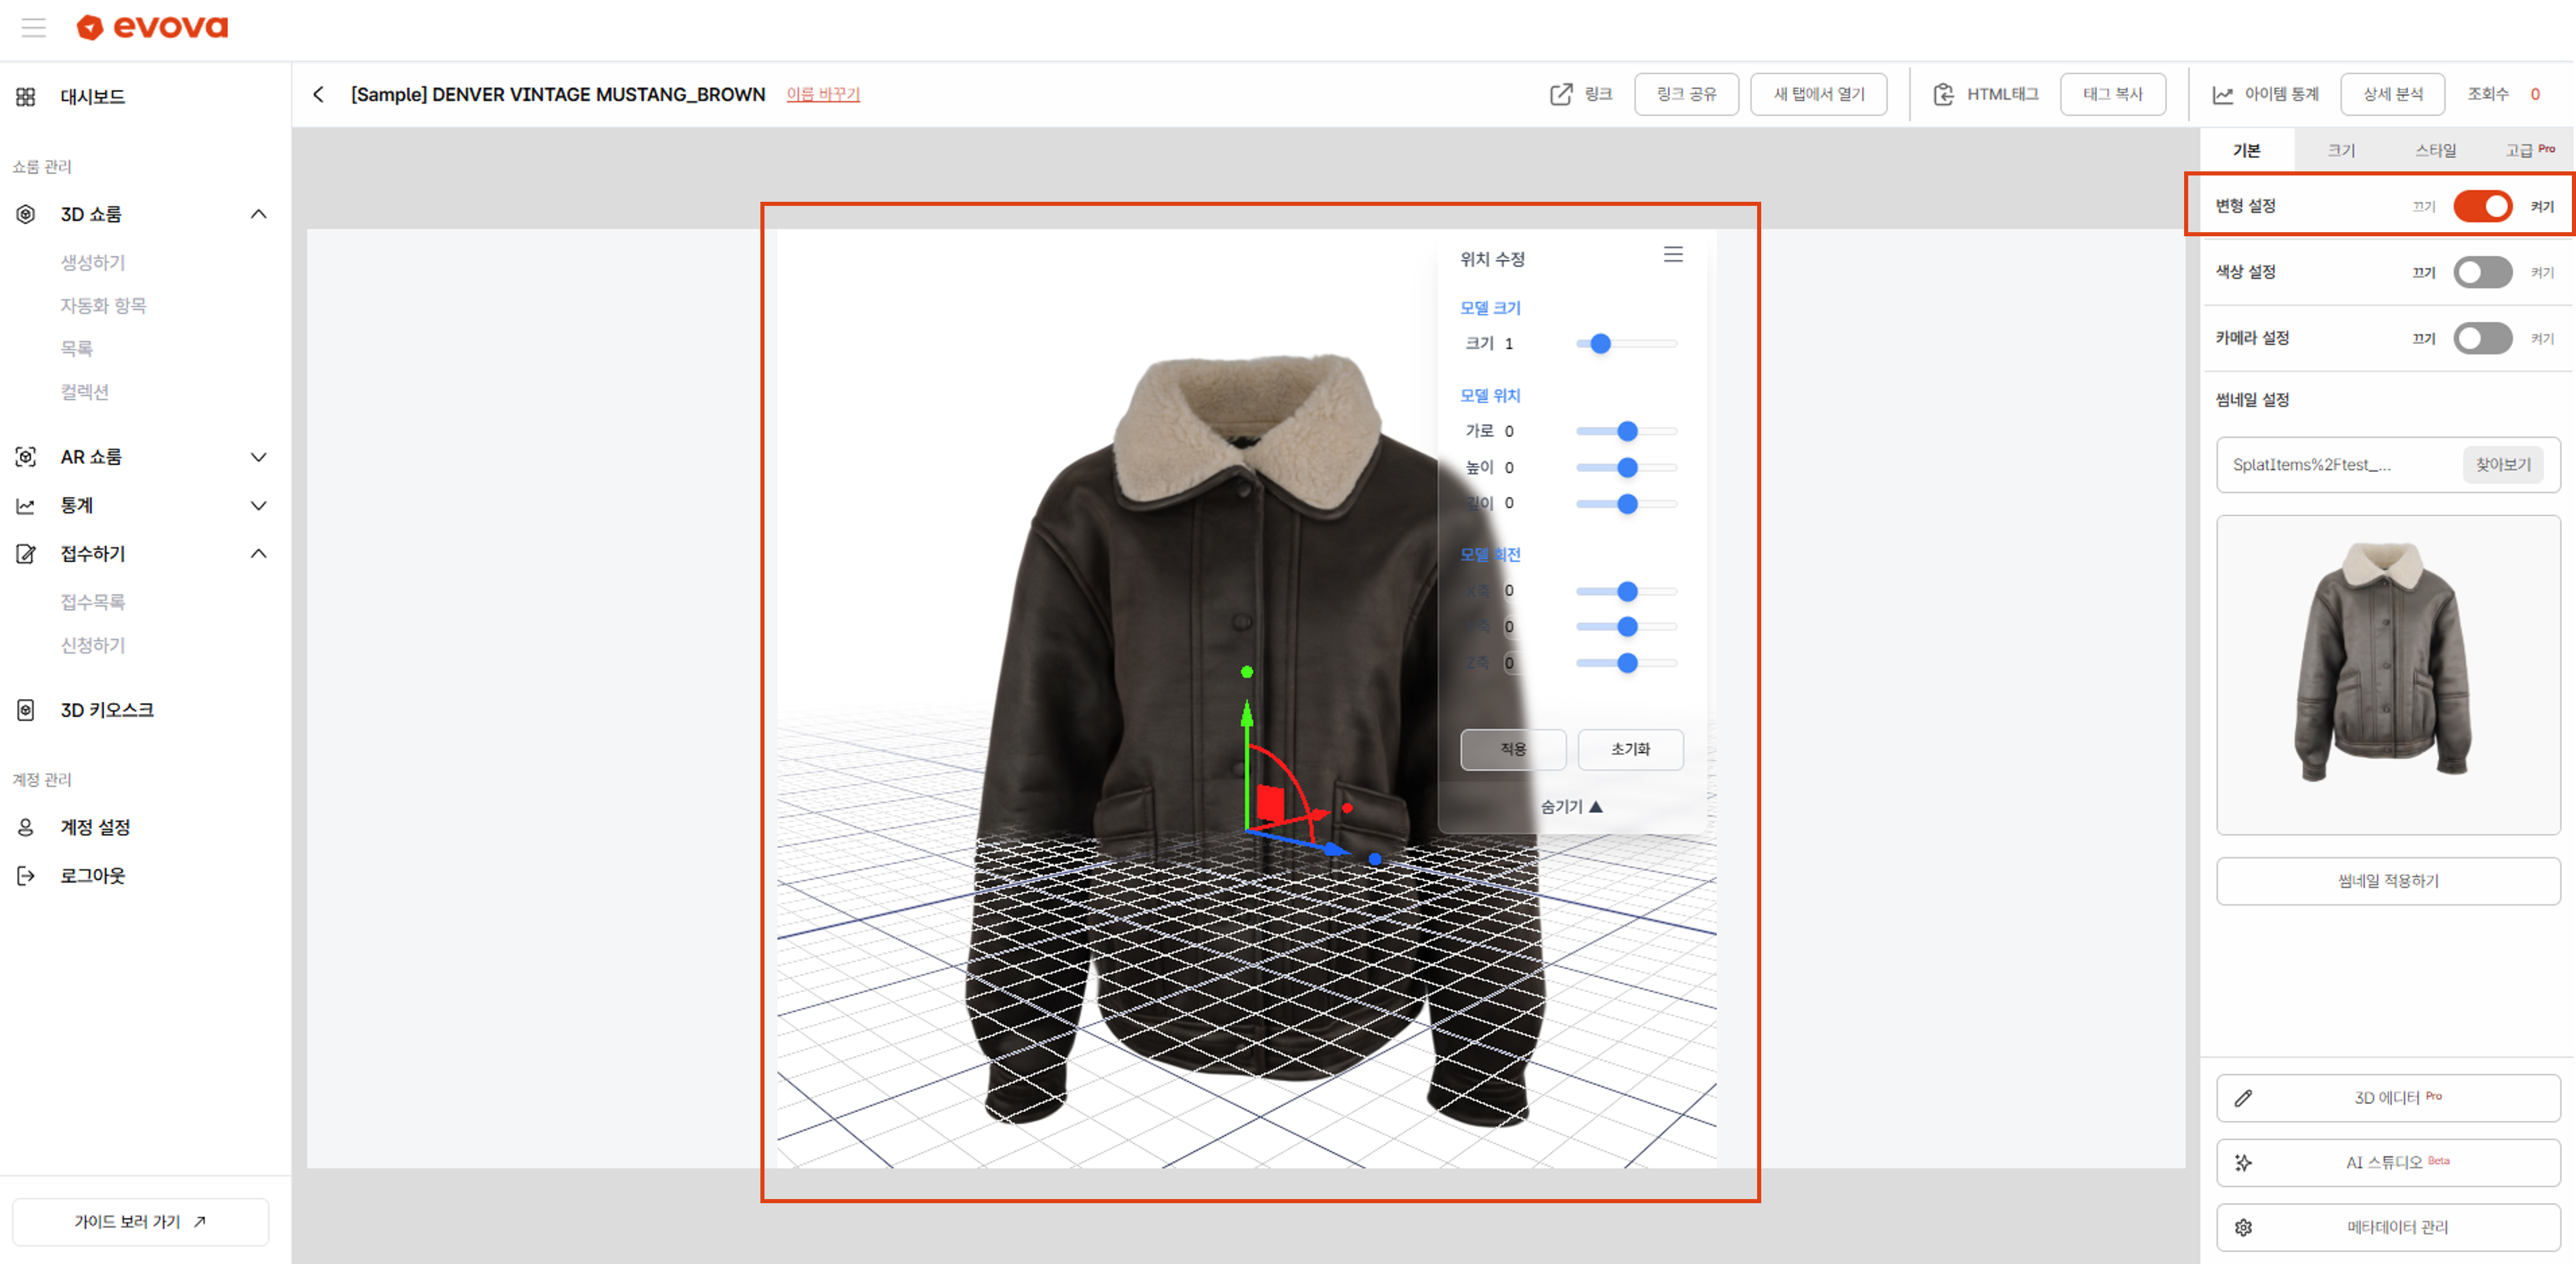 Image 2. Transform Settings
- After configuration, click the
[Apply]button to apply changes, and use[Reset]to restore to original state if needed. Tip: More detailed transform settings can be configured in the 3D Editor
3. Color Settings
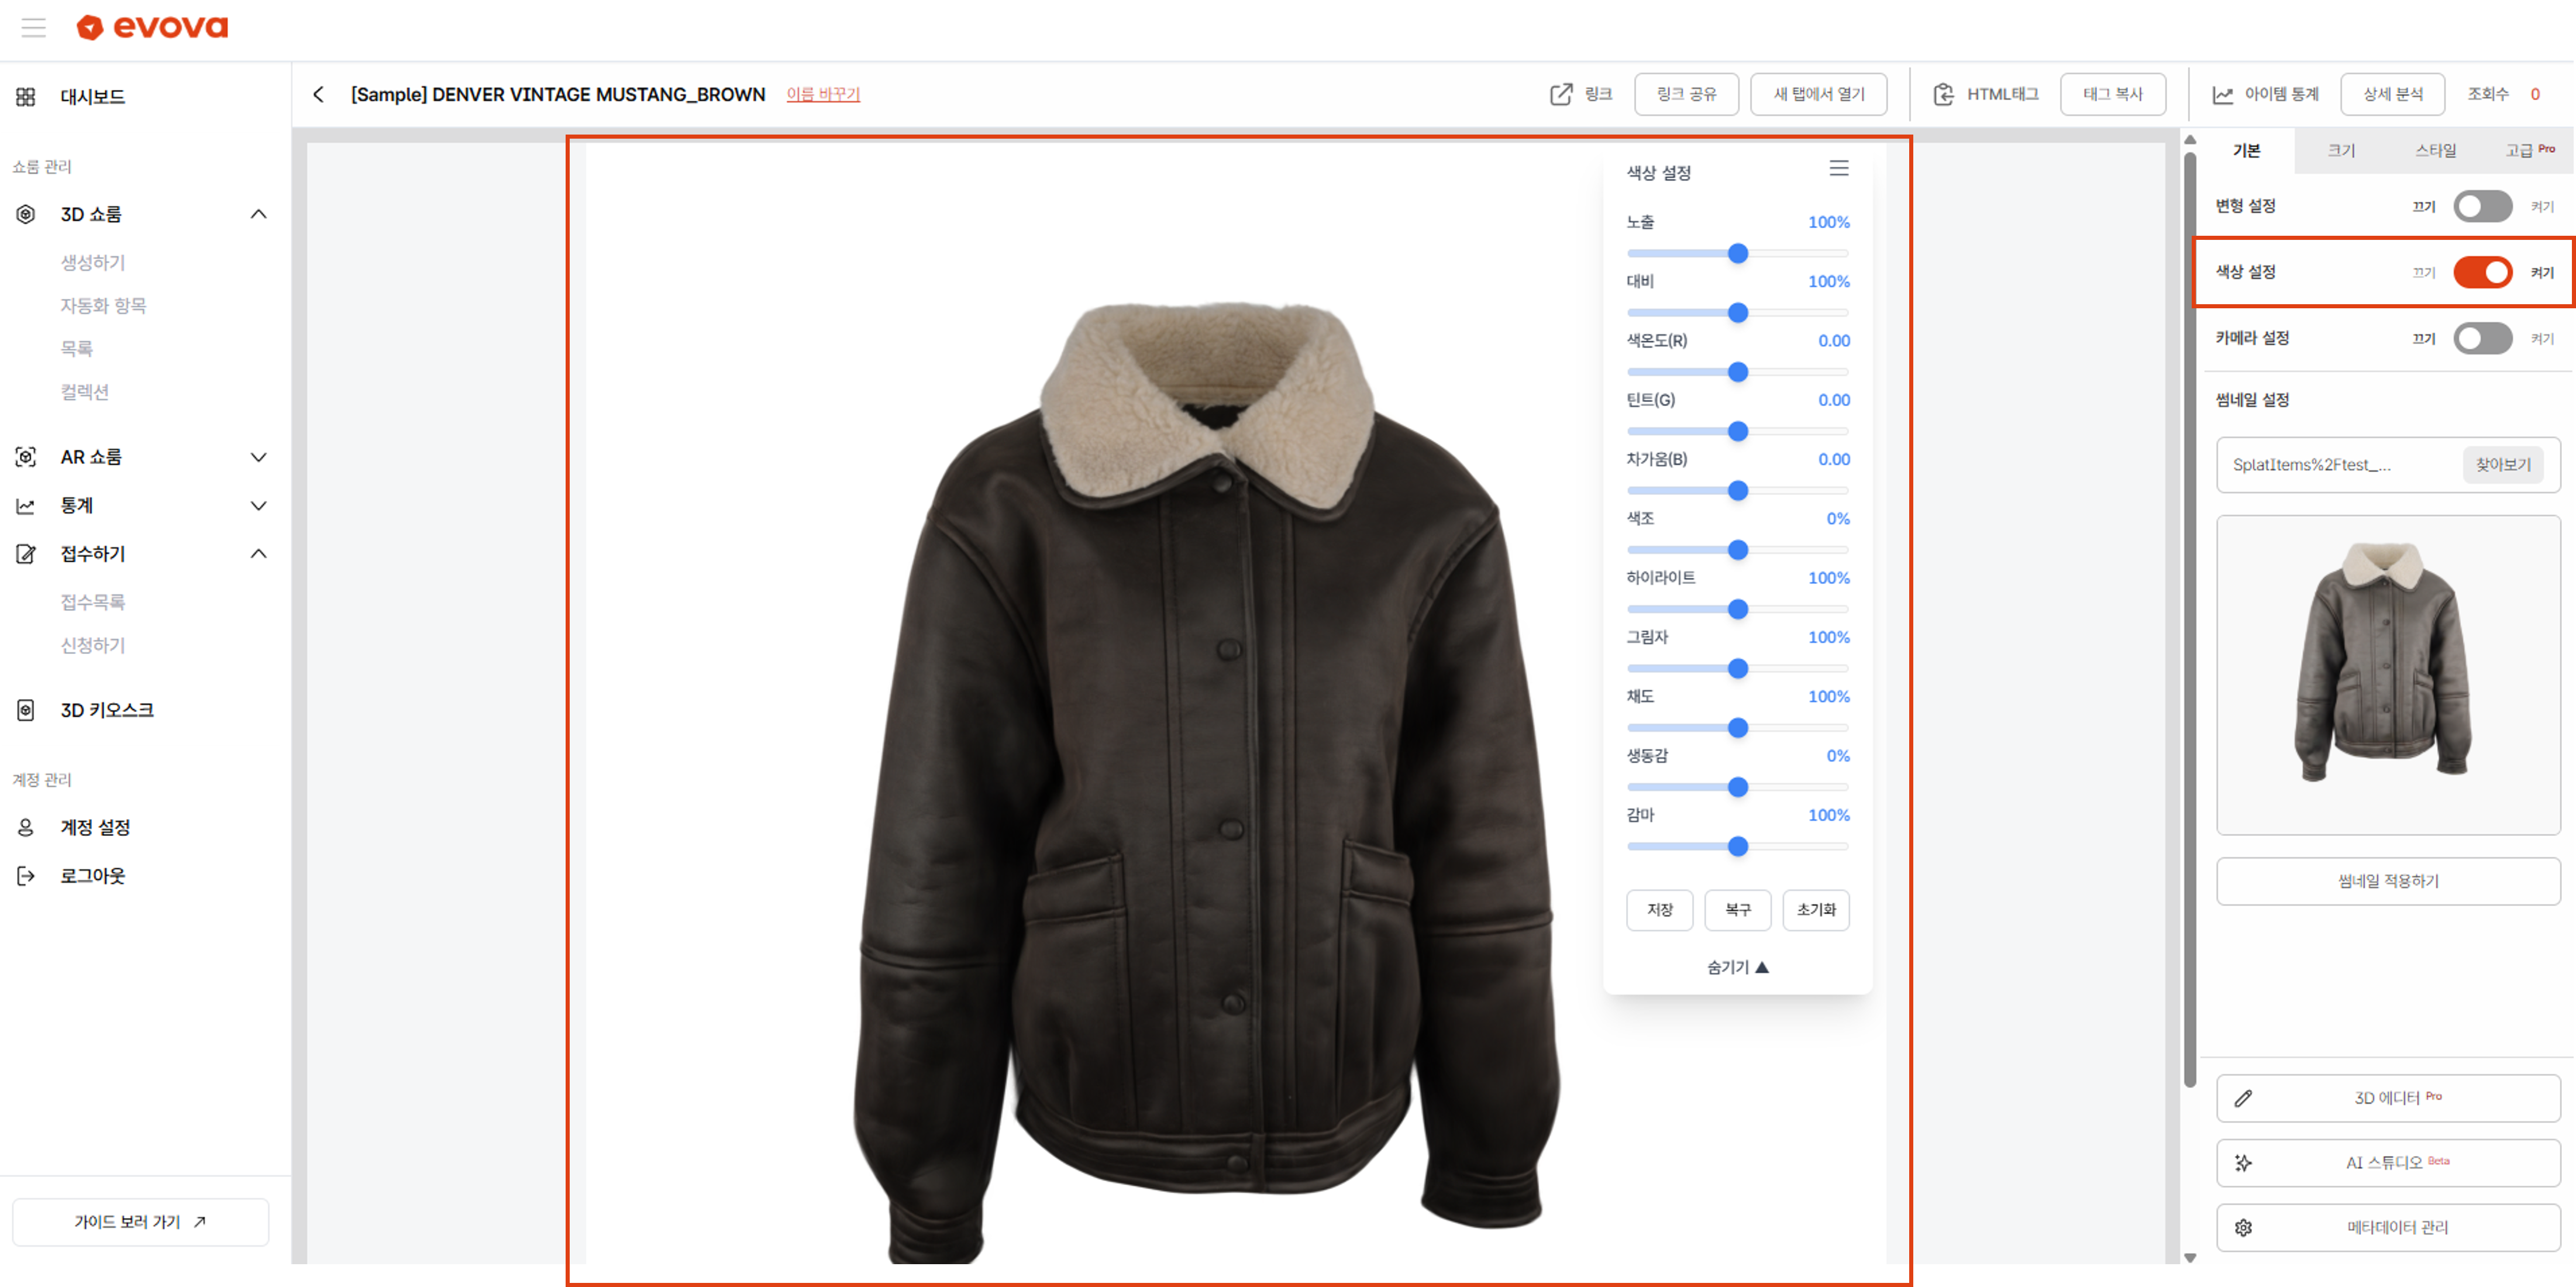 Image 3. Color Settings
- Adjust color tone by modifying parameters such as Exposure, Contrast, Color Temperature, etc.
- After configuration, you must click the
[Save]button to apply changes. To revert to the last saved state, click[Restore], or to completely reset to initial state, click[Reset]. Note that you must click[Save]for final application.
4. Camera Settings
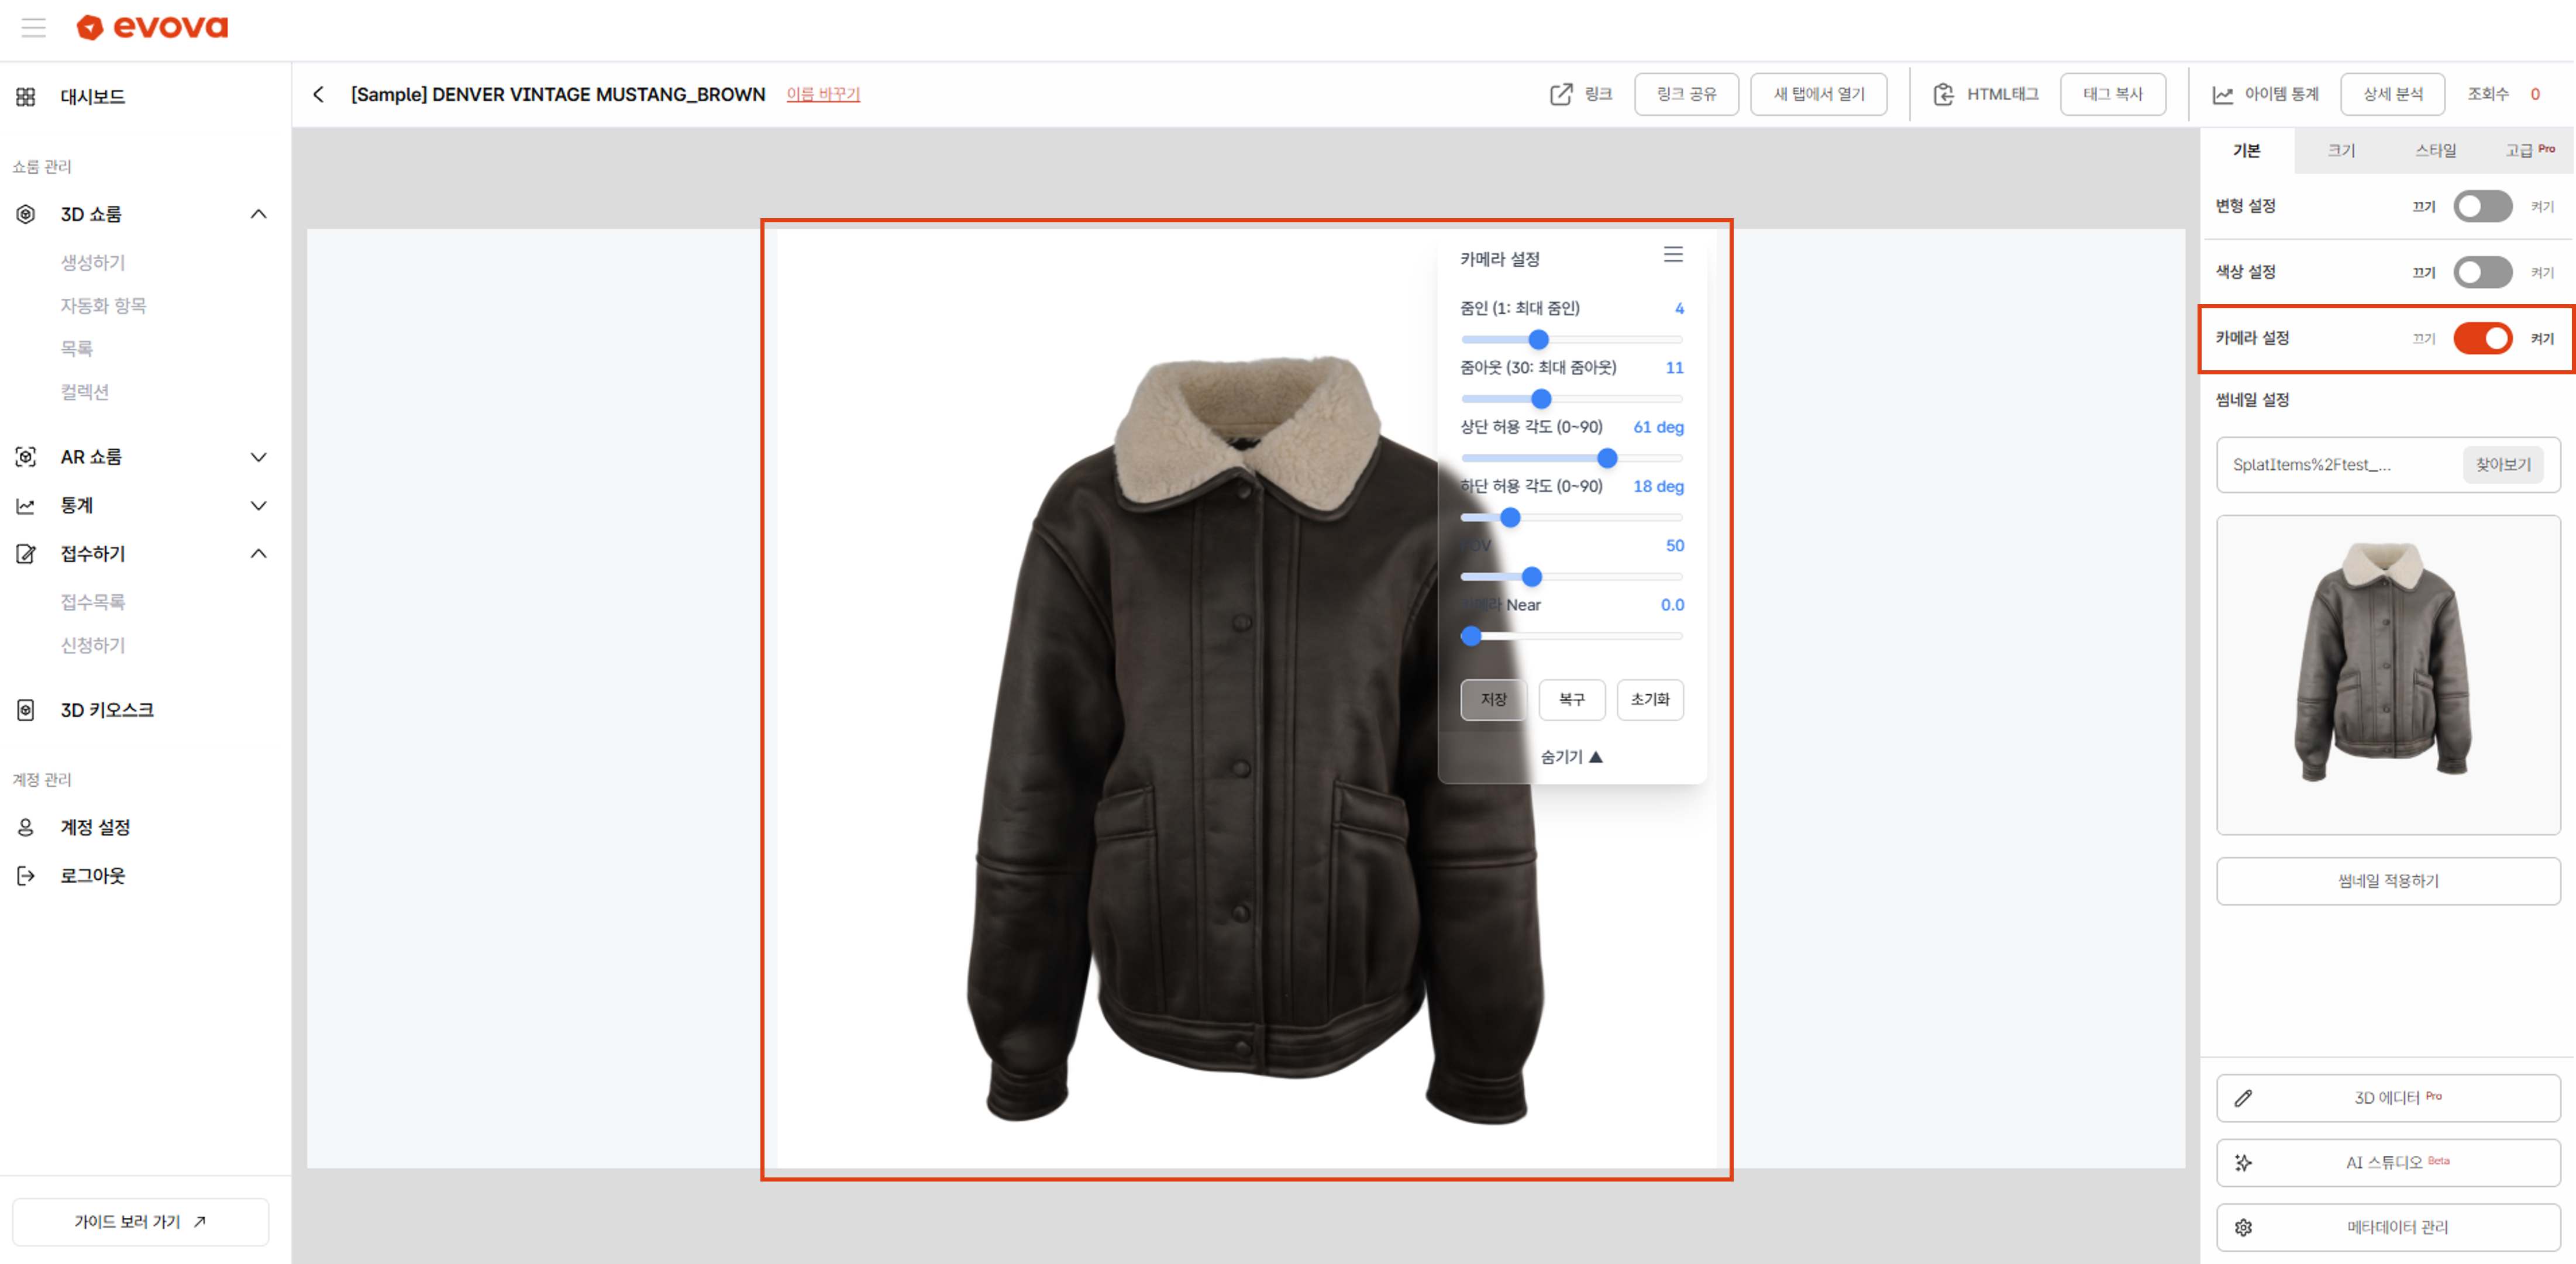 Image 4. Camera Settings
- Zoom In/Out: Set the maximum distance the camera can get close to or far from the product (zoom effect)
- Top/Bottom Allowed Angle: Set the angle at which the product can be viewed from above/below
- FOV: Adjust the Field of View for displaying the product
- Camera Near: Set the near plane between camera and product. Points closer to the camera than this value will appear transparent. In most cases, use the default value (0.0).
- After configuration, you must click the
[Save]button to apply changes. To revert to the last saved state, click[Restore], or to completely reset to initial state, click[Reset]. Note that you must click[Save]for final application. Tip: More detailed camera settings such as camera position can be configured in the 3D Editor
5. Change Thumbnail Image
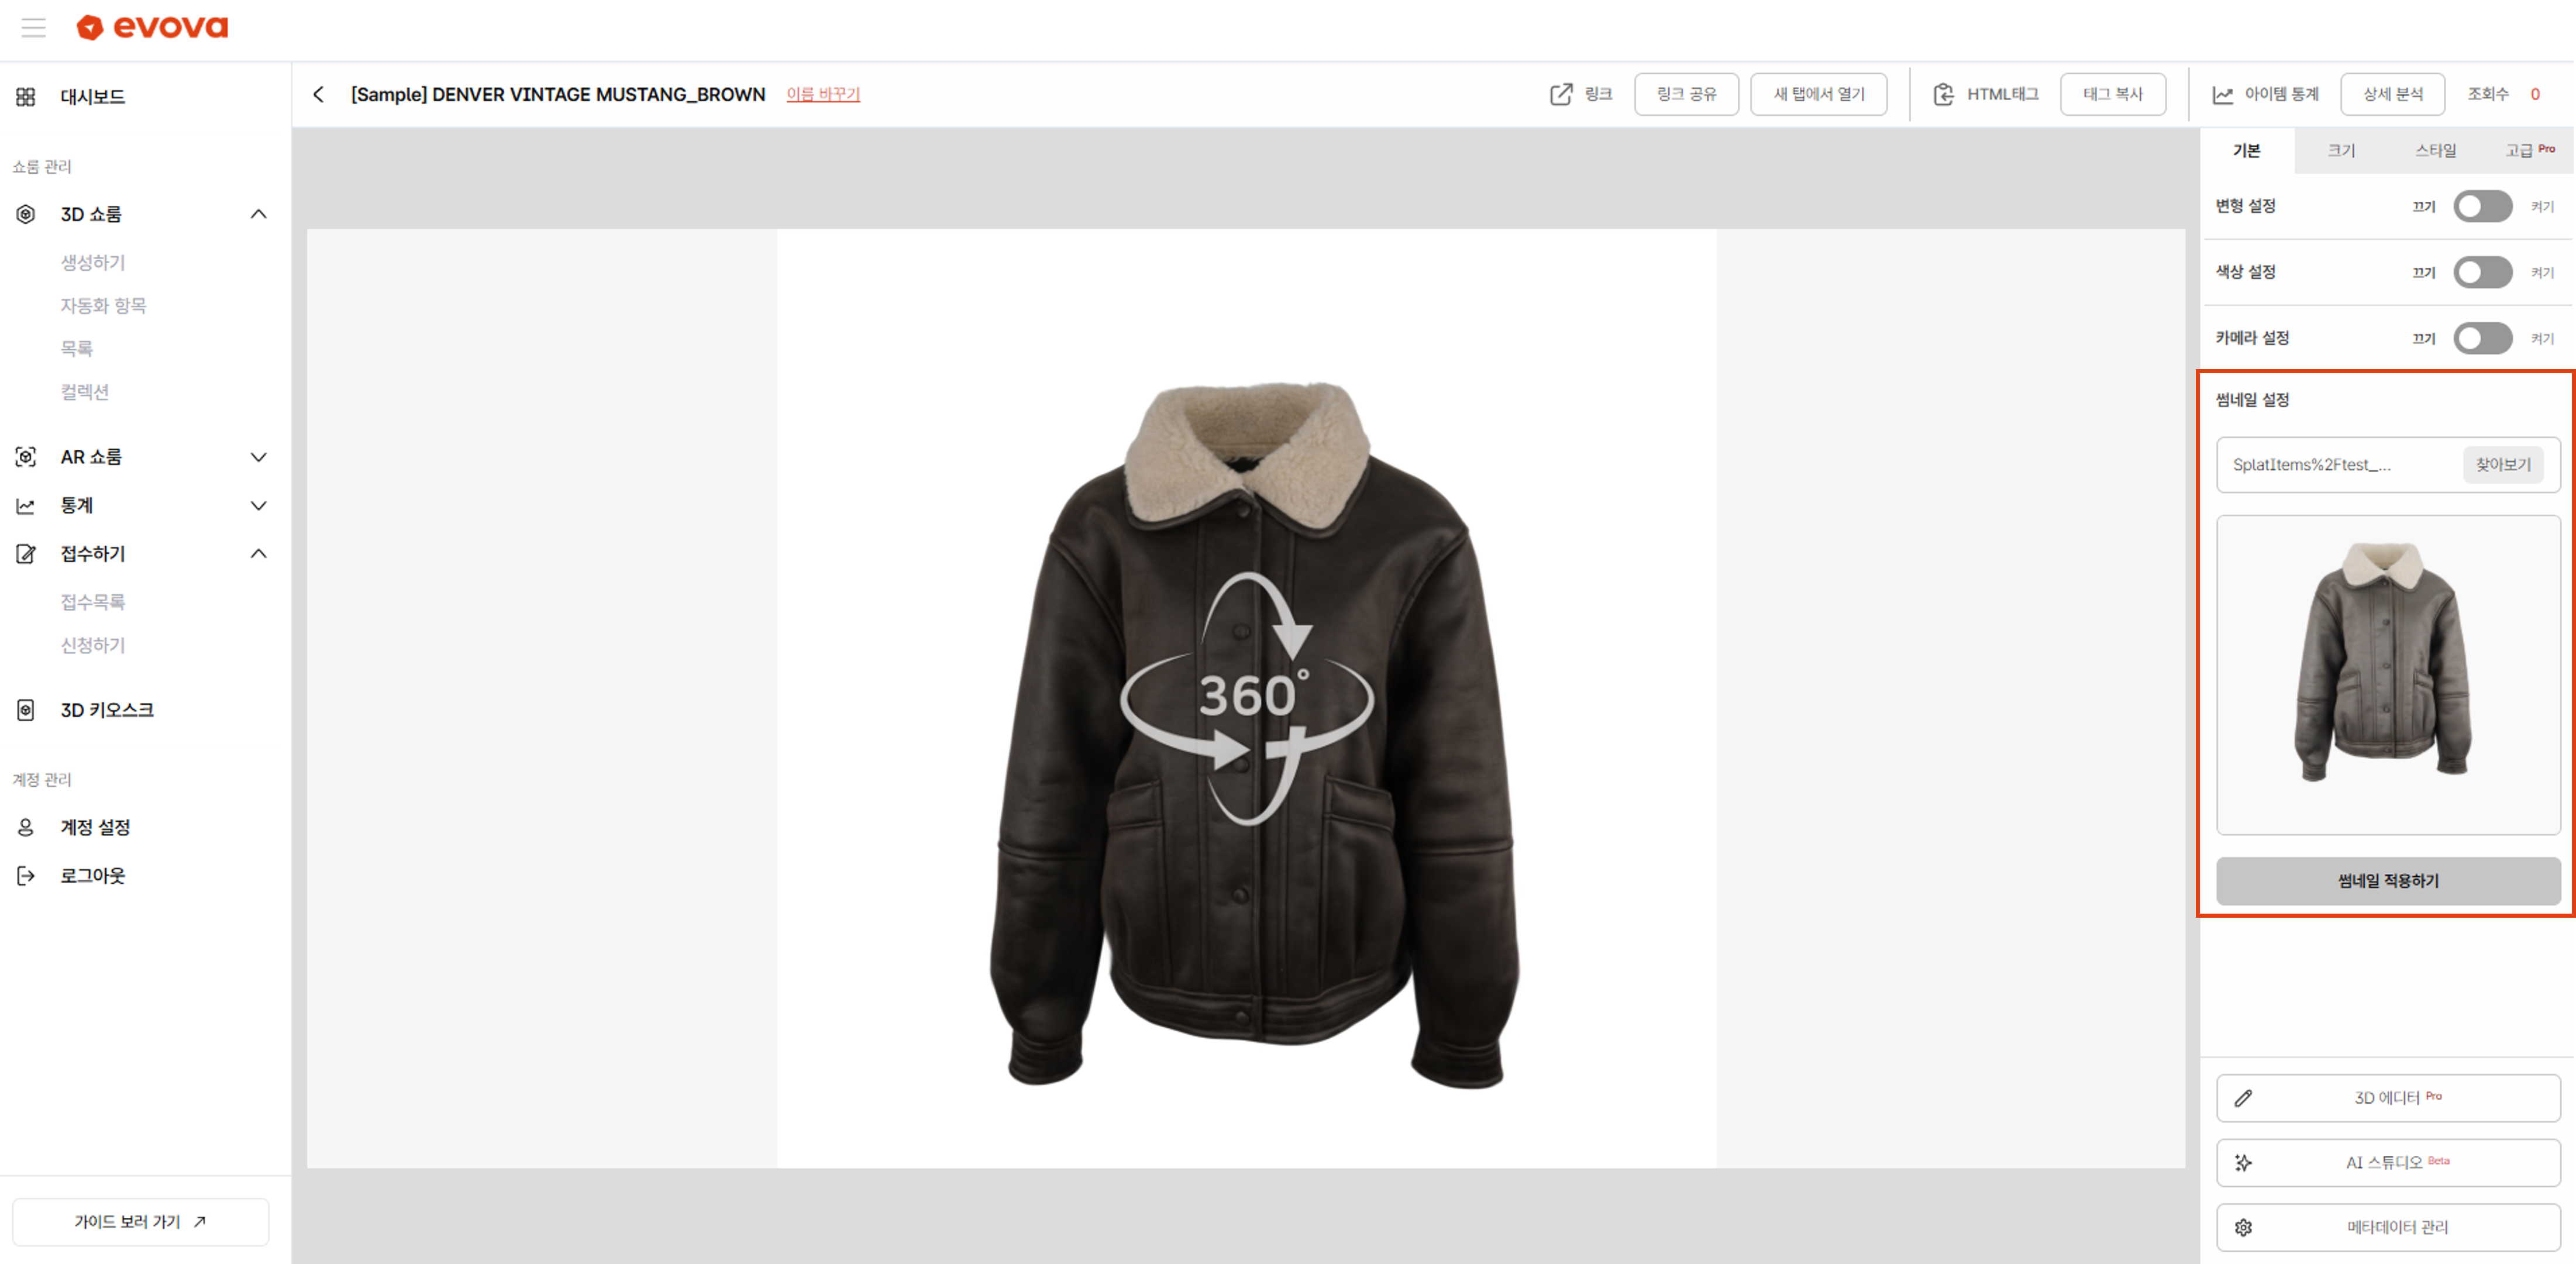 Image 5. Change Thumbnail Image
This thumbnail is used in the 3D Showroom list and dynamic loading screen.
- Click
[Browse]→ select the image to use as thumbnail - Click
[Apply Thumbnail]→ upload the image - Refresh the page to confirm the changed thumbnail
Conclusion
Adding Dimension to E-Commerce
EVOVA is always here to ensure your brand experience becomes more stable and exceptional.
If you have any questions, please feel free to contact our operations team at any time.
Contact Email: info@metown.co.kr
Contact Phone: 02-6380-0315