Style Settings
To adjust the style for your 3D product, follow the steps below.
Access Path:
Left Sidebar > [Library] > Click Item > Right Sidebar > [Advanced Editor] > Right Sidebar > [Style]
Advanced Editor - Style
- Select
[Style]in the right sidebar.
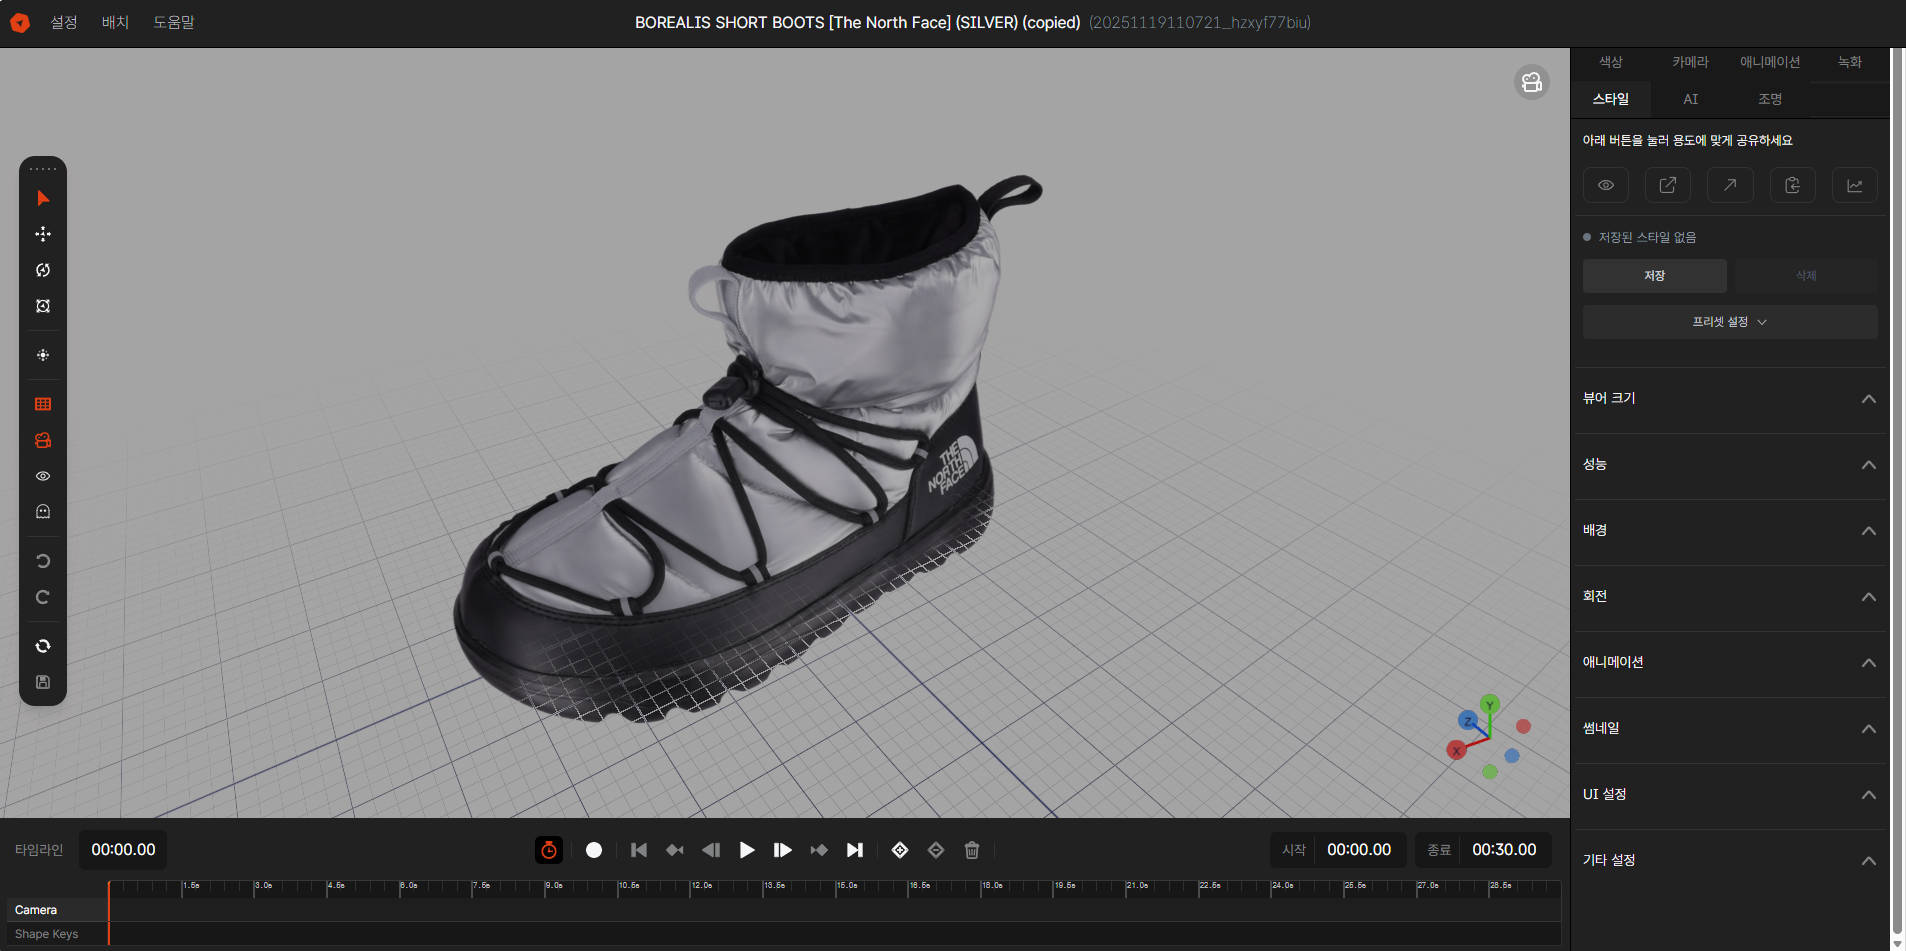
Image 1. EVOVA Advanced Editor, Style
Distribution and Sharing
You can preview or share the viewer.
- Viewer Preview: Immediately check how the currently set style will appear to users in the actual viewer.
- Copy Link: Generate a dedicated URL where the item can be viewed directly on the web.
- Open in New Tab: Review the result in full screen in a separate browser window, away from the working environment.
- Copy HTML: Copy the embed code to insert the item into your own website or blog.
- View Statistics: Check meaningful metrics such as view counts and user reactions for the deployed item.
Preset Settings
Click the [Preset Settings] button to expand the preset settings area.
- Preset Selection: You can select the desired preset from the dropdown menu:
- [DEFAULT] Presets: Default presets provided by EVOVA
- Example:
[DEFAULT] BASIC,[DEFAULT] MINIMAL - Standard styles managed by the system
- Example:
- [CUSTOM] Presets: Custom presets created by the user
- Example:
[CUSTOM] my-brand-style - Save and reuse brand-specific styles
- Example:
Viewer Size
- Adjust the width of desktop and mobile viewers from the base width.
- Base Width: Set the screen width ratio for each access device (desktop/mobile). (Example: Setting desktop to 50% displays a viewer half the monitor width, setting mobile to 100% displays a viewer that fills the screen.)
- Aspect Ratio: Select and apply the desired image ratio.
Performance
You can select the rendering quality to match the user's access environment (mobile, PC, etc.).
- Rendering Quality Selection: Higher quality is sharper, but loading speed may be slower.
- Highest (Original): Provides the best quality without data loss.
- High ~ Very Low: Lowering the value (1024~128) reduces file size for smooth operation on low-spec devices or slow networks.
- Custom Input: Users can directly set specific values optimized for their deployment environment.
Background Settings
Set the viewer's background color.
- Use the color picker to select the viewer background color.
- Selecting a color that contrasts with the product color is recommended.
Rotation Settings
- Auto: The product rotates automatically at a constant speed
- Enter the desired rotation speed as a number.
- Entering '0' stops the rotation.
- Keyframe: Plays along the camera path set in the timeline
- Keyframe settings required in the Advanced Editor's Recording tab
- Enables more dynamic and intentional camera direction
- Details: Timeline Sequence Guide
UI Settings
Customize the control UI displayed on the 3D viewer.
UI Type
Select the design style of icons displayed on the viewer.
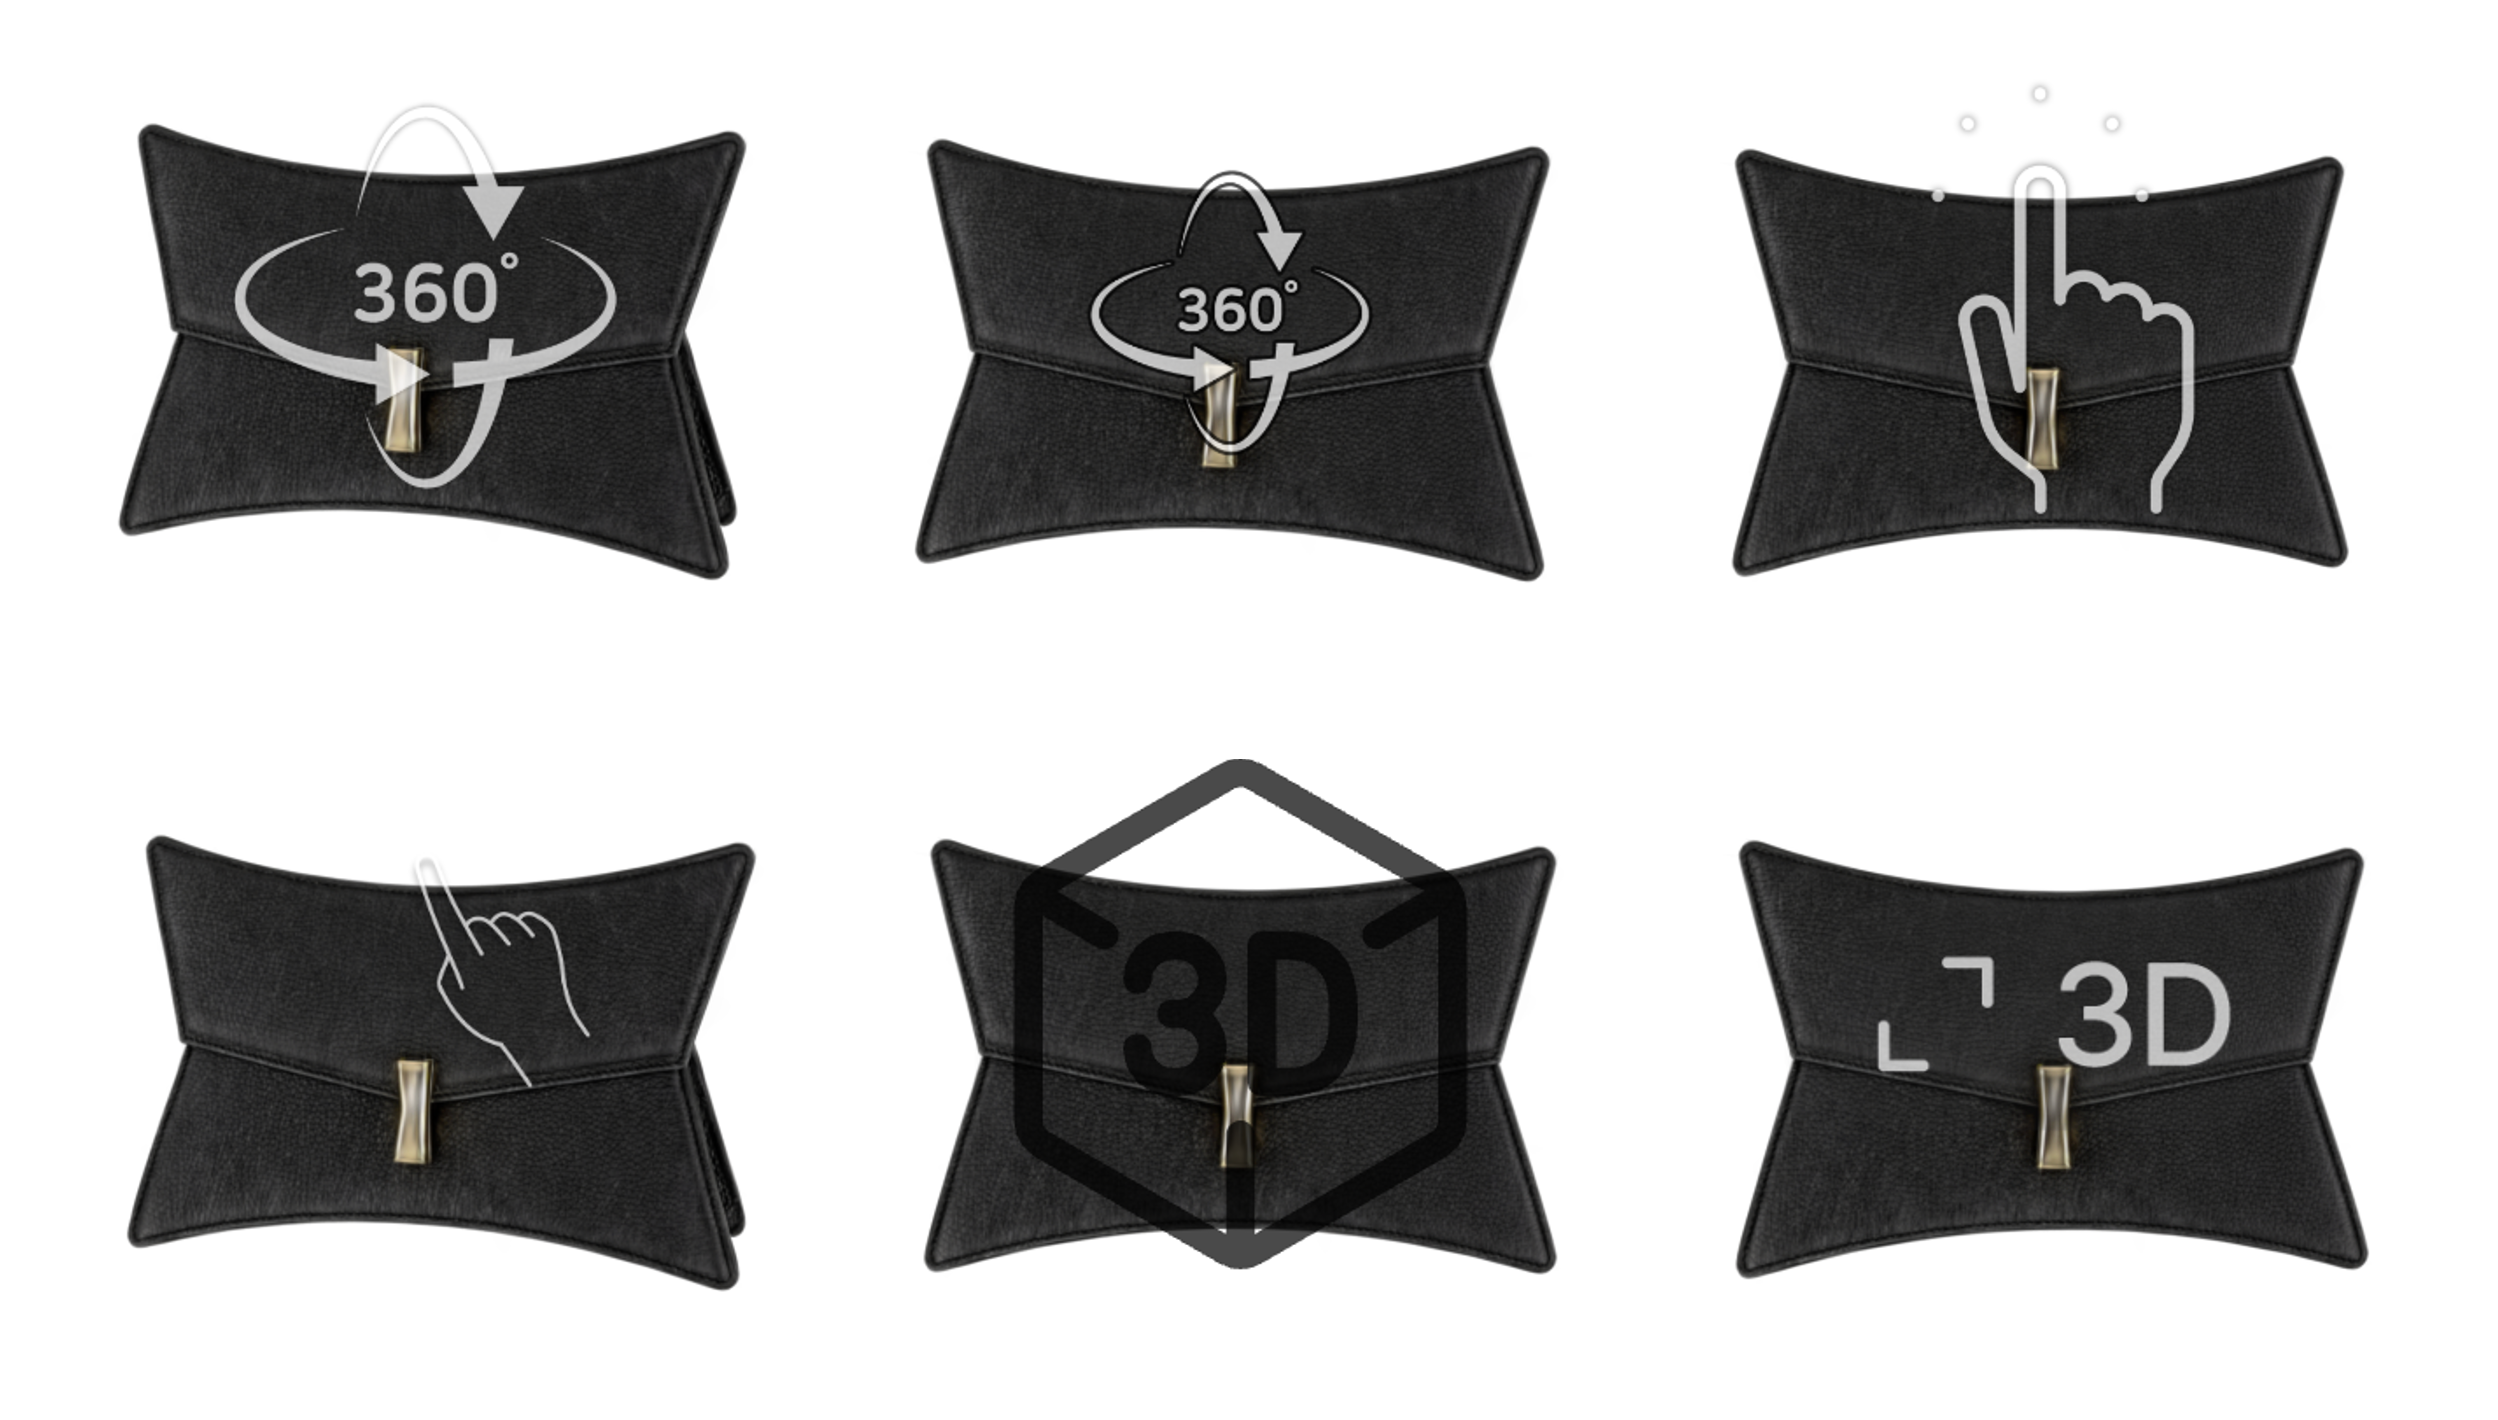 Image 4. UI Type
- Select the desired UI style from the dropdown
- Choose a design that matches your brand tone and manner
UI Position
Select the approximate area where icons will be located within the viewer screen.
- Example: Top left, bottom right, etc.
- Select according to the product and brand layout
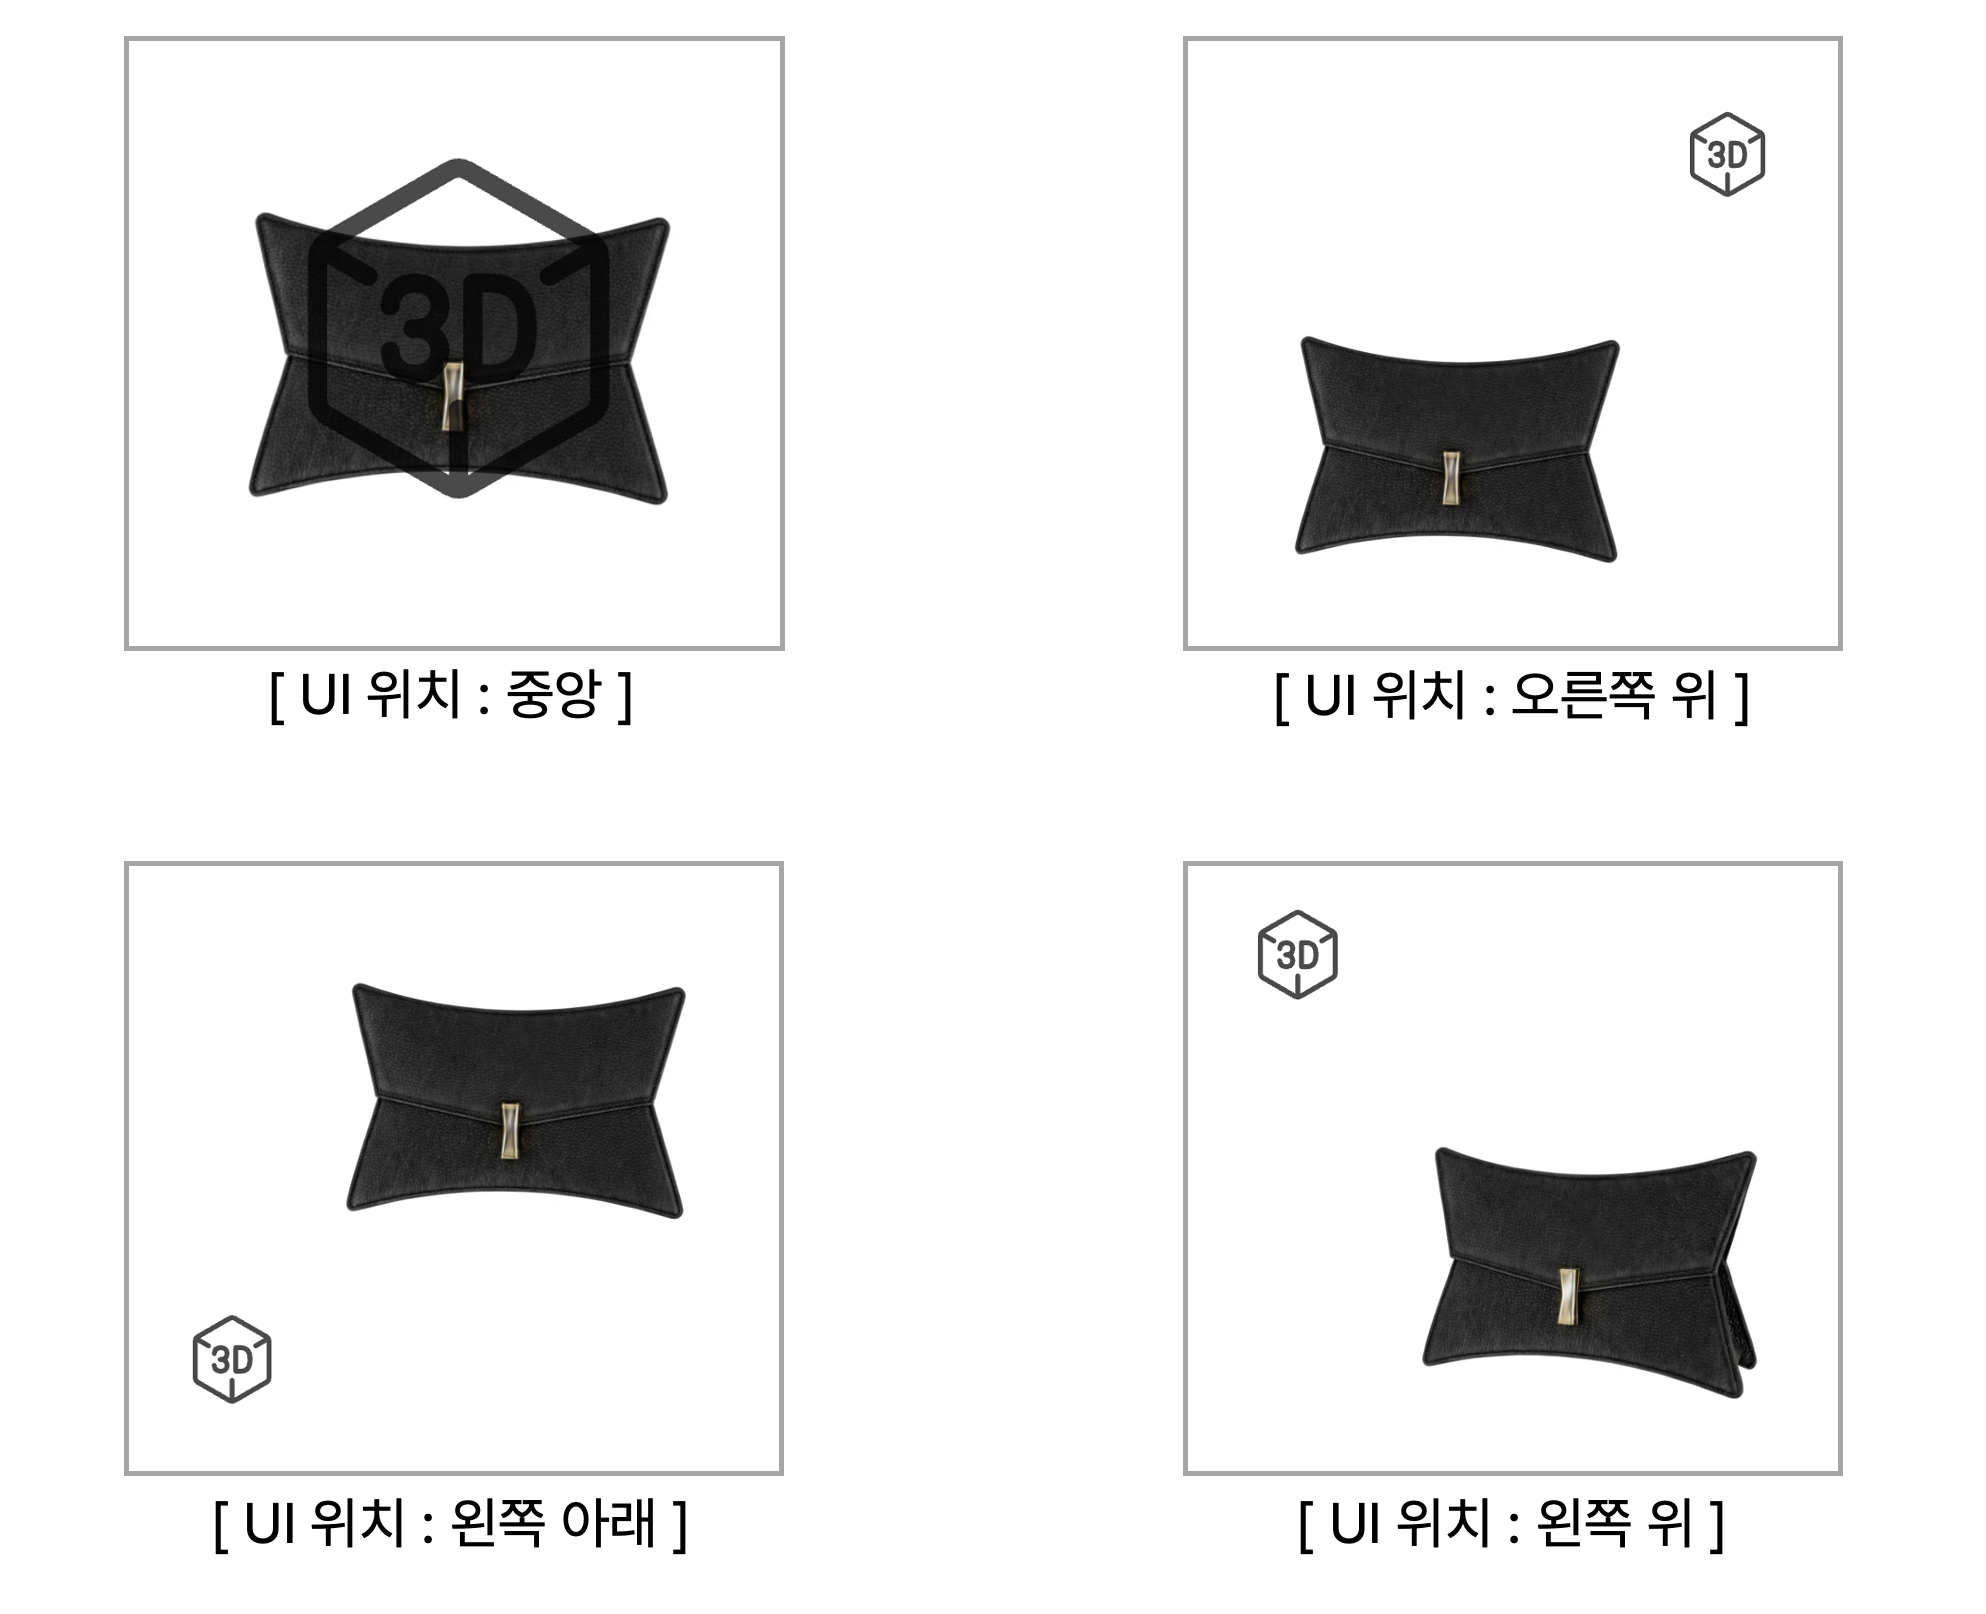 Image 5. UI Position
Fine Position Adjustment (X, Y Coordinates)
- Horizontal: Adjust left-right position in pixels
- Vertical: Adjust up-down position in pixels
- Use when precise placement is needed
UI Size
- PC Size: UI size in desktop environment
- Mobile Size: UI size in mobile environment
Scale Reference:
- 1x = Default size
- 1.5x = 1.5 times the default size
- Optimize per device considering screen ratio or visual balance
Other Settings
Control additional visual elements that will be displayed when viewing the item.
Style Application Order
- Select Preset
- Configure 5 Sections:
- Background Rotation
- Visual Effects (Color Chips)
- Thumbnail & Loading
- UI Settings
- Other Settings
- Click [Save Changes] to apply
Preset Utilization Tips
Create Brand-Specific Presets
- Save unique styles as presets for each brand
- When adding new products, simply select the brand preset for instant application
Seasonal Style Management
- Example:
[CUSTOM] summer-2025,[CUSTOM] winter-2025 - Change styles by season or campaign
Notes
- Confirm Before Saving Preset: Ensure all section settings are complete
- DEFAULT Presets: Cannot be modified, need to create new CUSTOM presets
- Style Saving Required: Changes are only applied when you press the [Save Changes] button
Closing
Adding Dimensions to E-commerce
EVOVA is always here to help make your brand experience more stable and special.
If you have any questions, please feel free to contact our support team.
Email: info@metown.co.kr
Phone: 010-6650-6300